Seal every opening larger than a quarter‑inch with hardware cloth, metal sheeting, or stainless‑steel fabric, then secure it using caulk or spray foam because a mouse can squeeze through a space as small as a dime. Install rubber weather‑stripping on the garage‑door bottom, ensuring the gap is fully covered, and pack steel wool into utility cracks before caulking. Store all food and pet supplies in airtight plastic containers, elevate them on shelves, and keep the yard tidy by trimming brush, removing debris, and storing firewood away from the garage. Inspect and refresh seals monthly, and use snap traps or tamper‑resistant bait stations in high‑activity zones; if you keep these steps up, the next section will show you how to spot early signs of infestation and when to call a professional.
TLDR
- Seal every opening larger than ¼ inch with metal, hardware cloth, or steel‑wool‑and‑mesh, then caulk or spray‑foam for durability.
- Install rubber or EPDM weather‑stripping on the garage door bottom, ensuring a tight floor seal and replace worn strips monthly.
- Store all food, pet supplies, and bait in airtight plastic containers on elevated, opaque shelves; regularly inspect for cracks.
- Trim shrubs, clear debris, and keep firewood ≥ 20 feet away, maintaining a 16‑inch clearance from the structure to eliminate shelter.
- Place tamper‑resistant bait stations near droppings, gnaw marks, and entry points, checking weekly and calling professionals if infestations grow.
Seal All Gaps Larger Than ¼ Inch
Why bother sealing every opening larger than a quarter‑inch? You’ll block the pathways mice use to slip into your garage, because gaps over ¼ inch let them enter directly. Inspect bottom seals, side jambs, corners, foundation cracks and vent openings, then apply hardware cloth, metal sheeting, or stainless‑steel fabric to cover each breach. Secure the material with caulk or spray foam, ensuring a durable, rodent‑proof barrier that keeps your home feeling safe and united. A mouse can squeeze through a space as small as a dime.
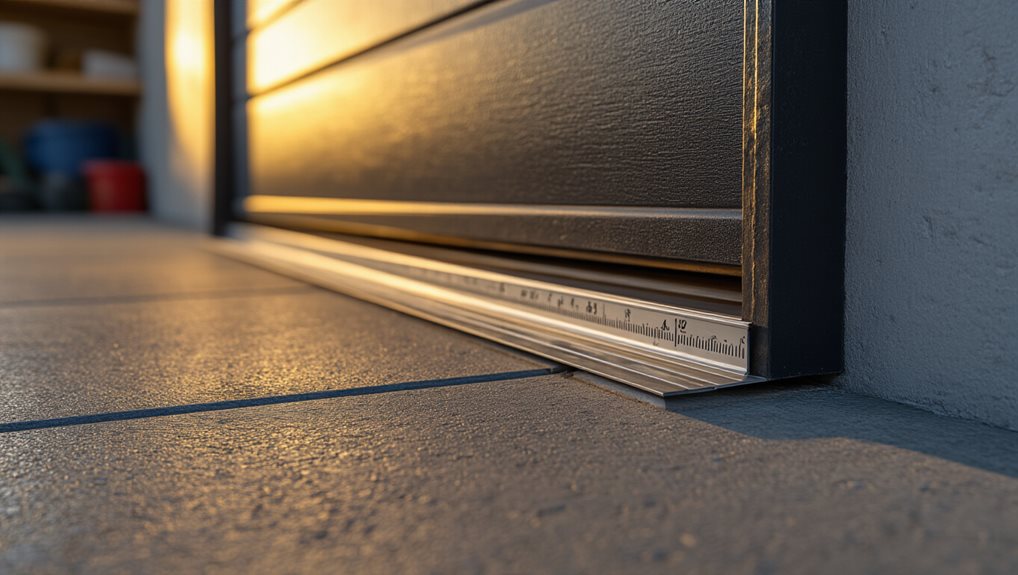
Install Rubber Weather Stripping on Garage Door Bottoms
First, measure the gap between the door and the floor to ensure the strip will cover it completely; then pick a material—rubber for flexibility, vinyl for compression, or EPDM for durability—that matches your climate and floor conditions.
Next, slide the weather‑stripping into the door’s track or attach it with the provided fasteners, making sure it compresses evenly to form a tight barrier.
Finally, test the seal by closing the door and checking for light or air leaks, adjusting the position as needed to eliminate any remaining gaps.
Remember to periodically inspect and replace worn weather-stripping to maintain an effective seal and keep pests like mice from re-entering the space Pest prevention.
Measure Door Gap
How can you tell if the door‑frame gap is large enough to let drafts, insects, or even mice slip through? Measure the width at the top, sides, and bottom with a tape measure, noting any uneven spaces. Record height and width of the entire door, double‑check each dimension, and calculate total length needed for sealing. This precise assessment ensures the upcoming weather‑stripping fits snugly, keeping unwanted guests out.
Choose Appropriate Material
After you’ve measured the door‑frame gap, the next step is picking the right rubber weather stripping for the garage door bottom. Choose a D‑shaped or T‑style strip that compresses tightly, sealing uneven floors and blocking mice, while resisting UV cracking and cold brittleness. Opt for heavy‑duty commercial seals if traffic is high, and pair them with thresholds for moisture protection, cleaning quarterly to preserve flexibility and durability.
Secure Proper Installation
Installing rubber weather stripping on the garage‑door bottom begins with careful measurement and preparation, because a properly sized strip won’t seal gaps or block mice effectively. Measure the opening, close the door, buy slightly longer strips, clean the bottom and channel, and wear gloves. Remove old seals gently, slide the new strip into the retainer, trim excess, secure with nails, apply lubricant if needed, and test the door to ensure a snug, mouse‑proof seal.
Block Utility Openings With Steel Wool and Mesh
A few well‑placed strips of steel wool or copper mesh can seal utility openings that would otherwise let mice slip into your garage, and the material you choose determines both durability and ease of installation. Pack the wool densely into cracks around pipes, vents, or wires, then caulk edges; alternatively, press copper mesh tightly, spray‑foam it for added deterrent, and periodically inspect for wear to keep your space rodent‑free.
Store Food and Pet Supplies in Airtight Plastic Containers to Stop Mice

Airtight plastic containers provide a simple, effective barrier that keeps mice from accessing food and pet supplies in your garage. Sturdy, heavy‑duty bins with tight‑fitting lids and silicone gaskets seal out scent and crumbs, while opaque walls block light that attracts pests. Elevate these containers on shelves, label them, and regularly inspect for cracks, ensuring your garage stays clean, organized, and rodent‑free. Watermelon rind can be fed to pigs in moderation to support health, but it should be sliced thinly and not replace a balanced diet; nutritional content is important to consider for any animal’s snack.
Trim Brush and Remove Debris to Reduce Outdoor Attractants
You should trim overgrown shrubs so they stay at least a foot away from the garage walls, because dense foliage offers mice shelter and easy access to your home.
Clearing fallen leaves and removing wood piles eliminates hidden nesting sites and food sources that draw rodents toward the foundation.
Trim Overgrown Shrubs
When shrubs grow too close to your garage, they create a sheltered corridor that mice can use for travel and nesting, so trimming them back is a key step in reducing outdoor attractants. Keep a 16‑inch gap from the structure, clear at least 12 inches beneath plants, and maintain an 18‑inch buffer for hedges. Removing excess foliage exposes ground, discourages burrowing, and lets you spot signs of rodents quickly.
Clear Fallen Leaves
Why let a blanket of fallen leaves become a hidden highway for mice around your garage? Rake regularly, removing leaf piles that create damp, dark shelters where rodents hide, nest, and travel toward food. Dispose of debris away from the perimeter, keep the yard tidy, and eliminate escape routes. This simple habit reduces attractants, deters ants, beetles, and ticks, and helps your garage stay pest‑free.
Remove Wood Piles
Raking away fallen leaves eliminates the damp, hidden pathways that invite mice, but the next step is to address wood piles and brush that linger near the garage.
Keep firewood at least twenty feet away, elevate it on bricks or a grate, and cover it with a tarp to stay dry; rotate stock regularly, using the oldest logs first, and never store wood indoors, ensuring rodents can’t find shelter or nesting material.
Keep Storage Off the Floor and Away From Walls to Eliminate Hiding Spots
How can you make your garage less inviting to mice? Store items on sturdy shelves or stackable bins, keeping them off the floor and a few inches away from walls. This eliminates dark corners, blocks travel along edges, and exposes any droppings or nesting material for quick removal.
Use sealed plastic containers instead of cardboard, and maintain clear aisles to deter hidden nests. Puncture-resistant hard-sided storage boxes provide a durable barrier against gnawing and help keep contents contained.
Set Snap Traps for Mice in High‑Activity Zones and Pre‑bait Them
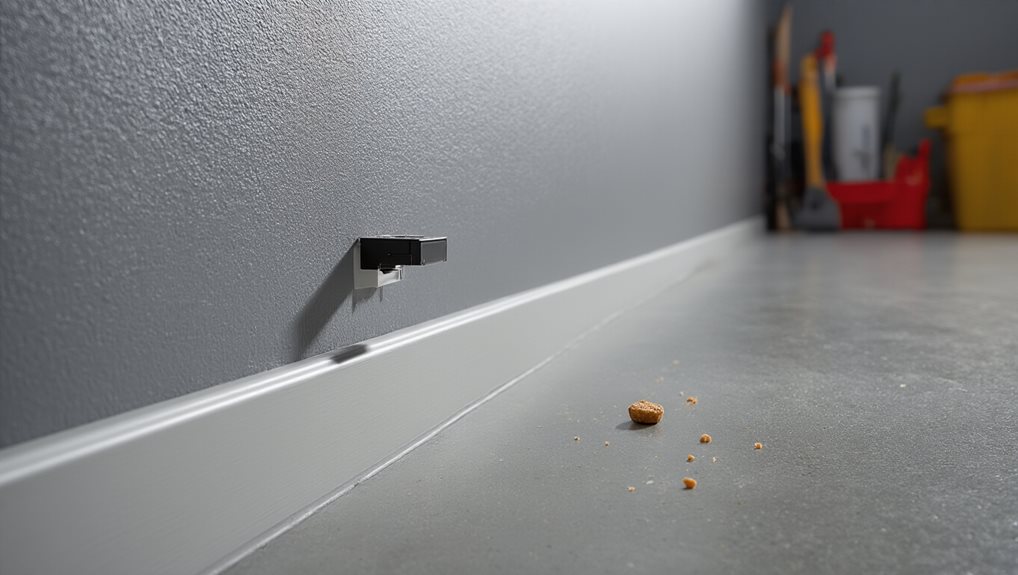
After clearing the floor and keeping items off the walls, the next step is to target the mice where they’re most active. Sprinkle cornstarch, spot footprints, then line three snap traps perpendicular to the wall, 6‑12 inches apart, outer two against the wall, middle a few inches out. Pre-bait each trap with chocolate‑coated floss or a small soap‑crayon dab, allowing mice to acclimate before setting. This clustered, pre‑baited setup maximizes catches while keeping the garage safe and orderly. Phosphorus deficiency signs can inform gardeners about nutrient needs, but in this context the focus remains on effectively controlling mice inside the space.
Use Bait Stations Carefully When Mice Numbers Get High
When the mouse population spikes, you’ll want to space bait stations every 8–12 feet, positioning them between shelter and food sources to maximize exposure while keeping them out of reach of children and pets. Choose tamper-resistant models with 1–1½‑inch entrances and internal baffles so the bait stays dry and the rodents can’t spill it, and anchor the units to prevent theft or relocation. Check the stations regularly, replace the bait according to label directions, and adjust spacing tighter in high‑infestation zones to keep the control effort both safe and effective. Tamper-resistant design supports safer placement and reduces accidental access by non-target animals.
Placement Placement Placement
Where should you position bait stations when mouse activity spikes? Place them near droppings, nests, or gnaw marks, aligning with walls, edges, and shadows where mice travel, and keep stations 8‑12 feet apart.
Focus on entry points, darkened corners, and routes between food and shelter, using compact, tamper‑resistant units that protect bait from moisture and dust, and inspect weekly to adjust placement as needed.
Baiting Safety Precautions
Ever wonder how to keep your family and pets safe while you tackle a mouse surge? Wear nitrile or vinyl gloves when unpacking, setting, or disposing of bait stations, and avoid inhaling dust by using protective clothing as labels advise. Place tamper‑resistant stations out of reach, anchor them securely, and label them clearly. Check daily, clean minimally, and store unused bait away from food.
Inspect and Refresh Seals Monthly to Keep Mice Out

Why should you inspect and refresh your garage door seals every month? You’ll catch gnaw marks, tiny gaps, or cracked rubber before mice exploit them, keeping drafts, dust, and disease out. Use stainless‑steel‑mesh Xcluder or RodentBLOCK kits, add metal guards, and adjust the lip for a tight floor seal. Monthly checks preserve energy efficiency, maintain a clean garage, and reinforce the community’s shared commitment to pest‑free living.
Know the Signs That It’s Time to Call a Professional Pest‑Control Service
Inspecting and refreshing your garage door seals each month catches gaps before mice slip through, but once you start spotting fresh droppings, gnaw marks, or structural damage, it’s a clear signal that professional pest‑control help is needed.
Multiple droppings across walls, gnawed wiring, expanding holes, or rapid population growth indicate infestation has spread beyond DIY control, so call experts to seal entry points, remediate health hazards, and protect your home.
Final Note
By sealing gaps, using weather‑stripping, and storing food in airtight containers, you’ll deny mice easy entry and food sources. Regularly trim vegetation, clear debris, and inspect seals to keep the perimeter hostile to rodents. Deploy snap traps or bait stations in high‑traffic zones, but monitor them and replace as needed. If signs of infestation persist despite these measures, contact a professional pest‑control service to ensure a thorough, lasting solution.