You can convert your lawn into a fertile garden bed in one day with sheet mulching, a no-till method that builds healthy soil, blocks weeds, and retains moisture. Start by mowing low, laying down overlapping cardboard, and watering each layer deeply. Add compost, carbon-rich materials like leaves, and a top dressing of mulch. This approach protects soil life, reduces work, and speeds garden prep—discover how to get the best results with simple, smart adjustments.

TLDR
- Skip tilling and lay overlapping, uncoated cardboard directly over mowed grass to suppress weeds easily.
- Water each layer thoroughly as you build to speed decomposition and settle materials.
- Use free, local materials like leaves, straw, and coffee grounds to reduce cost and effort.
- Top with 4–6 inches of compost-soil blend for instant planting or wait 1–6 months for natural soil formation.
- Avoid common mistakes like piling mulch against stems or using contaminated, treated materials.
What Is Sheet Mulching (And Why It Beats Tilling)
While you might be tempted to fire up the tiller for a quick garden fix, consider sheet mulching—a method that builds healthy soil over time without disturbing its delicate ecosystem.
You preserve fungi and microbes, suppress weeds, and enhance water retention. This method also pairs well with compost bins to supply finished compost and speed soil building.
Sheet mulching reduced initial weed load and bending/weeding compared to plowing, though edge maintenance remained necessary, especially where creeping Charlie and rhizomatous grasses invaded unedged beds.
Choose the Right Spot for Sheet Mulching
You’ve seen how sheet mulching protects soil life and builds fertility without the disruption of tilling—now it’s time to put that knowledge into action by selecting the best spot for your new garden bed.
Choose a sunny area that matches your plants’ needs, considering trees and existing growth.
Prep the site by mowing low, watering well, and marking edges.
Use compost in poor soils, skip tilling, and layer materials right over grass to build rich, weed-free beds.
A good spade can help define and edge your new bed for a clean border and easier maintenance (garden spade).
Gather Free or Cheap Sheet Mulching Materials
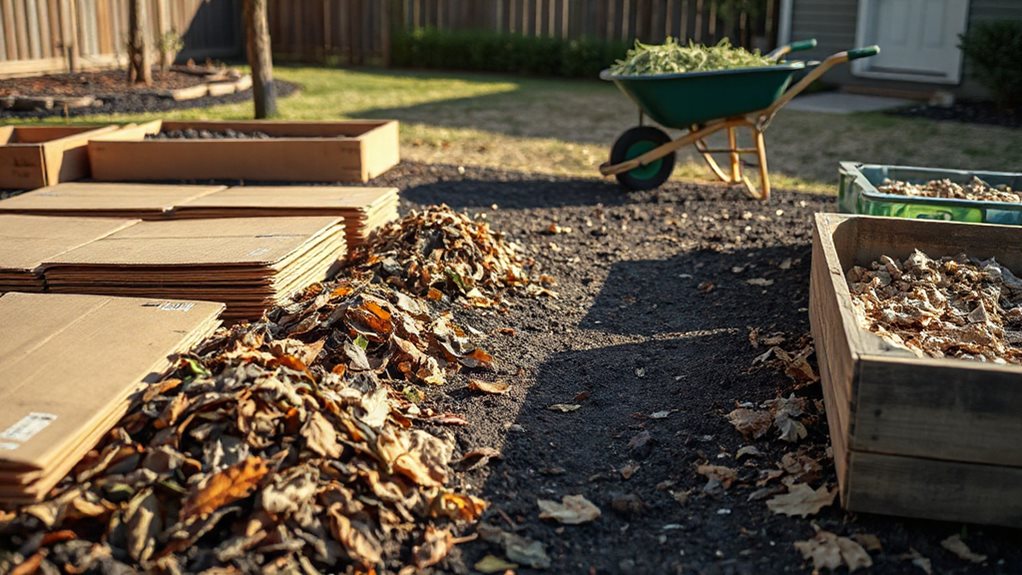
You can save money and reduce waste by gathering free mulch materials like cardboard and compost from everyday sources.
Pull apart old appliance boxes, removing staples and tape, then overlap them by 6 inches to block weeds effectively.
Look for finished compost at garden centers or through municipal programs, since it’s rich in microbes and perfect for enhancing soil health.
Consider storing extra tools and materials in a compact vertical shed to protect them from weather and pests.
Free Mulch Sources
When gathering materials for sheet mulching, tapping into free or low-cost sources not only saves money but also repurposes organic waste into beneficial soil-building resources.
You can collect dried fall leaves, grass clippings, and straw bales, all rich in carbon and nitrogen.
Use neighborhood arborist wood chips, spent crops, or coffee grounds from local shops.
Just avoid treated materials, and you’ll build healthy, fertile soil naturally.
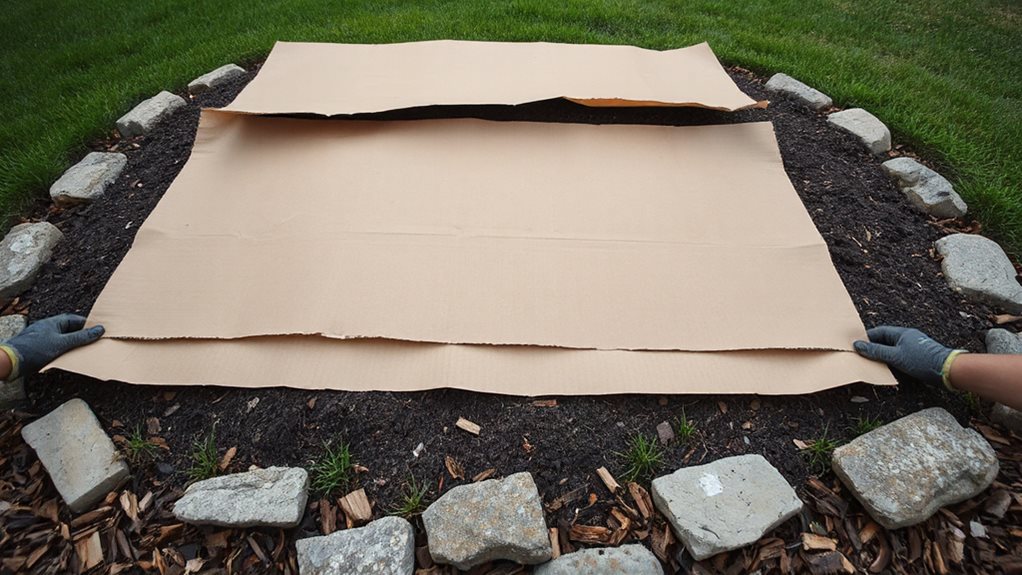
Cardboard And Compost
Start by sourcing clean, uncoated cardboard from local grocery stores, delivery hubs, or recycling centers—this widely available material forms a powerful base layer for sheet mulching that blocks weeds while building soil structure.
Overlap pieces well and moisten thoroughly to suppress weeds, support decomposition, and gradually enhance soil.
Though cardboard limits gas exchange compared to wood chips, it effectively diverts waste, retains moisture, and promotes earthworm activity when used properly in layered compost systems.
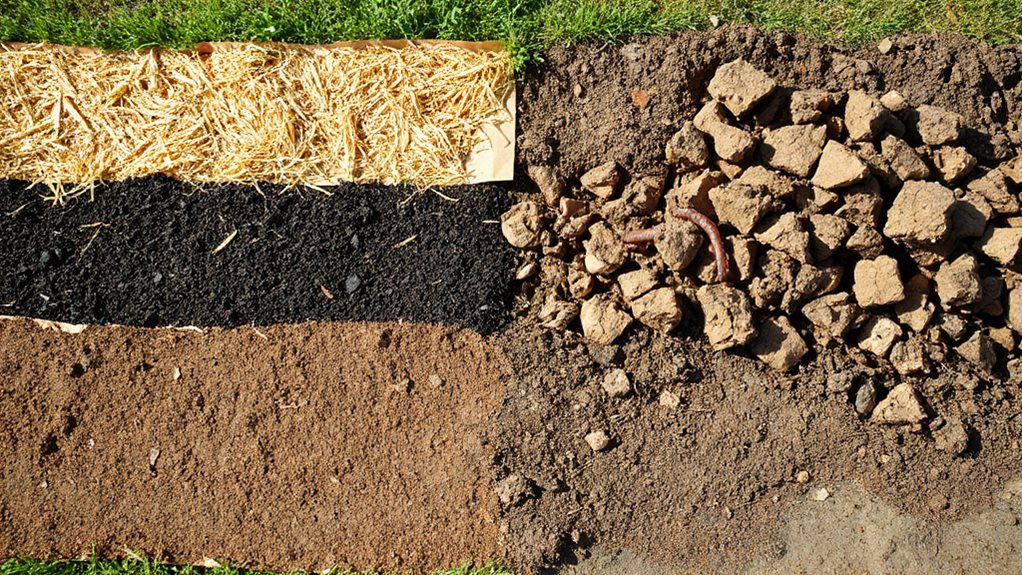
Build Your Sheet Mulch Bed in One Day
Start by mowing your grass and weeds, leaving the clippings in place, then wet the area until it’s as damp as a wrung-out sponge to help kickstart decomposition.
Lay down overlapping cardboard sheets to block light and smother the grass, watering each section well before adding a 4-6 inch layer of shredded leaves for faster breakdown and better moisture flow.
Finish by stacking nitrogen-rich materials like manure or coffee grounds, mixing them into thick carbon layers of hay or straw, topping it all with compost and mulch, then watering deeply to set the layers and begin the breakdown process.
Prepare The Ground
While preparing your garden site, focus on creating a strong foundation by first addressing the existing vegetation and layout. Mow or cut weeds low, leaving clippings in place, and aerate if needed.
Clear debris, outline the bed, then water the area well to kickstart decomposition. Lay down cardboard or newspaper, overlapping and wetting it thoroughly to block weeds and prepare for amendments.
Layer With Care
Lay down a solid foundation for your sheet mulched bed by carefully assembling each layer in one efficient day.
Overlap cardboard by 6 inches, wet it well, and remove staples.
Add 4–6 inches of shredded leaves, then mix in 1–2 inches of manure for nitrogen.
Top with 4–6 inches of compost-soil blend and finish with 2–3 inches of seed-free mulch, creating a balanced, fertile garden bed ready for planting.
Top Off And Water
Now that you’ve built up the core layers with cardboard, compost, and organic matter, it’s time to finish strong by topping off and watering your sheet mulched bed.
Add 1–2 inches of compost or topsoil, then a 2–3 inch layer of seed-free mulch, shaping it into a shallow trench to catch rain.
Water each layer well as you go—this kickstarts decomposition, suppresses weeds, and keeps everything settled and moist for healthy, thriving soil.
When Should You Apply Sheet Mulch for Fastest Results?
If you’re aiming for the quickest conversion of compacted lawn or weedy ground into fertile garden beds, timing your sheet mulch application to align with peak microbial activity makes all the difference.
Apply in spring or summer when warm soil speeds decomposition. Shred leaves, moisten layers, and use a 4–6 inch thickness to accelerate breakdown. With active microbes, you’ll have rich, plant-ready beds in just 1–3 months. Coconut coir chips improve moisture retention and aeration, making them a great amendment to include in your layers for faster, healthier breakdown and root development coir chips.
How Long Should You Wait Before Planting?
When you’re keen to start planting, it’s tempting to rush into the soil, but waiting for the right moment guarantees your sheet-mulched bed supports healthy growth.
You’ll need to wait 1–6 months, depending on season and depth. Warmer temps speed decomposition, while winter slows it.
Wait until materials break down completely and the soil looks rich and uniform—then you’re ready to plant with confidence.
Keep an eye out for signs of weed pressure, since dormant seeds in the soil can germinate quickly and compete with new plantings.
Avoid These 5 Sheet Mulching Mistakes
While sheet mulching offers a powerful way to build healthy soil and suppress weeds, skipping key steps can backfire—leading to poor plant performance and unexpected problems down the line.
Avoid overmulching, piling mulch against stems, neglecting weeds, ignoring soil type, and using contaminated materials to guarantee your garden thrives with strong, healthy growth.
Turn Your Lawn Into a Garden With Sheet Mulching
Turn your tired lawn into a thriving garden with sheet mulching, a smart, sustainable method that converts grass into fertile planting beds without tilling or chemicals.
Mow low, lay overlapping cardboard, then layer compost and mulch.
Water well and wait 3–6 months.
You’ll build rich soil, suppress weeds, and welcome beneficial organisms—all while recycling materials and working in harmony with nature’s rhythms.
Final Note
You’ve laid the foundation for a thriving garden with sheet mulching, skipping tilling to protect soil structure and biology. By choosing the right materials and timing, you accelerate decomposition and suppress weeds effectively. Avoid common mistakes like using poor carbon sources or planting too soon. With patience and proper layering, you’ll build fertile, moisture-retentive beds that support healthy plants—all while working with nature, not against it.