Build a 6‑inch‑tall raised bed in a sunny spot, line its base with weed‑barrier fabric, and fill it with a 12‑inch mix of soil and compost. Install drip or soaker hoses and keep pathways dry, then spread 2‑3 inches of bark chips or straw mulch over any exposed soil, leaving a small gap around stems. Plant densely so the ground is covered within six weeks, and add a living mulch such as buckwheat between rows to outcompete weeds. Spot‑treat any gaps with hand‑pulling or brief flame weeding, and you’ll see a healthier, weed‑free garden; the next steps will show you how to fine‑tune irrigation and seasonal techniques.

TLDR
- Lay weed‑barrier fabric under the bed, staple edges, and cover with 2–3 inches of mulch or soil mix.
- Install drip irrigation with a ½‑in. header and ¼‑in. tubing; keep paths dry to discourage weed germination.
- Plant densely (e.g., buckwheat living mulch or quick‑growing cover crops) to create a canopy that shades and suppresses weeds.
- Use a solarizing layer of black plastic for a month before planting to kill existing weed seeds.
- Spot‑treat any breakthrough weeds early by hand‑pulling, flame weeding, or cutting, then reseed with mulch promptly.
Build a 6‑In‑Tall Raised Bed for a Weed‑Free Garden
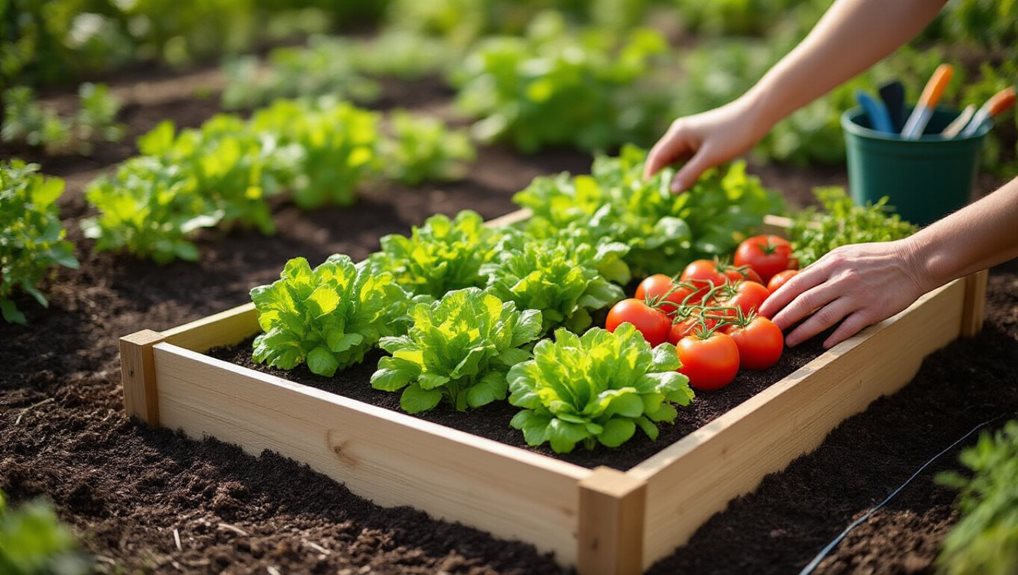
A 6‑inch‑tall raised bed gives you a compact, weed‑resistant growing space while keeping the soil depth sufficient for most vegetables and herbs; start by selecting a sunny spot that receives six to eight hours of direct sunlight daily, then lay out a rectangle that’s four feet wide and eight feet long, ensuring the dimensions allow easy access to the center of the bed without stepping on the soil. Choose untreated cedar or redwood, cut two 4‑foot and two 8‑foot 2×6 boards, secure corners with 3.5‑inch screws, add four 15‑inch 4×4 posts, level the ground, lay fabric, and fill with a 12‑inch soil‑compost mix for a sturdy, shared garden foundation. Use galvanized nails for additional durability.
Mulch Every Exposed Spot With 2‑3 Inches of Bark Chips or Straw
You’ll want to pick a chip thickness that stays within the 2‑3‑inch range, because anything thinner lets weeds break through while a thicker layer can trap moisture and slow decomposition.
Match the material to your climate—bark chips hold up longer in hot, dry summers, whereas straw works well in cooler, wetter seasons and breaks down faster for nutrient release.
Spread the mulch evenly over every exposed spot, keep it a few inches away from stems, and plan to refresh it annually to maintain the protective barrier.
In addition to mulch, using a grid-based layout helps you track where weed suppression is most needed and ensures you cover every square with the right mulch depth. Grid-based planning
Choose Chip Thickness
How thick should your mulch be to keep weeds at bay? Aim for 2‑3 inches of fine bark chips or straw, covering every exposed spot completely; this depth blocks sunlight, suppresses seed germination, and retains moisture.
Use coarser pine bark at 3‑4 inches if you prefer longer‑lasting coverage.
Reapply annually, ensuring the layer stays uniform and never exceeds four inches, to maintain a thriving, weed‑free community garden.
Match Climate To Material
Choosing the right mulch thickness set the stage for matching the material to your garden’s climate, and now it’s time to pair that depth with the most suitable organic cover.
In cooler zones, bark chips retain winter warmth and suit alkaline soils, while in hot, dry areas straw regulates temperature and drains quickly; select shredded bark for fast breakdown or pine nuggets for durability, and apply 2‑3 inches uniformly to block sunlight and suppress weeds.
Apply Evenly And Refresh
Spread the mulch evenly across every exposed soil surface, aiming for a consistent 2‑3 inch depth of bark chips or straw, because a uniform layer blocks sunlight, smothers emerging weed seedlings, and maintains the soil’s oxygen balance.
Drop small batches, rake gently, leave a thin gap around stems, wet before placing, and refresh annually to sustain suppression and community garden health.
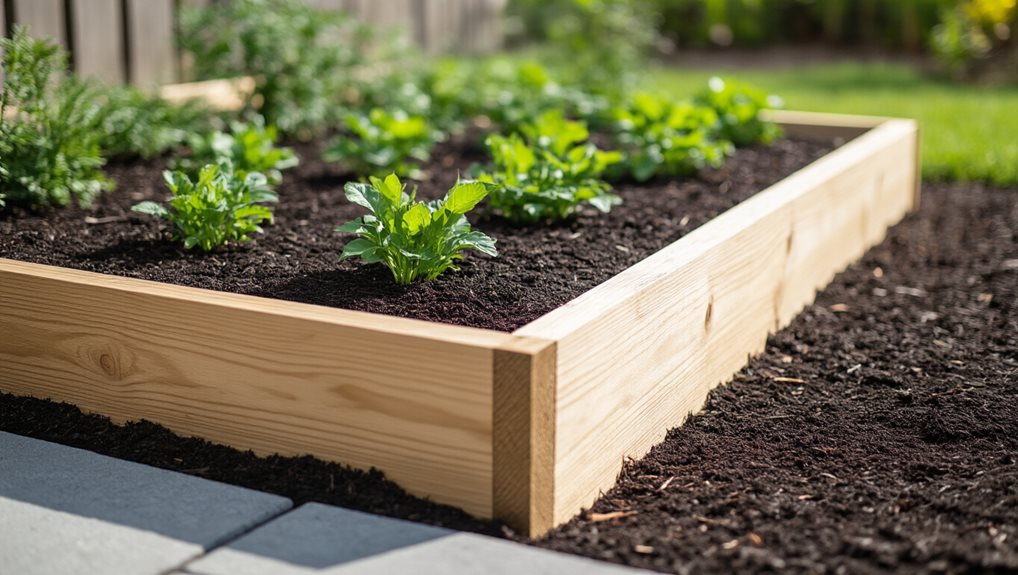
Plant Densely So the Soil Is Covered Within Six Weeks
You’ll want to space each seed just enough for its own growth, which lets the canopy close quickly and leaves no bare soil after six weeks.
By planting densely, the early ground cover blocks light, curtails weed germination, and forces the plants to compete for nutrients and space.
Monitoring the bed during the first few weeks lets you fill any gaps before the canopy is fully established, ensuring a solid, weed‑resistant cover.
In addition, before you start, consider calling 811 to mark underground lines and prevent accidental damage to utilities that could delay your project or create unsafe conditions. 811
Rapid Soil Coverage
How can you achieve a fully covered soil surface in just six weeks? Lay overlapping cardboard or newspaper, secure with pins, then top with 2–4 inches compost; the smothering material kills weeds in 6–8 weeks while the compost enriches the bed.
Mix organic matter—manure, leaf compost, peat—into the top 6 inches, then add a 2-inch mulch layer, keeping it away from crowns. This rapid, layered approach creates dense, nutrient-rich coverage, inviting thriving plants and a shared garden community.
Dense Plant Layout
After the soil is smothered and enriched, the next step is to arrange the crops so the ground stays covered as the plants grow. Use a block‑style layout, planting each vegetable in a square‑foot grid, spacing tightly but allowing airflow; this dense arrangement shades soil within six weeks, suppresses weeds, boosts yields, and fosters a shared sense of garden stewardship.
Early Ground Canopy
Why wait for weeds to take hold when you can block them before they sprout? Plant intensively, aiming for full ground cover within six weeks, because dense seedlings seal bare soil, denying weeds light and space.
Use layered species—low‑growth covers beneath taller plants—to create a continuous canopy, while cardboard or fabric at the bed bottom suppresses upward invaders, ensuring a thriving, weed‑free community.
Water Only the Beds With Drip or Soaker Hoses: Keep Paths Dry
Ever wonder why your garden paths stay dry while the beds stay lush? Install a ½‑inch header along each bed, attach T‑connectors, and run ¼‑inch drip tubing with emitters spaced nine inches apart, sealing ends with caps. Use separate shut‑off valves, pressure regulators, and mulch to keep moisture where roots need it, preventing weed germination and keeping pathways bone‑dry. Additionally, test your soil pH naturally to tailor irrigation and mulch choices so that the applied water contributes to healthy, weed‑free beds rather than favoring unwanted growth pH testing methods.
Install Weed‑Barrier Fabric Beneath Raised Beds Only
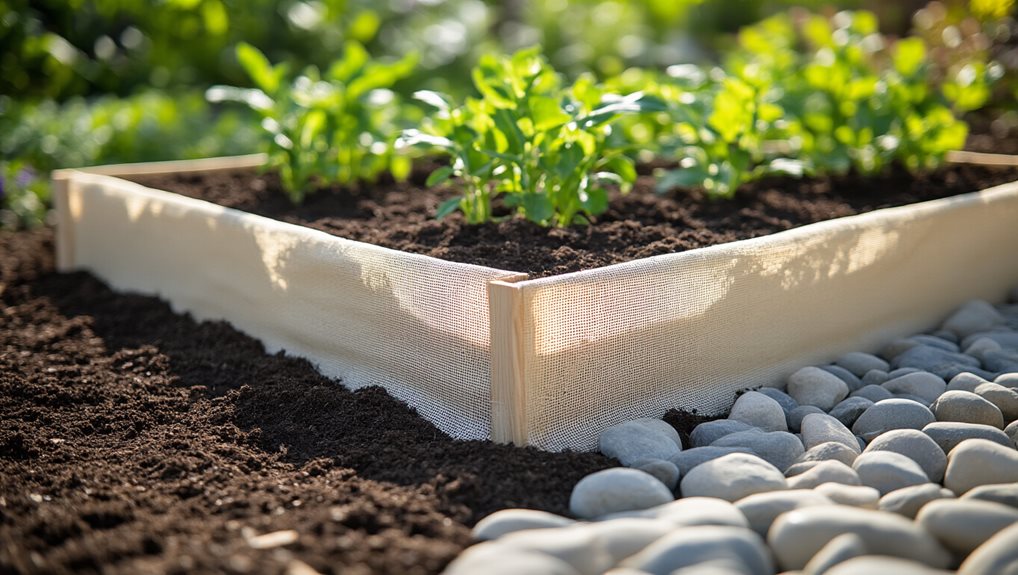
How can you keep weeds out of your raised garden beds without sacrificing soil health?
First, unroll high‑quality woven weed‑barrier fabric, cut it to fit the bed with extra inches on each side, then fold the edges under before stapling to prevent fraying. Secure corners with garden staples, add a staple every foot, and pull the material taut, using a mallet or furring strips as needed.
This creates a seamless barrier that blocks weeds while allowing you to add mulch or soil on top.
Solarize Future Beds With Black Plastic for a Month
After installing weed‑barrier fabric, you can enhance its effectiveness by solarizing future beds with black plastic for a month. Begin by smoothing the raised bed, removing debris, and moisten slightly, then tightly drape black plastic, bury edges in a 4‑6‑inch trench and pack soil to eliminate air pockets. Leave it during the hottest weeks, repeating four‑week cycles if needed, to block light and heat, suppressing weed seed germination while you prepare the next planting season. During this process, monitor soil moisture and temperature to ensure the skin of the soil heats evenly and remains within a range that discourages weed emergence. gradual outdoor acclimation
Use a Stale‑Seedbed Technique to Kill Existing Weeds Before Planting
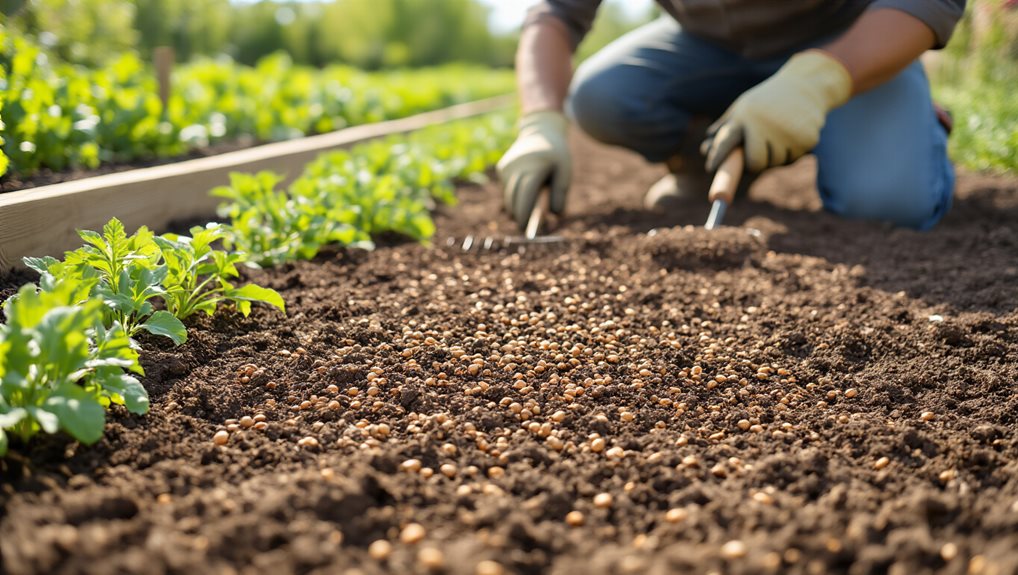
Why not let the weeds reveal themselves before you sow? Till your raised beds to fine tilth weeks or planting, irrigate to trigger germination, then shallow‑till or flame‑weed the seedlings, repeating cycles until the surface is clear.
This depletes the seed bank by up to 90 %, preserves soil structure, and lets your crops thrive without chemical herbicides.
Plant Buckwheat as a Living Mulch Between Rows
You can sow buckwheat densely between your rows, and within days it forms a thick mat that blankets the soil, cutting off light for emerging weeds. This rapid coverage not only suppresses unwanted plants but also draws down phosphorus and loosens compacted beds, so when you cut it back the decomposing matter enriches the crop zone. The seamless transition from living mulch to nutrient‑rich organic matter lets your tomatoes or peppers thrive without the hassle of manual weeding. Plan routine maintenance to protect the cover crop and ensure it integrates smoothly with your regular garden care.
Rapid Soil Coverage
How quickly can a living mulch blanket your raised‑bed soil?
Buckwheat sprouts in four days, shoots to 2.5 feet, and forms a dense mat that covers the bed within four weeks, outpacing most weeds even in poor soil.
Scatter one to two pounds per 1,000 sq ft, lightly press seeds, and let the fast‑growing roots loosen compacted topsoil while mining phosphorus for your main crops.
Weed Suppression Benefits
Buckwheat’s rapid growth and dense canopy turn a raised‑bed row into a living mulch that smothers emerging weeds, shades the soil, and blocks light from reaching weed seeds, so you’ll see far fewer summer annuals breaking through.
Its fast‑spreading stand outcompetes weeds for nutrients, while allelopathic compounds suppress germination, and the lingering organic mat after termination continues shading soil, keeping seedlings under a few inches and preserving community harmony.
Seamless Transition to Crops
When you sow buckwheat between rows at a 50‑80 lb/acre rate, it quickly forms a dense, living mulch that shades the soil, conserves moisture, and suppresses weeds while you prepare the next crop.
Within four weeks it blankets the bed, then you chop it, releasing phosphorus and organic matter that loosen compacted soil, attract pollinators, and let you plant tomatoes or peppers without a bare, vulnerable surface.
Spot‑Treat Mulch‑Breached Seedlings With Hand‑Pulling or Flame Weeding
If you notice a weed seedling poking through a gap in your mulch, act quickly by either hand‑pulling it or using a flame‑weed torch, because early removal prevents the plant from establishing a deep root system that will be harder to eradicate later.
Lightly scrape around the seedling, dig down to the stem, and nip just above soil level, or pass a torch briefly over the young shoot, ensuring you avoid nearby vegetables; consistent monitoring and swift spot‑treatment keep your raised beds tidy and your garden community thriving.
Keep Garden Paths Dry and Compact With Ram Board or Builder’s Paper
After clearing weed seedlings, the next step is to protect the pathways that channel foot traffic and water across your raised beds. Unroll ram board or builder’s paper, cut to fit, and overlap sections two inches to block weeds. Tamp firmly, then spread a few inches of organic mulch to anchor and keep paths dry, while the biodegradable barrier smothers weeds and enriches soil.
Final Note
By following these steps—building a six‑foot‑tall bed, mulching thoroughly, planting densely, using drip irrigation, installing barrier fabric, applying a stale‑seedbed, intercropping buckwheat, spot‑treating breaches, and keeping paths dry—you’ll create a resilient, weed‑suppressed garden. Each technique works synergistically, reducing weed pressure while preserving soil health and moisture. Consistent maintenance and proper spacing ensure long‑term productivity, allowing your crops to thrive with minimal manual weed control.