First, check for yellow or browning leaves, wilting stems, and stiff or discolored branches; these signs usually point to water, light, or soil problems. Test soil moisture with a finger or chopstick—if it’s soggy, cut back watering and try bottom‑watering, letting excess drain away; if it’s bone‑dry, water deeply in the morning and adjust frequency seasonally. Assess light by looking for leggy growth or scorched tips, then move the plant to a brighter spot or add a diffused grow light. Clean leaves gently with a damp cloth to improve photosynthesis, and apply a balanced slow‑release fertilizer during active growth. Keep a simple care calendar to track watering dates and monitor recovery over the first two weeks, noting greener leaves and reduced drop. Continuing will reveal deeper maintenance strategies.

TLDR
- Diagnose the cause: check soil moisture, light levels, and root health to distinguish over‑watering, under‑watering, or light stress.
- Water correctly: water only when the top inch of soil feels dry, using morning bottom‑watering and ensuring excess drains away.
- Adjust lighting: place the plant where it receives species‑specific light intensity, using sheer curtains or grow lights to avoid shade or scorching.
- Refresh soil and repot if needed: use a well‑draining mix with sand or grit, and repot in early spring when roots are crowded or media is exhausted.
- Monitor recovery: look for greener leaves, reduced brown tips, and stable soil moisture; prune damaged foliage and maintain consistent care.
Spot the First Signs Your Houseplant Is Dying
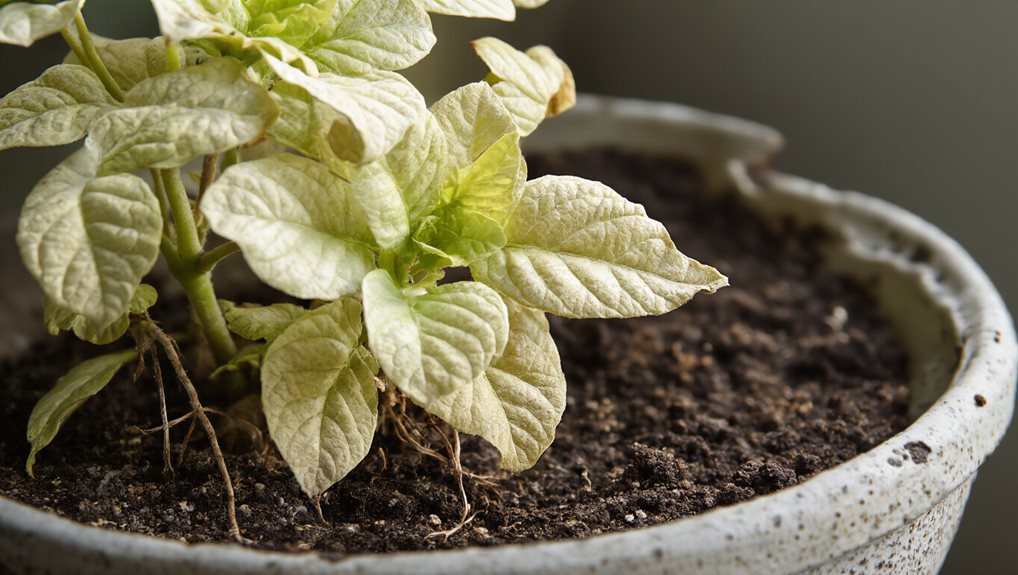
How can you tell a houseplant is on the brink of death before it’s too late? Notice yellowing leaves spreading uniformly or irregularly, brown tips crisping, and complete browning of lower foliage, which often signals water stress. Watch stems for loss of flexibility or brown discoloration when scratched, and observe wilting branches that droop without firmness, all indicating early decline. Remember that no-dig mix can mimic these symptoms, so assess watering and light conditions before concluding the plant is dying.
Identify the Root Cause: Water, Light, or Soil?
First, you’ll want to check how often you water, noting whether the soil stays soggy or bone‑dry between sessions, because both over‑ and under‑watering can quickly stress a plant.
Next, assess the light intensity by observing leaf color and growth direction, remembering that too much shade can stunt photosynthesis while excess sun can scorch shade‑loving species.
Finally, examine the soil for signs of compaction or nutrient depletion, as pot‑bound roots or exhausted media often starve the plant despite correct watering and lighting.
Watering Frequency Check
Why is your houseplant wilting despite your best efforts? Check soil moisture weekly, inserting a finger two inches deep or using a meter at one‑third pot depth; water only when dry.
Adjust for season—summer may need watering every few days, winter every two weeks.
Favor morning watering, let excess drain, and avoid soggy soil, because consistent, measured watering prevents root rot and restores vigor.
Light Intensity Assessment
Ever wondered if your plant’s drooping leaves are caused by insufficient light rather than water or soil issues? Measure illumination with a calibrated lux meter at canopy height, record peak noon values, and note shadow crispness—bright shadows mean high intensity, faint shadows low.
Convert lux to PPFD or foot‑candles, compare readings to species needs (e.g., 1500‑2500 fc for peace lily), then adjust placement or diffuse light accordingly.
Fix Over‑ or Under‑Watering for Houseplants With Bottom‑Watering
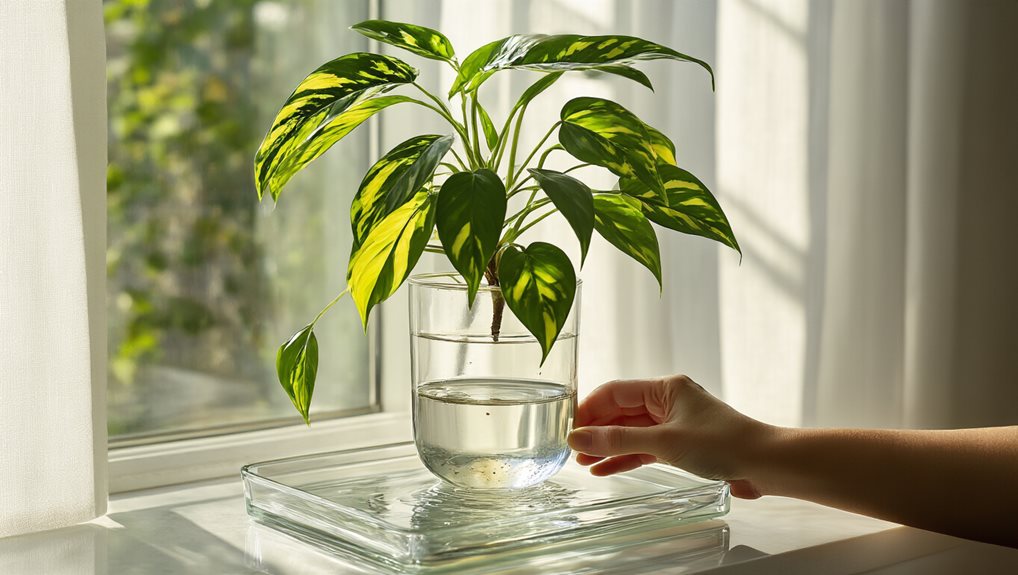
How can you prevent the common pitfalls of over‑ and under‑watering while still giving your houseplant the moisture it needs?
Try bottom‑watering: fill a tray, let the pot soak through drainage holes, then discard excess water; choose a well‑draining mix with sand or grit; check moisture by feeling one inch deep or lifting the pot; let the soil dry slightly between sessions, and repot if roots stay soft or mushy.
Adjust Light Exposure for Houseplants to Prevent Yellow Leaves
After mastering bottom‑watering, the next step is to fine‑tune your plant’s light exposure, because even well‑hydrated foliage can turn yellow when it isn’t receiving the right amount of light.
Place sun‑loving species near east‑facing windows or a few feet from unobstructed southern panes, use sheer curtains for diffused brightness, rotate weekly, and add full‑spectrum grow lights if natural light’s insufficient, watching for leggy stems or bleached edges.
Clean Leaves Gently to Boost Photosynthesis
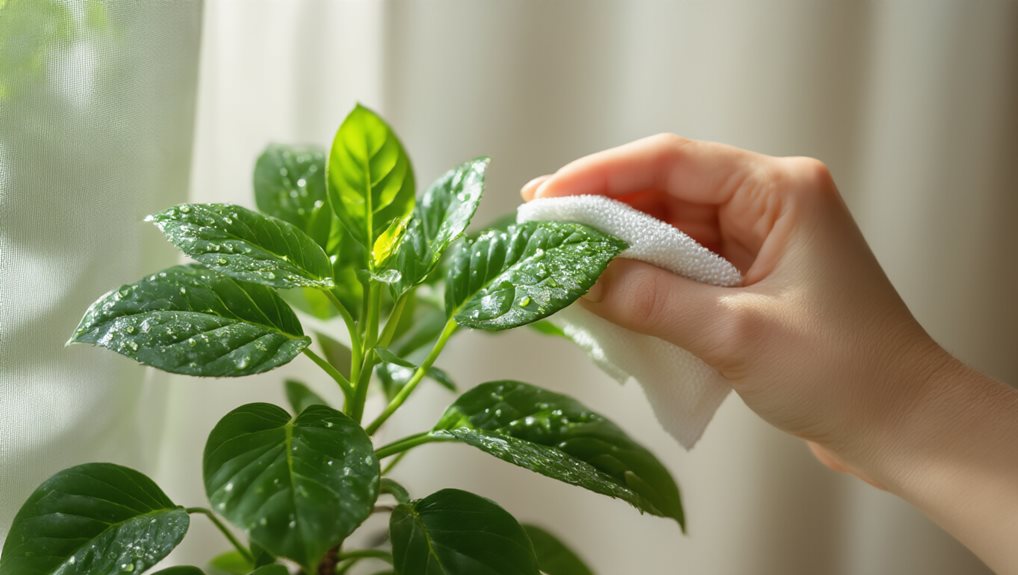
If dust settles on your plant’s foliage, it creates a barrier that blocks sunlight, reduces photosynthetic efficiency, and hampers gas exchange through the stomata, which can stunt growth and increase susceptibility to pests and disease.
Gently dust with a feather duster or wipe leaves using a damp micro‑fibre cloth, moving from base to tip; repeat monthly, especially in dusty rooms, to keep photosynthesis humming and your plant thriving.
Regular maintenance with a wipe can also help preserve a healthy inner leaf surface that supports optimal gas exchange and overall plant vitality gap protection
Treat Scale and Other Pests Without Harsh Chemicals
A gentle, chemical‑free strategy for tackling scale and other common houseplant pests begins with identifying the infestation early, because once the insects multiply they can quickly weaken the plant and invite secondary problems. Using natural fertilizers and soil‑health practices can support recovery by building a living soil that strengthens plants and improves resilience compost benefits. You can spray neem oil, diluted soap, or garlic, repeat every five to seven days, or physically remove insects with a file, tweezers, or a strong water jet; introducing ladybugs or predatory mites further supports a balanced, pest‑free community.
Repot Your Houseplant to Refresh Soil and Uncrowd Roots
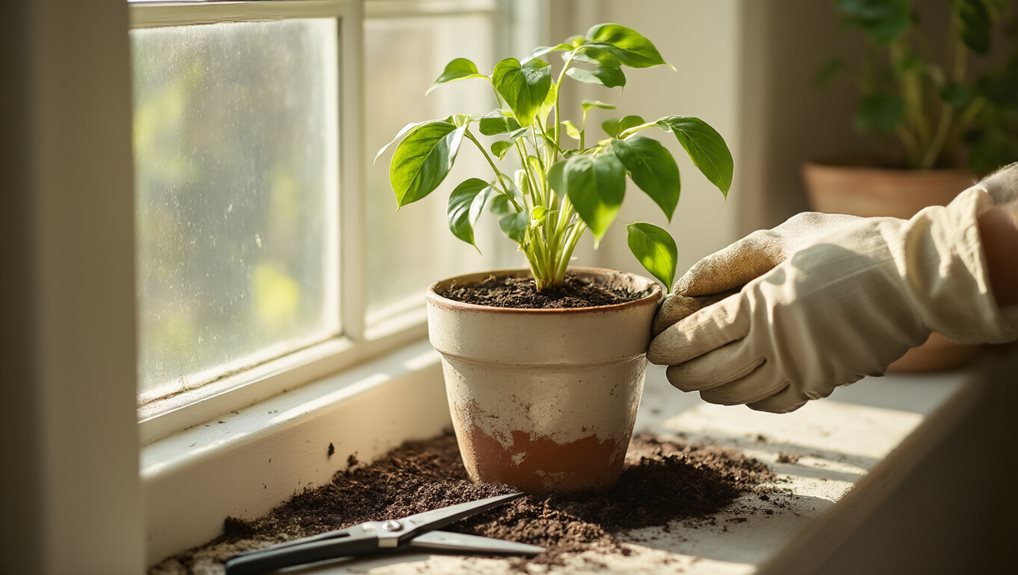
When you notice roots crowding the pot’s drainage holes or the soil drying out unusually fast, it’s a clear sign the plant needs fresh medium and space to breathe. By gently loosening the tangled roots and replacing the old mix with nutrient‑rich, well‑draining soil, you restore essential nourishment and improve aeration, which helps prevent rot and encourages vigorous growth.
Doing this in early spring, while the plant is entering its active phase, maximizes recovery and sets the stage for a healthier, more resilient houseplant.
Loosen Crowded Roots
Because roots that circle the pot or push through drainage holes signal a plant‑bound condition, loosening them is essential before repotting. Gently tease the dense mass with your fingers, separating intertwining strands, and trim any outer roots that are overly thick or dead. This creates space for new growth, improves aeration, and prevents rot, allowing the plant to thrive once you refresh the soil.
Refresh Soil Nutrients
After loosening crowded roots, the next step is to refresh the soil so the plant can draw on new nutrients and breathe more easily. Choose a well‑draining mix, blend a 1:4 compost‑to‑soil ratio, and add a layer of lava rocks for aeration.
Repot in early spring, one size larger, soak the media, then water thoroughly to settle the blend and support radiant growth.
Choose the Right Soil Mix for Your Houseplant
Ever wondered why some houseplants thrive while others struggle to survive? Choose a mix that drains quickly, stays lightweight, and matches your plant’s needs. For succulents, blend equal parts potting soil and pumice or coarse sand; for aroids, combine orchid bark, coco coir, and perlite; for general foliage, use 50% potting mix, 25% perlite, and 12.5% coco coir. Keep pH near neutral and sterilize to prevent pests. Integrate a rotating, soil-health-focused approach by observing how different mixes affect drainage, aeration, and overall vigor across your plant collection, so you can tailor the blend to each species and seasonal changes pest prevention and maintain a resilient growing environment.
Apply Slow‑Release Fertilizer at the Right Time
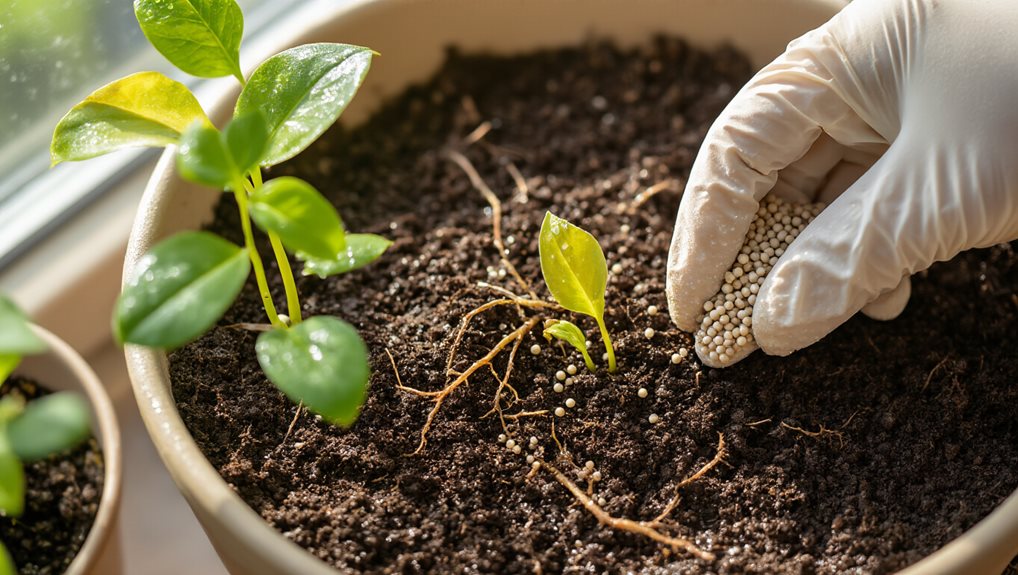
When should you start feeding your houseplant with slow‑release fertilizer? Begin in early spring, roughly eight weeks before the last frost, often in March, using half‑strength pellets for the first three feedings.
Apply the granules directly into the potting mix or as a top dressing while the plant is actively growing, and stop in late fall to avoid winter dormancy.
Slow‑release fertilizer should be applied only during the plant’s active growth periods to ensure the nutrients are available when the roots are most able to absorb them. active growth periods
Create a Care Calendar (Never Forget to Water)
Regularly scheduling your watering routine is the simplest way to keep a houseplant thriving, and a well‑structured care calendar eliminates guesswork while ensuring you never miss a moisture check.
Use your phone calendar or a plant‑care app to set weekly alerts—Sunday mornings, for example—group plants by watering needs, and label each pot with specific dates; adjust frequency seasonally, checking soil 2‑3 times weekly in May and reducing water in winter, so you stay consistent and your plants feel supported.
Monitor Recovery Progress in the First Two Weeks
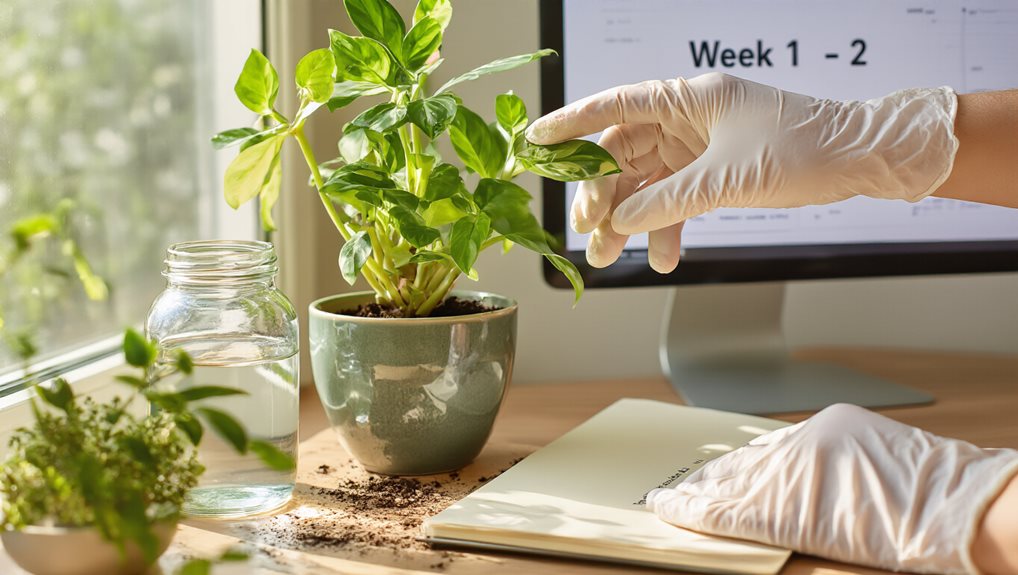
You’ll notice the leaf color shifting from pale yellow to a richer green as the plant stabilizes, which signals that the photosynthetic tissues are recovering.
At the same time, feel the top inch of soil each day; it should feel dry before you water, then moist but not soggy after watering, indicating you’ve balanced moisture levels, By tracking these two indicators consistently, you can confirm whether the plant is on the right track during the essential first two weeks.
Leaf Color Changes
What should you look for in the first two weeks after treating a struggling houseplant? Notice yellow leaves turning greener, pale shoots darkening, and any brown tips receding; these shifts signal that water, light, and nutrients are stabilizing. Prune lingering brown or yellow leaves promptly, and watch for reduced spotting or deformation. Consistent green return without further drop confirms recovery is on track.
Soil Moisture Check
After spotting the first signs of leaf improvement, turn your attention to the soil’s moisture levels, because they reveal whether the plant’s water balance is truly stabilizing.
Use the finger test weekly, feeling for dampness a inch deep, or insert a chopstick to see darkening.
Lift the pot daily to compare weight, and check drainage holes for excess water, ensuring consistent, not soggy, moisture.
Prevent Future Decline With Ongoing Maintenance Tips
One simple habit—checking soil moisture before each watering—can keep most problems at bay, because it prevents the overwatering that leads to root rot, fungal diseases, and pest infestations.
Pair that with consistent light placement, regular humidity checks, occasional fertilizing during growth, and timely repotting; monitor for pests, adjust temperature, and keep drainage clear, ensuring your plant thrives long term.
Final Note
By spotting early symptoms, pinpointing the cause, and applying targeted remedies—proper watering, appropriate light, clean leaves, and timely feeding—you’ll give your houseplant the best chance to rebound. Stick to a care calendar, monitor progress over the first two weeks, and maintain consistent maintenance to prevent future decline. With these practical steps, you can revive a struggling plant and keep it thriving long‑term.