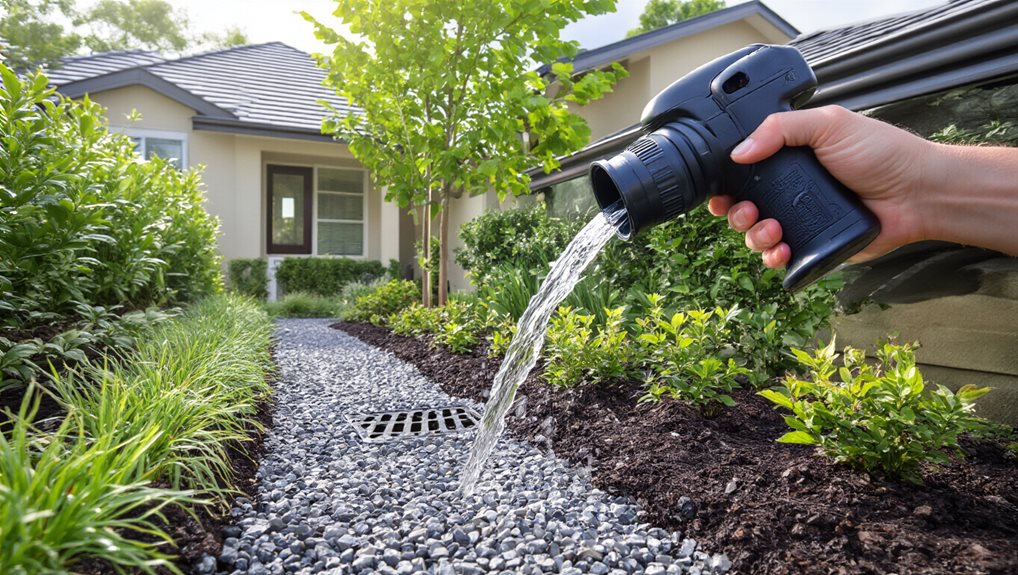
Divert rainwater by first checking your grading; walk the perimeter, spot low spots, and use a sheet‑of‑paper flow map after a storm to locate pooling. Extend downspouts at least eight feet in clay or ten feet in heavy‑rain areas, keeping a 1 % slope and the low point eight inches below ground. Install splash blocks or angled extenders, then re‑grade the landscape to a 6‑inch‑per‑10‑foot (2 %) slope away from the foundation, confirming with a string line or laser. Add swales, dry streams, or trench drains for extra channeling, and consider permeable paving or gravel paths for passive drainage; the next sections will guide you through sump‑pump setup and long‑term maintenance.

TLDR
- Extend downspouts at least 5 ft (preferably 8‑10 ft) from the foundation with a 1 % slope to keep water away.
- Grade the landscape to a 2 % slope (≈6 in per 10 ft) away from the house, confirming with a string line or laser.
- Install splash blocks, extenders, or flexible elbows at downspout outlets to direct flow downhill.
- Add perimeter French drains, dry wells, or rain‑garden berms to capture and infiltrate runoff before it reaches the foundation.
- Set up a sump pump with a discharge pipe terminating ≥14 in from the foundation, using a check valve and proper sealing.
Why You Need to Divert Rainwater Away From Your Foundation
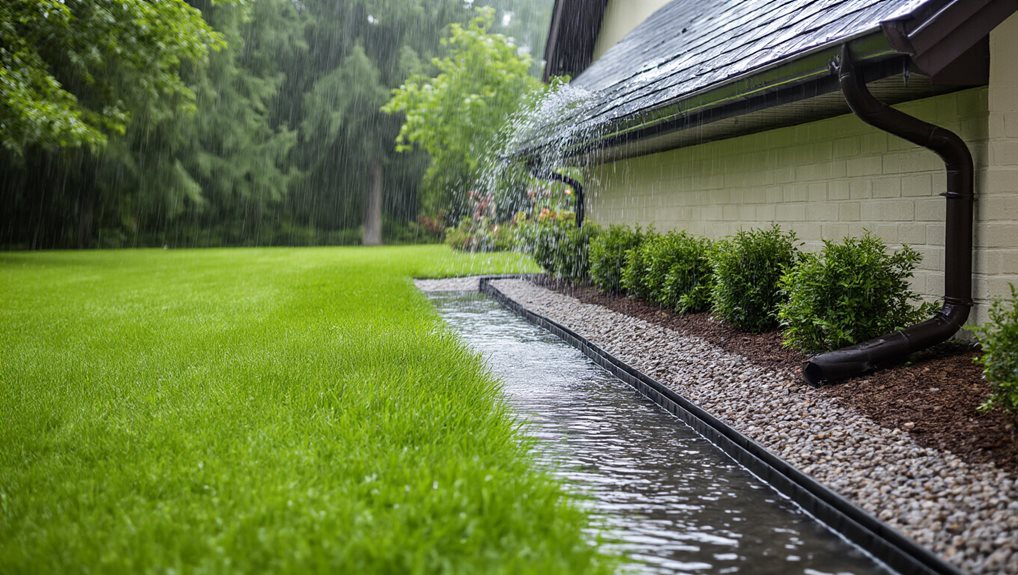
Why should you divert rainwater away from your foundation? When heavy rain saturates soil, hydrostatic pressure pushes against walls, cracking concrete and inviting costly repairs; expansive clays intensify this force, while erosion strips support, causing uneven settling and structural shifts. Water seeping into cracks fuels mold and flooding, and the financial burden skyrockets as damage escalates. Proper drainage protects your home’s integrity and your peace of mind. Hydrostatic pressure can also cause foundation walls to bow inward, further compromising structural stability.
How to Assess Your Property’s Current Drainage Situation
First, check your soil grade by walking the perimeter and noting any low spots where water collects, then locate the downspout ends to see if they discharge at least five feet from the foundation.
Next, identify water‑pooling areas by observing wet patches after a rainstorm, using a simple sheet‑of‑paper map to track flow paths across impervious surfaces and softscapes.
Finally, compare these observations with your existing grading and drainage features, confirming that slopes, berms, and swales direct water away from the house. Ensure you account for the time of concentration and local rainfall intensity when evaluating peak runoff and potential drainage needs surface runoff assessment.
Check Soil Grade
How can you tell if your yard’s grading is helping or hurting your home’s drainage? Walk the stake‑and‑string method, placing a stake at the foundation and another ten feet away, pull a tight string, and use a level to confirm a six‑inch drop over that distance; observe during rain for puddles or erosion, and note any low spots that pull water toward the house.
Locate Downspout Ends
After confirming that your yard’s slope directs water away from the foundation, turn your attention to the downspout ends, because they’re the final conduit that carries runoff from the roof to the ground. Inspect each outlet to ensure it extends at least five feet from the foundation, avoids windows or walkways, and discharges onto a sloping area or underground system, checking brackets for secure attachment and gaps for leaks.
Identify Water Pooling Areas
Where does water collect on your property after a storm, and why does it matter for your foundation’s health?
Walk the site during rain, laying a sheet of paper to trace flow, marking impervious surfaces, hard pans, and softscapes.
Map high and low points, check slopes toward the foundation, note nearby storm drains, and observe soil type and existing drainage efficiency to pinpoint pooling zones.
Choose the Right Downspout Extension Length for Rainwater Diversion
If your home sits on clay soil or a slope that directs water toward the foundation, you’ll need a longer downspout extension than the typical four‑to‑six‑foot rule.
Aim for at least eight feet on clay, ten feet where storms are heavy, and maintain a 1 % slope—one foot drop per hundred feet—to keep water moving away.
Choose flexible extensions for easy adjustment, but ensure the pipe’s lowest point stays eight inches below ground for optimal drainage.
Adjustable downspout extensions can help tailor the length to site conditions and improve drainage efficiency.
Install Splash Blocks or Extenders for Immediate Water Dispersal
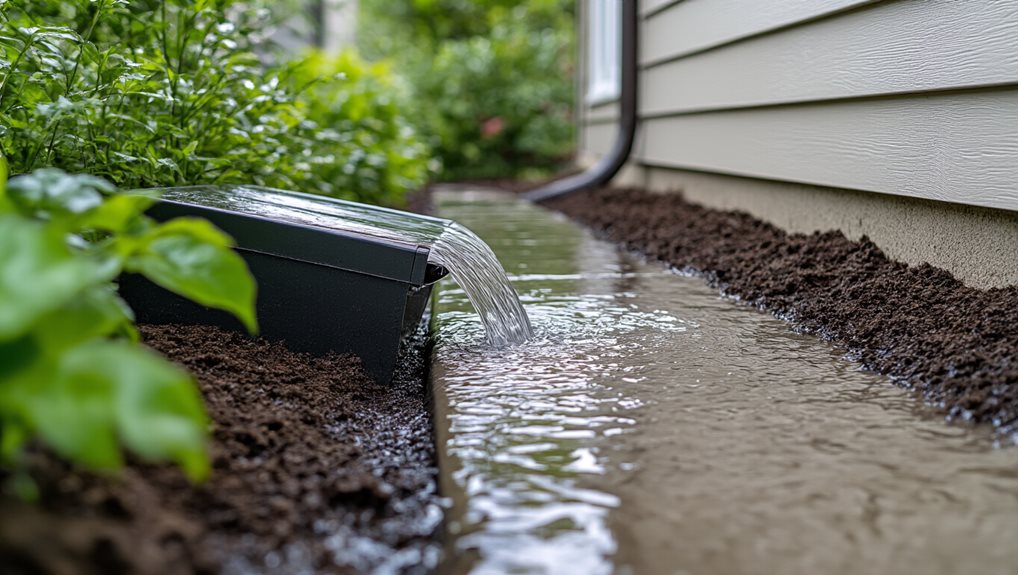
When you’ve sized the downspout extension to keep water away from the foundation, the next step is to install a splash block or an extender right at the outlet, ensuring the runoff is immediately redirected.
Clear the area, place the block with its closed end under the spout, angle it slightly downhill, anchor it with stakes, and verify a gentle slope so water slides away, protecting your foundation and fostering neighborhood pride.
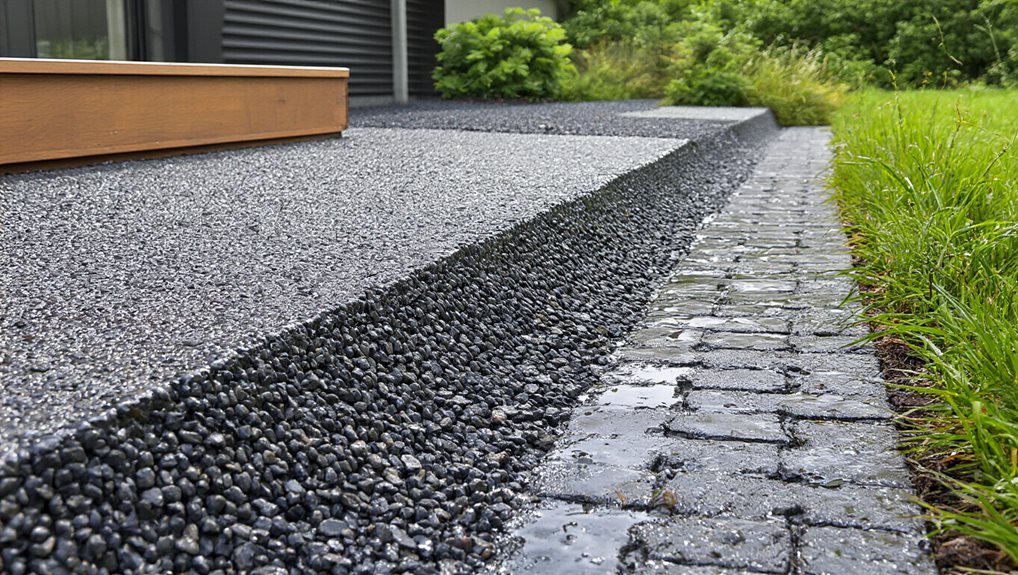
Grade the Landscape to Create a 6‑Inch‑per‑10‑Feet Slope for Effective Diversion
What does a proper yard grade look like, and why does it matter?
You need a steady 6‑inch‑per‑10‑feet drop away from the foundation, creating a 2 % slope that channels rain toward swales or drains.
Use a string line or laser transit to verify the grade, add or remove soil until the elevation is six inches below siding, and check after rain to confirm water moves off your home. Proper drainage relies on consistent slope and stable footing, which mirrors the importance of routine maintenance and safety checks in other disciplines. 6-inch‑per‑10‑feet drop
Build a French Drain to Capture and Redirect Subsurface Flow
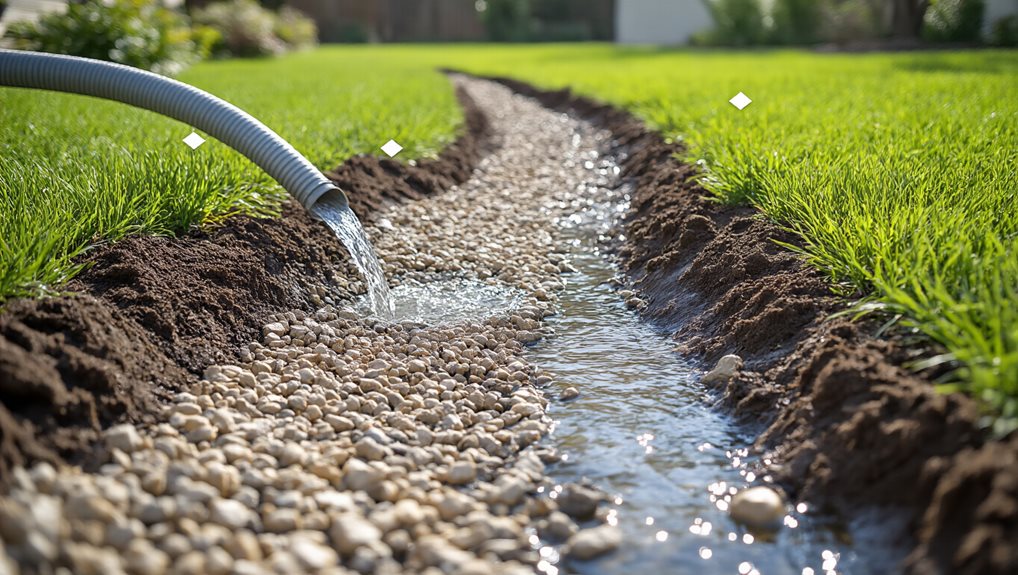
Because groundwater can seep through the soil right up to your foundation, installing a French drain gives you a reliable way to capture that subsurface flow and channel it away before it causes damage.
Dig an 8‑inch‑to‑2‑foot trench sloping away from the house, line it with geotextile fabric, lay a 4‑inch perforated PVC pipe, backfill with pea gravel, then wrap fabric and cover with soil.
Regularly inspect cleanouts and ensure the discharge point stays clear.
A practical approach from square foot gardening methods emphasizes grid-based planning and no-dig, which can support efficient water management around raised beds and containers, including moisture control and mulch strategies to reduce evaporation soil health and improve drainage.
Dig a Dry or Percolating Well for Long‑Term Water Absorption
Excavate a four‑foot‑diameter, three‑foot‑deep hole, line it with fabric, fill with crushed stone, insert a perforated PVC chamber, and connect a sloped pipe from the downspout, ensuring filters and seals keep debris out. In addition, place a simple cover or grate over the well to deter small animals and to reduce debris entry boredom relief in goats and minimize noise from nearby drainage activity.
Design a Rain Garden or Berm as a Functional Diversion Feature
Where can you place a rain garden or berm so it effectively can divert runoff while protecting your home? Position it at least ten feet from the foundation, on a gentle slope that captures water from roofs or driveways, and ensure the soil infiltrates at least half an inch per hour.
Size it using 5‑10 % of the impervious area, amend the substrate, and plant native, deep‑rooted species for absorption, filtration, and habitat, while the surrounding berm levels the site, spreads flow evenly, and prevents edge erosion.
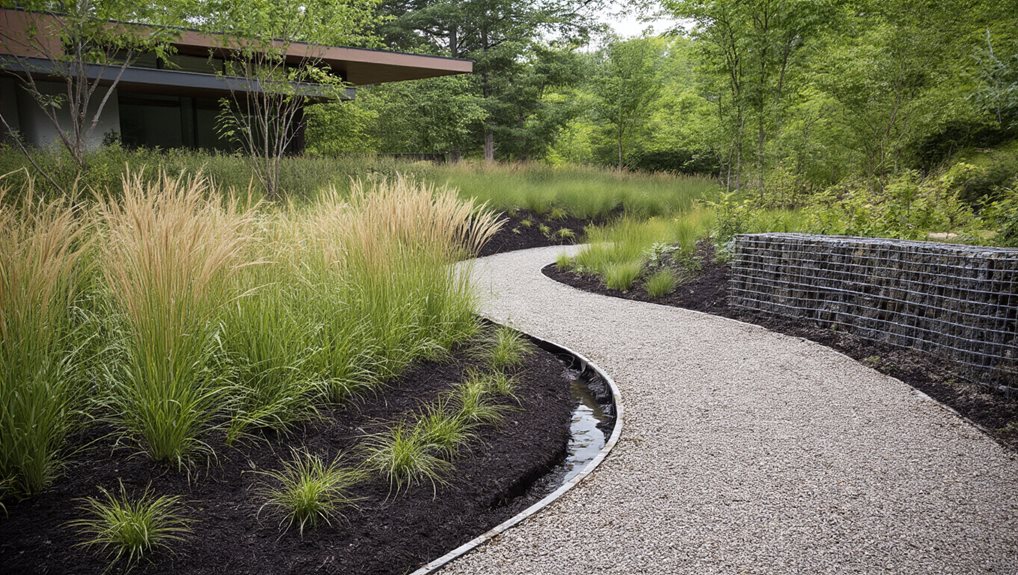
Add Swales, Dry Streams, or Trench Drains for Extra Channeling
How can you effectively channel excess runoff while keeping your foundation dry? Install swales, dry streams, or trench drains along the house perimeter, using vegetated, shallow channels that slow water, filter pollutants, and guide flow toward safe discharge points.
Add check dams or berms to promote infiltration, reduce peak runoff, and protect foundations, while maintaining low‑maintenance, cost‑effective drainage.
Install Permeable Paving and Gravel Paths for Passive Drainage
A permeable pavement system turns a driveway or patio into a passive drainage network, allowing rain to seep through open joints and stone layers instead of pooling on the surface.
You’ll cut runoff by up to 80%, keep foundations dry, and let stone bases filter pollutants, while groundwater recharges and maintenance costs drop.
This sustainable choice strengthens community resilience and adds curb appeal.
Set Up a Sump Pump System for Heavy Rain and Low‑Lying Areas
You’ll first pick a pump that matches the expected water volume and head pressure, then position it in a level pit with a reliable float switch to trigger automatic operation.
Next, you’ll route a 1‑1/2″ PVC discharge pipe through a check valve, seal the wall entry, and angle it downward so water exits at least 14 inches from the foundation.
Finally, you’ll test the system by filling the pit, confirming the pump kicks on, and verifying that the discharge line carries water clear of the house.
Choose Right Pump
Where should you start when selecting a pump for heavy rain and low‑lying areas?
First, assess your basement’s square footage, typical water entry, and water‑table height; a ¾‑1 HP submersible works for deep pits, while a ⅓‑½ HP pedestal suits shallower spaces.
Choose a model whose GPH exceeds local rainfall flow, ensure the sump pit fits, and consider a backup pump to guard against power loss.
Install Proper Discharge
How do you guarantee that rainwater leaves your home quickly and safely once the sump pump kicks in? Install a 1‑1/2‑inch PVC discharge pipe, attach a male threaded adapter with primer and cement, and secure a check valve to prevent backflow. Extend the pipe 6 inches out, 24 inches above ground, add a 90‑degree elbow, seal, and create a weep hole to avoid air lock. Test the system to ensure reliable drainage.
How to Keep Your Drainage System Working All Year
Regularly inspecting your drainage system—ideally every six to twelve months in tree‑dense areas and at least once a year elsewhere—keeps blockages, cracks, and root intrusions from turning minor inconveniences into costly repairs.
Clear gutters, downspouts, and catch basins monthly; flush drains with hot water; test sump pumps; trim nearby trees; and keep detailed records, so your home stays protected and your community feels confident in shared stewardship.
Final Note
By properly diverting rainwater, you protect your foundation, prevent costly damage, and maintain a healthy landscape. Use downspout extensions, splash blocks, and grading to guide water away, then reinforce the system with swales, dry streams, or trench drains for added capacity. Incorporate permeable paving and a sump pump where needed, and schedule regular inspections to keep everything functioning year‑round. Consistent maintenance assures your drainage remains effective, safeguarding your home without excessive effort.