Clean up garden debris to prevent pests and diseases from overwintering. Pull weeds now to stop seed spread and reduce spring work. Rake leaves to protect lawns and beds, composting healthy ones or using them as mulch. Remove and store trellises, row covers, and markers properly. Feed soil with compost or manure after the first frost. Sharpen tools, drain hoses, and store equipment dry. Cut back only diseased perennials, leaving seed heads for birds. Plan next year’s layout and order seeds early—there’s more to get right before winter sets in.

TLDR
- Remove fallen leaves and diseased plant material to prevent pests, mold, and overwintering diseases.
- Pull weeds and apply preemergent barriers to reduce spring infestations and limit seed spread.
- Apply compost and mulch after the first frost to protect soil and insulate perennial roots.
- Clean, sharpen, and store tools properly to prevent rust and ensure readiness for spring.
- Drain and store hoses indoors, and plan next season’s layout using crop rotation and companion planting.
Clean Up Garden Debris to Stop Pests and Disease

Cleaning up garden debris is your first line of defense against pests and diseases that can overwinter in fallen leaves, dead plant material, and decaying matter.
You’ll prevent infections by removing diseased foliage, pruning infected branches, and clearing clutter.
Shred or compost healthy leaves, but dispose of any showing signs of disease.
This simple step protects your garden’s health and sets the stage for stronger growth come spring.
Aim for several consecutive dry days to make cleanup easier, as dry conditions improve debris removal efficiency.
Regular maintenance also reduces mushroom-friendly mulch and other decaying material that harbor fungi.
Pull Weeds Before They Spread in Fall
Pull weeds now to stop them from spreading seeds that’ll cause bigger problems next spring.
Since many perennials store energy in their roots during fall, this is the best time to remove them completely—use a digging tool to get the whole root and prevent regrowth.
If you catch winter annuals early, you’ll also reduce the need for herbicides or extra labor when the garden wakes up in spring.
Weeds often have deep roots that let them regrow if any root fragments are left behind.
Pull Weeds Early
Now’s the time to get ahead of winter weeds before they take root and multiply. Pull them early in fall to stop seed spread and reduce spring outbreaks.
Target dandelions and plantain while they’re vulnerable. Use a digging tool to remove full root systems, and hoe shallowly to avoid waking dormant seeds. Tarp beds now to weaken emerging weeds and starve future growth.
Stop Seed Spread
While winter may seem like a quiet time in the garden, the fall months are critical for disrupting weed life cycles before they gain momentum.
Pull weeds early, before they set seed, and use preemergent barriers like Preen or mulch to block germination.
Apply treatments in early fall to stop winter annuals and prevent perennials like dandelions from taking hold, ensuring your garden stays healthy and weed-free.
Prevent Spring Infestation
Getting ahead of weeds now pays off when spring rolls around, so take advantage of fall’s ideal conditions to curb infestations before they start.
Target dandelions, chickweed, and clover while they’re active and vulnerable. Use post-emergent herbicides or hand-pull tap-rooted weeds for lasting control.
Cooler temps and moisture help treatments stick, giving your lawn a stronger root system and reducing spring competition.
Rake Leaves From Trees and Garden Beds
Rake up fallen leaves regularly to protect your lawn and garden from long-term damage.
You’ll prevent mold, shield grass from smothering, and reduce winter rodent risks.
Clear beds and paths to safeguard bulbs and plants, and use a mulching mower on thin layers.
Collect and repurpose leaves as mulch or compost—your garden will thrive with this simple, effective care.
Avoid piling leaves too thickly; instead, spread thin layers or compost them to maintain good soil contact for any grass seed you might sow.
Remove and Store Trellises, Markers, and Row Covers

Pull your trellises out after harvest, making sure to clear off any plant debris and remove supporting stakes to prevent disease and winter damage.
Lay row covers flat, shake off dirt, and check for tears before folding them neatly for storage in a dry spot.
Clean your markers, group them by crop type, and stash everything in labeled containers so it’s ready and organized for next season.
Consider storing heavier items on a sturdy shelf to avoid floor moisture and prevent damage to stored materials.
Remove And Clean Structures
As the growing season winds down, it’s time to take down and clean your garden structures to keep your space organized and disease-free.
Remove trellises, clear all plant debris, and wipe down wood or metal to prevent disease.
Wear protective gear when handling mesh.
Clean stakes and markers, then store them vertically or bundled tightly.
Don’t forget to inspect for damage, ensuring everything’s ready for next season’s success.
Store Tools Properly
Now that you’ve cleared away trellises, markers, and row covers and given your garden structures a thorough cleaning, it’s time to focus on how you store your tools for the winter.
Hang long-handled tools on wall-mounted racks or pegboards to prevent rust and damage, while using storage bags or cabinets for smaller items like trowels and secateurs.
Keep everything dry, off the ground, and organized—this protects your tools and makes spring prep easier.
Protect Materials From Weather
Secure your garden’s structural supports before winter’s chill sets in, starting with trellises that hosted climbing crops during the growing season.
Remove and store trellises, markers, and row covers to protect them from harsh weather.
Clear debris, detach hog panels, fold collapsible designs, and bundle stakes.
Clean, dry, and inspect row covers before storing in a dry place to prevent mold and damage over winter.
Feed Your Soil With Fall Compost and Manure

Increase your garden’s future harvests by feeding the soil now with fall compost and well-rotted manure—this simple step builds fertility while winter weather does the work of blending it into the earth.
You’ll enhance organic matter, improve soil structure, and support microbial life.
Apply a 1–2 inch layer after the first frost, letting rain and freeze-thaw cycles move nutrients downward, so your garden wakes up nourished and ready.
Using a well-aged compost from a properly aerated system can speed nutrient availability and improve results, especially when stored in perforated bins that promote airflow.
Mulch Garden Beds for Winter Protection
After you’ve enhanced your soil with a generous layer of fall compost or well-rotted manure, the next smart move is locking in those benefits by mulching your garden beds.
Use coarse wood chips or shredded leaves to a depth of 2–4 inches, keeping mulch slightly away from stems.
Apply after a hard frost to prevent freeze-thaw cycles, protect shallow roots, and reduce heaving—all while enhancing soil health over winter.
Protect Carrots and Garlic With 8 Inches of Mulch

When winter’s chill starts to settle, your carrots and garlic need more than just soil to survive the season—insulating them with a thick blanket of mulch makes all the difference.
Apply 6–8 inches of seed-free straw or shredded leaves after the ground freezes to buffer cold and stabilize temperatures. This layer shields bulbs and roots from freeze-thaw cycles, reduces moisture loss, and deters pests—giving your crops the steady, protected environment they need to thrive come spring.
Start a New Compost Pile With Clean Garden Waste
Kick off your winter composting by building a pile large enough to hold heat—aim for at least 5 to 6 feet wide and tall, so it can generate and retain the warmth needed to keep microbes active through cold spells.
Start with coarse browns at the base, then layer greens and browns in a 1.5:1 ratio, keeping materials moist but not soggy.
Cover the pile with a tarp to block excess rain, and insulate with straw-filled sacks or cardboard to hold in heat.
Turn it occasionally to enhance oxygen flow, helping microbes thrive and break down material efficiently—even in chilly weather.
Sharpen and Store Tools for Spring

With your compost pile set to break down over the colder months, turn your attention to the tools that helped make your garden thrive this season—giving them proper care now guarantees they’ll be ready to perform when spring returns.
Clean dirt and sap off blades, sharpen edges annually, lubricate moving parts, tighten hardware, and store in a dry place so everything stays in top shape and feels familiar, reliable, and ready when you are.
Drain and Store Hoses, Pots, and Sprinklers
Now’s the time to wrap up your outdoor watering gear by draining and storing hoses, pots, and sprinklers properly—this keeps them in working order and ready for next season.
Disconnect hoses, drain completely by elevating one end, then coil loosely and secure.
Clean and dry all items thoroughly, store indoors, and keep fittings dry to prevent damage and pests.
Cut Back Perennials and Leave Seed Heads for Birds
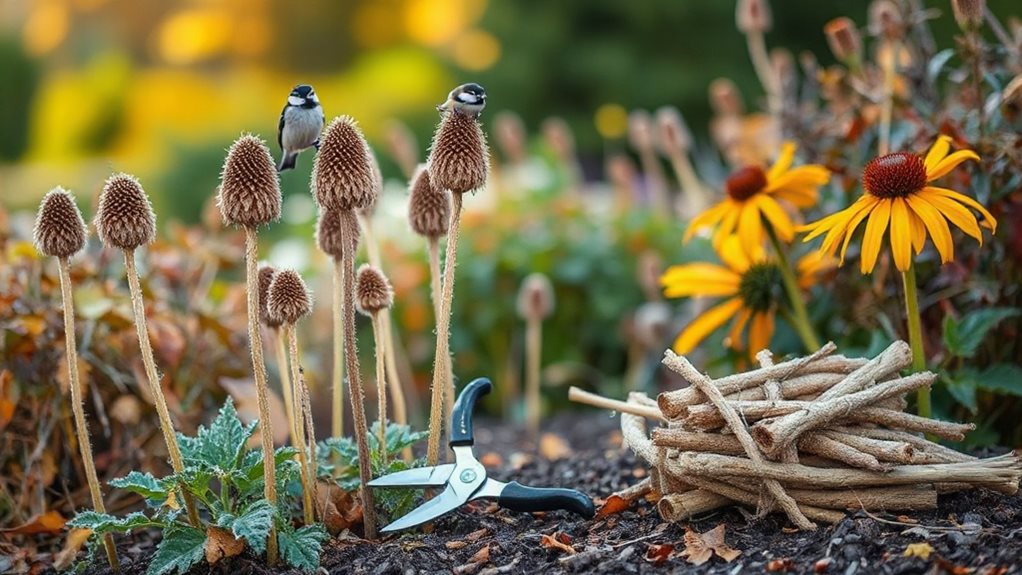
After securing your hoses and storing irrigation tools for the season, turn your attention to the perennial beds, where a thoughtful approach to end-of-season care supports both garden health and local wildlife.
Leave seed heads of coneflowers, black-eyed Susans, and ornamental grasses standing to feed birds and shelter pollinators. These stems also insulate plant crowns, trap snow, and add winter garden structure.
Cut back only diseased foliage, like hostas or daylilies, to prevent mold.
Map Out Next Year’s Garden and Order Seeds
Take advantage of winter’s quiet to map out your garden’s layout, noting sunlight shifts and planning crop rotations that enhance soil health and yield.
Review your seed inventory, toss old stock, and use catalogs to pick varieties suited to your zone, including pollinator-friendly plants and hardy perennials.
Once your plan’s set, order seeds early—especially for popular cultivars—and secure bare-root plants like asparagus to lock in a strong start for spring.
Garden Layout Planning
How can you set your winter garden up for success before the first seed is sown? Plan your layout now by sketching beds on graph paper or using digital tools, positioning taller crops like trellised tomatoes to the north and west.
Group plants by family for rotation, use companion planting to deter pests, and guarantee proper spacing for mature growth, sunlight, and airflow—all key to a thriving, resilient garden.
Seed Selection And Ordering
You’ll often find that the key to a productive winter garden starts not in the soil, but in careful seed selection.
Choose cold-hardy varieties like ‘Auroch’ spinach or ‘Oslo’ leeks, prioritizing germination rates and days to maturity. Order from trusted suppliers like Johnny’s or Territorial, and look for open-pollinated, non-GMO seeds customized to your micro-climate for reliable, resilient harvests.
Final Note
You’ve cleared debris, fed the soil, and stored tools, setting your garden up for success. By cutting back perennials and leaving seed heads, you support wildlife while preparing for spring growth. Mapping your next season’s layout now saves time later. With hoses drained, beds tidy, and compost in place, your winter garden rests ready. These steps protect your investment and guarantee a healthier, more productive growing season ahead—smart, simple care today brings lasting rewards.