Install a tight butterfly‑net frame over your seedling rows, securing it with hoops, staples, or rocks so it stays taut and lets light through, then add a low‑profile chicken‑wire fence with garden fleece tucked flush to the soil to block perching and squeezing. Hang 6‑10 lb monofilament lines 2 ft above the ground, spacing them 1½ in. apart and raising them as seedlings grow, and sprinkle reflective Mylar balloons, CDs, or terror‑eye devices nearby to create moving visual deterrents. Keep bird feeders at least 10‑15 ft away to reduce attractants, and you’ll find more detailed strategies ahead.
TLDR
- Install a tight‑fit bird‑proof net using butterfly‑mesh over seedlings, securing edges with rocks or staples to prevent sagging.
- Build a low‑profile ground barrier using bamboo legs, chicken wire, and garden fleece, weighted down with rocks or mulch.
- Add monofilament fishing‑line deterrents spaced 1–1.5 inches apart, raising them as seedlings grow to stay just above foliage.
- Use inexpensive reflective deterrents (pinwheels, foil, Mylar) and rotate them weekly to avoid bird habituation.
- Perform weekly inspections, reseal gaps, and keep feeders at least 10–15 ft away to reduce attractants.
Choose the Most Effective Bird‑Proof Barriers for Seedlings

Which barrier will keep birds away while still letting light and beneficial insects reach your seedlings? You’ll find butterfly netting ideal: it blocks birds, lets honeybees pollinate, and transmits almost 100% light, while a tight pull over hoops prevents sagging, and rocks or staples secure it. This setup yields near‑perfect germination for carrots, beets, and other direct‑sown seeds, even during wind storms. Including a sturdy frame ensures the net stays taut and resistant to wind.
Build a Sturdy Net‑Frame for Bird‑Proof Protection Using PVC, Bamboo, or Hula Hoops
Need can you protect seedlings from birds while still letting light and beneficial insects through? Choose PVC, bamboo, or hula hoops, drive steel rods 30 cm deep, attach saddles with timber screws, and thread pipes or hoops into them. Secure netting with pegs, clamps, and twine, using 20 mm mesh for birds and finer mesh for insects. Expand modularly for airflow and seasonal tweaks. Additionally, ensure that the netting covers any gaps where birds could perch or squeeze through bird-proofing; this reduces flight attempts and helps maintain a consistent barrier.
Install Chicken Wire and Garden Fleece as Ground‑Level Bird‑Proof Barriers
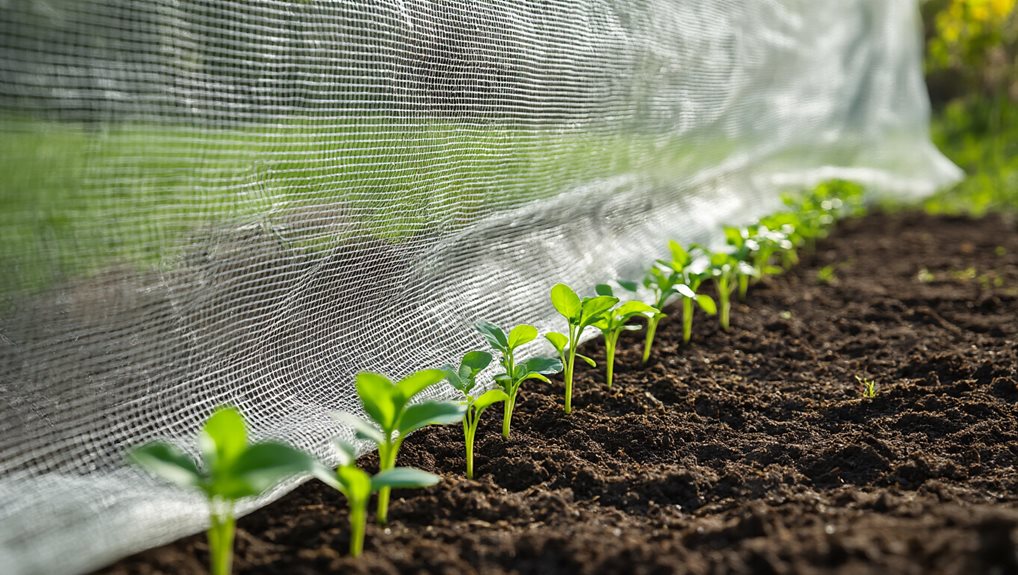
You’ll start by building a low‑profile frame that sits flush with the soil, using sturdy stakes or U‑shaped hardware cloth to hold the chicken wire in place, then secure the mesh tightly so there are no gaps for birds to slip through.
Next, drape garden fleece over the seedlings, fastening its edges with rocks or stakes to keep wind from lifting it and to create a breathable barrier that still lets light reach the plants.
To further deter birds, plan the installation around best practice for airflow and coverage, ensuring the barrier materials maintain a proper CFM-per-ton style of protection for consistent plant protection. best practice
Ground‑Level Frame Construction
How do you build a sturdy, ground‑level frame that keeps birds out while staying easy to assemble? Cut 2‑foot bamboo legs, join with three‑arm connectors, then attach 3‑foot side canes; hammer steel rods 30 cm deep, bend poly pipe over them, and level with gravel. Drape fine‑mesh chicken wire, pin with steel pegs, overlap seams, and tie garden fleece with twine for a seamless, protective barrier.
Secure Soil‑Level Netting
After assembling the ground‑level frame, you’ll want to seal the base with a tight‑fitting netting system that stops birds from reaching the seedlings. Lay chicken wire or garden fleece flush on the soil, overlap edges, then secure with staples, U‑pins, or buried 1×2 strips; heap soil or mulch to weight it down, keep a four‑inch clearance, and inspect weekly to maintain a seamless, bird‑proof barrier.
Set Up Monofilament Fishing Line to Deter Birds in Row Crops
Pick a monofilament with a 6‑10 lb test weight, then space the strands about 1‑1/2 inches apart, keeping them roughly 1/8 inch on either side of each row’s entry points.
As the seedlings grow, raise the line to stay just above the foliage, ensuring the gap remains consistent and the birds can’t slip through.
This simple adjustment lets you maintain a clear barrier while minimizing the chance of birds nesting or feeding directly on the crops.
Choose Line Strength
Wondering which monofilament strength will keep sparrows off your seedlings without breaking under wind or crop abrasion? Choose the 9‑kg line for long‑term durability, as tests in Nebraska showed it resists wind and abrasion better than 1.8‑kg or 5.4‑kg options. The stronger line maintains visibility, repels sparrows effectively, and endures summer sunlight, requiring only annual replacement to keep your row crops protected.
Space Lines Evenly
How far apart should you space your monofilament lines to keep sparrows from your seedlings? Plant the lines at roughly 30 cm (one foot) intervals across each row, because experiments in Nebraska and New Mexico show that spacing repels house sparrows and barn swallows.
Keep the strands taut, align them parallel to the planting direction, and maintain uniform spacing to create a consistent visual barrier that birds recognize and avoid.
Adjust Height As Plants Grow
After spacing the monofilament lines evenly, the next step is to adjust their height as the seedlings grow. Begin with lines about two feet above ground, then raise them to keep a one‑foot clearance above the canopy as plants mature, rechecking monthly.
Use 6‑10 lb test line for visibility and strength, replace it yearly, and monitor wind or crop abrasion to maintain effective sparrow deterrence.
Adjust and Re‑position Fishing Line for Ongoing Seedling Protection
Can you keep the fishing line perfectly positioned as seedlings grow? Raise the line incrementally, keeping it 1‑2 inches above each plant, and re‑tension after wind or growth shifts; tie it securely to stakes spaced at least 12 inches apart, using 20‑pound monofilament to avoid sagging. Properly inspect windows during sealing projects to ensure surrounding areas are dry and free from moisture before sealing, as moisture can compromise the effectiveness of line setups and create gaps that birds may exploit. Properly inspect
Deploy Reflective Tactics: Mylar Balloons, CDs, and Terror‑Eye Devices

Reflective tactics such as Mylar balloons, rep‑mirror CDs, and terror‑eye stakes work by creating bright, moving visual cues that confuse and deter birds when sunlight hits them.
You’ll notice the rustling sound and glinting flash amplify deterrence, especially when wind stirs the Mylar; stakes’ iridescent centers frighten pigeons, sparrows, crows and more.
Rotate and reposition devices weekly to prevent habituation, and combine them with mesh or tubing for lasting protection.
Make Quick DIY Seedling Covers With Crates, Cups, and Fabric Clips
A simple, reusable seedling cover can be assembled in minutes using a crate, a cut‑off bottle, and a few fabric clips, giving you a sturdy dome that shields young plants from birds while still allowing easy access for watering and inspection.
Position the crate over the bed, insert the bottle cylinder into the soil around each seedling, then clip fabric to the crate edges with binder clips, tucking excess under bricks for stability; the system is cost‑effective, reusable, and lets you monitor growth without disturbance. Mulching blades and their functionality are not needed for seedling protection, but understanding different mower technologies can help you manage yard waste without disturbing beds. Mulching blades provide nutrient recycling by finely cutting clippings, though they are not designed for use with seedling covers.
Move Your Bird Feeders Far From the Garden to Reduce Attractants
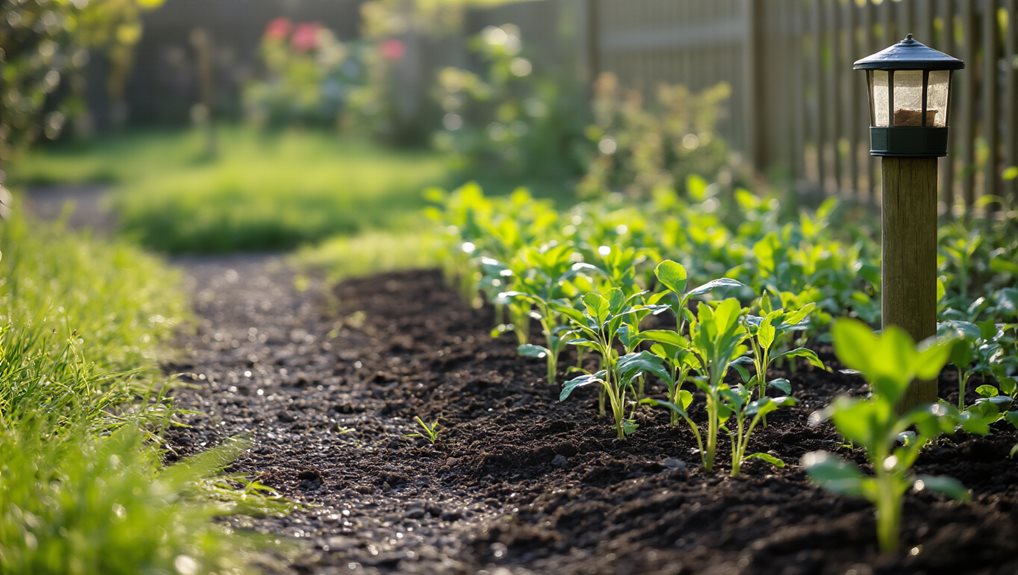
After securing seedling covers, the next step is to re‑position your bird feeders so they’re far enough from the garden to curb unwanted foraging. Place feeders at least ten feet from any hedgerow or shrub, ideally ten to fifteen feet from the garden edge, because distance reduces seed spillover, limits species like Blue Tit and House Sparrow, and lowers disease risk while keeping birds satisfied elsewhere. Be mindful that the exact distance should also consider preventing heavy seed washout from weather and minimizing temptation to overhangs that could impact nearby walls or anchors used in garden structures. Periodic inspection and maintenance of any existing anchors or mounts used to secure feeders or related fixtures can help ensure safety and stability over time.
Budget‑Friendly Bird‑Proof Materials You Can Find at the Dollar Store
Ever wondered how a few inexpensive items from the dollar store can turn your garden into a bird‑proof zone?
You can hang durable plastic pinwheels that spin and flash light, crumple aluminum foil into shimmering barriers, scatter reflective flash pieces for instant scares, sprinkle coffee grounds for a natural repellent, and attach plastic scare sheets that mimic pinwheel movement. All are affordable, easy to install, and keep seedlings safe.
Final Note
By combining sturdy net‑frames, low‑lying chicken wire, and adjustable monofilament lines, you’ll create a resilient barrier that deters birds without hindering growth. Reflective devices and DIY fabric covers add extra protection, while moving feeders away minimizes attraction. Choose cost‑effective materials from local stores, and regularly inspect and reposition the barriers to maintain effectiveness. With these practical steps, your seedlings will thrive, and bird damage will be substantially reduced.