Start your no dig garden by choosing a sunny spot and clearing grass or weeds with a close mow. Lay down overlapping cardboard or newspaper, moisten it well, and top with 4–6 inches of compost to smother weeds and build rich soil. Add a mulch layer to lock in moisture and suppress weeds. Plant directly into the compost, water gently, and let earthworms and microbes do the work—your soil will improve each season, and you’ll uncover even smarter ways to grow over time.

TLDR
- Choose a sunny, accessible site with at least 6 hours of daily light and proximity to water for easy maintenance.
- Prepare the ground by mowing low, laying overlapping cardboard, and watering it to suppress existing vegetation.
- Build fertility by layering compost, organic matter, and mulch without disturbing the soil structure underneath.
- Plant directly into the top compost layer, using seedlings or seeds suited to rich, shallow soil conditions.
- Maintain with annual compost top-ups, consistent mulching, and minimal disturbance to support long-term soil health.
What Is No Dig Gardening and Why Try It?
While traditional gardening often relies on turning the soil to prepare beds, no-dig gardening skips the spade work entirely—instead, you build fertile growing conditions by layering organic matter like compost and mulch right on top of the soil. This approach pairs especially well with using a steady supply of compost from a dual-chamber tumbler to maintain continuous additions.
You protect soil life, reduce weeds, retain moisture, and grow healthier plants with less effort, all while working in harmony with nature’s rhythms and building a thriving, balanced ecosystem beneath your feet.
Improved drainage and aeration help roots access oxygen and water more effectively, supporting stronger plant growth.
Pick the Best Spot for Your No Dig Garden
You’ll want to pick a spot that gets plenty of sun, ideally with southern or western exposure, since most vegetables thrive in bright light.
If your site has grass or weeds, don’t pull them up—just mow them short and get ready to smother them with cardboard.
Make sure the area is close to water and somewhere you’ll see often, so watering and checking on plants stays easy and routine.
Consider your USDA planting zone when choosing plants for the bed, especially if you garden in Zone 7a, to pick varieties suited to your minimum winter temperatures.
Sunlight Access Matters
Choosing the right spot for your no-dig garden often makes the difference between thriving plants and disappointing yields, so pay close attention to sunlight access.
You’ll need at least 6 hours of direct sun daily, ideally between 10 a.m. and 4 p.m., to support strong growth.
Fruiting crops demand full sun, while leafy or root vegetables tolerate partial shade but still need 4+ hours.
Avoid shady areas under trees or hedges, which block light and invite pests.
Position your garden where sunlight is consistent and unobstructed, ensuring healthy plants and abundant harvests.
Clear The Area First
Now that you’ve confirmed your chosen spot gets enough sunlight, it’s time to prepare the ground—without digging.
Mark the garden’s edges and pathways, then cut grass and weeds, leaving them as organic matter.
Water the area well, especially after rain, to help breakdown materials.
Smother existing vegetation with mulch to suppress growth, no digging required.
Start small, expand later as resources allow.
Prepare No Dig Beds Without Tilling
While selecting the right location sets the foundation, preparing your no-dig beds without tilling begins with working directly atop existing vegetation—grass, weeds, and all.
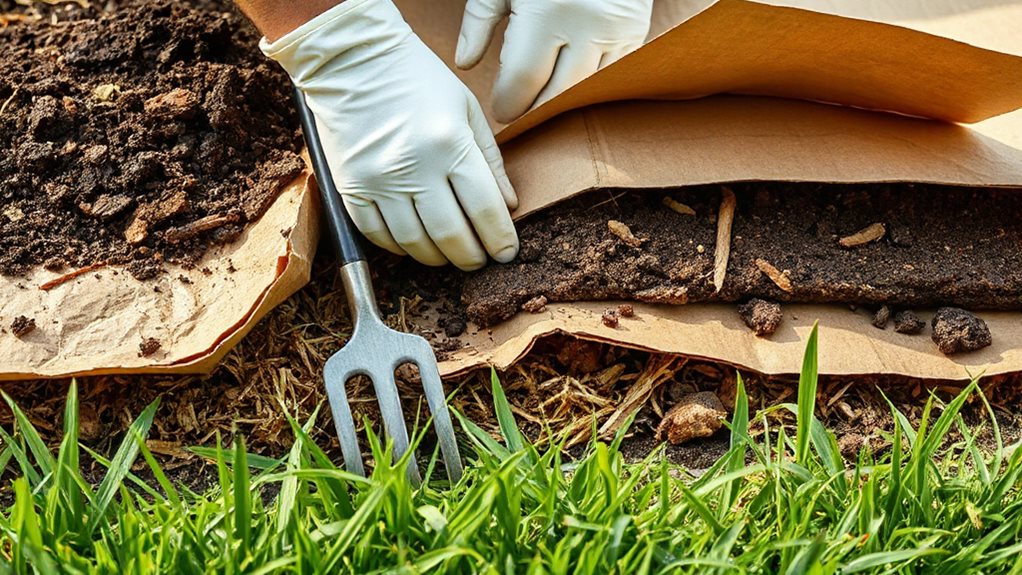
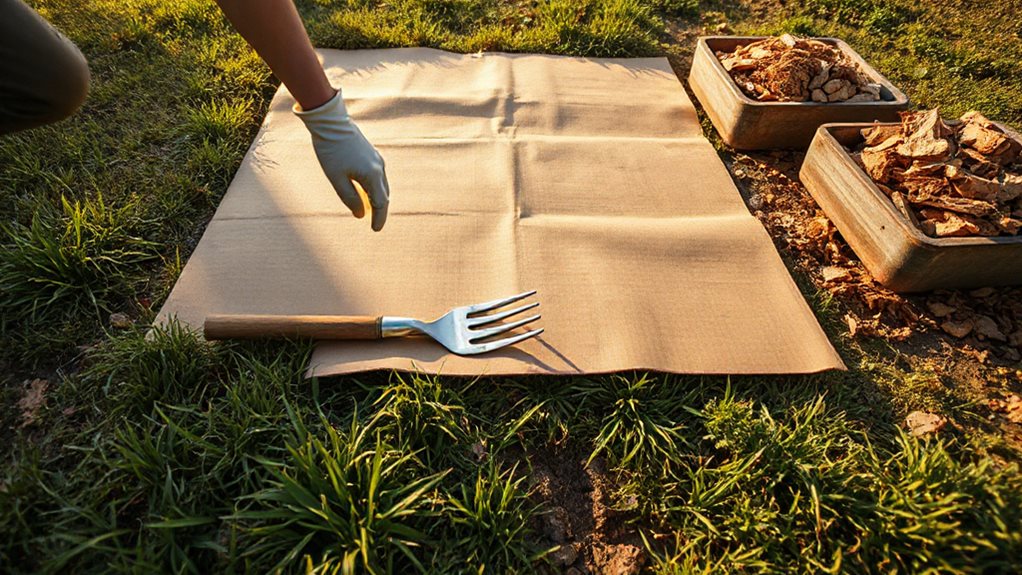
Insert a garden fork deeply to aerate, then lay down 10 sheets of cardboard or newspaper, moisten well, and secure it.
This suppresses weeds while building healthy soil structure over time, all without disturbing the earth beneath.
Watermelon rind can be used sparingly as a compostable mulch to add moisture and some nutrients as it breaks down, but ensure it is chopped and fed in moderation if you have pigs nearby to prevent overfeeding.
Layer Compost and Organic Matter
Start by building a nutrient-rich foundation that feeds both your plants and the living soil beneath. Lay down cardboard tightly, overlapping edges, then add a thin compost layer to invite soil life upward.
Alternate carbon-rich and nitrogen-rich materials in thin layers, keeping a 70/30 to 50/50 balance. Top with 2–3 inches of compost or soil for immediate planting, and mulch thickly to suppress weeds and retain moisture. Water lightly after mulching to help settle materials and encourage decomposition of organic matter.
Choose Mulch That Feeds and Protects Soil
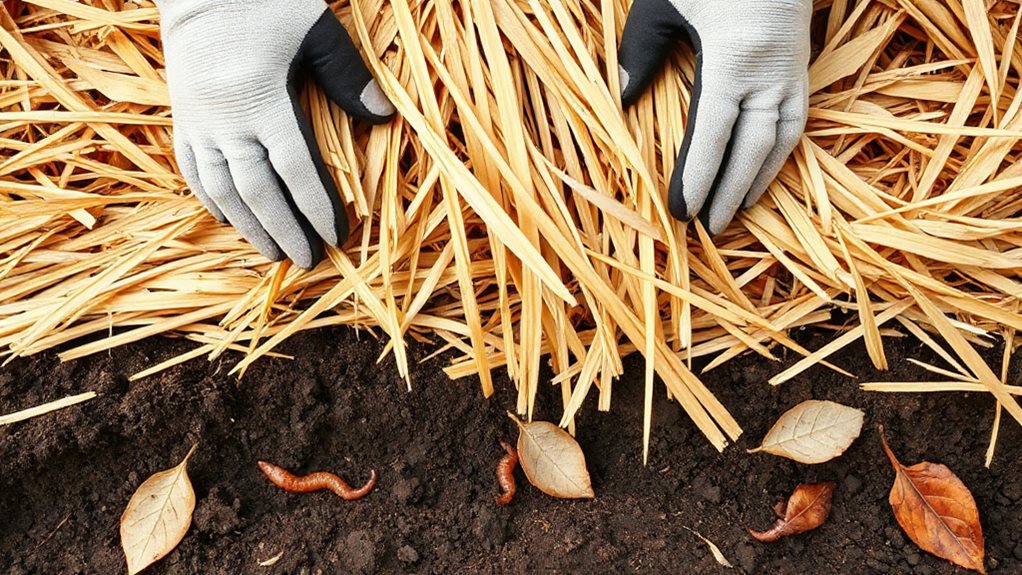
Choose mulch that feeds your soil while shielding it from erosion and moisture loss, like compost or aged wood chips that enhance microbial life and improve structure.
Keep a layer 2–4 inches thick to block weeds effectively by cutting off light, yet avoid piling it against plant stems to prevent rot.
This natural approach not only suppresses weeds without chemicals but also enriches the soil as the mulch breaks down over time.
For containers or beds where water retention and aeration matter, consider using coconut coir as a peat-free mulch alternative that resists compaction and holds moisture.
Organic Matter Benefits
Feeding your soil with organic mulch sets the foundation for a thriving, self-sustaining garden ecosystem.
You enhance microbial activity, helping break down matter into humic and fulvic acids while releasing slow-release nutrients.
Undisturbed fungi and bacteria enhance nutrient uptake, improve soil structure, and support vigorous plant growth, creating a resilient, fertile environment where your garden can truly flourish year after year.
Mulch Layer Depth
A well-constructed no-dig garden begins with a generous 15cm (6-inch) layer of compost spread over existing vegetation or lawn, setting the stage for both immediate fertility and long-term soil health.
After firming, this settles to about 5cm, while annual top-ups of 2cm compost mulch sustain soil life, preserve structure, and support continuous growing without disturbance, ensuring your garden thrives year after year.
Suppress Weeds Naturally
Lay down the right mulch, and you’ll not only block weeds but also feed your soil, conserve moisture, and create a thriving ecosystem beneath your plants.
Use straw or woodchips for perennials, compost on growing beds, and cardboard layers to smother grass.
These organic materials break down, enhancing the soil while suppressing weeds naturally, so your garden stays healthy, productive, and in harmony with nature.
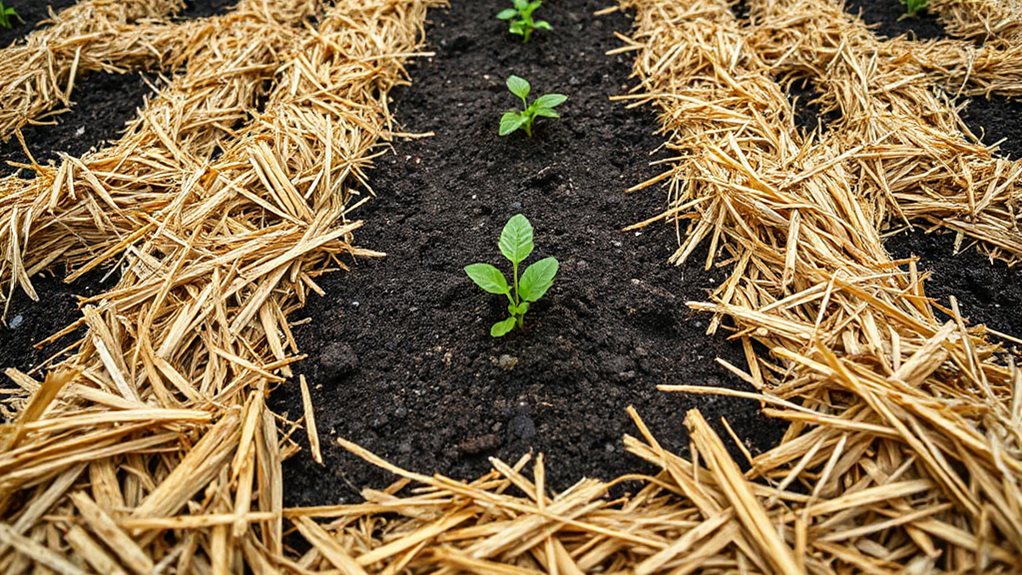
Plant Directly Into No Dig Beds
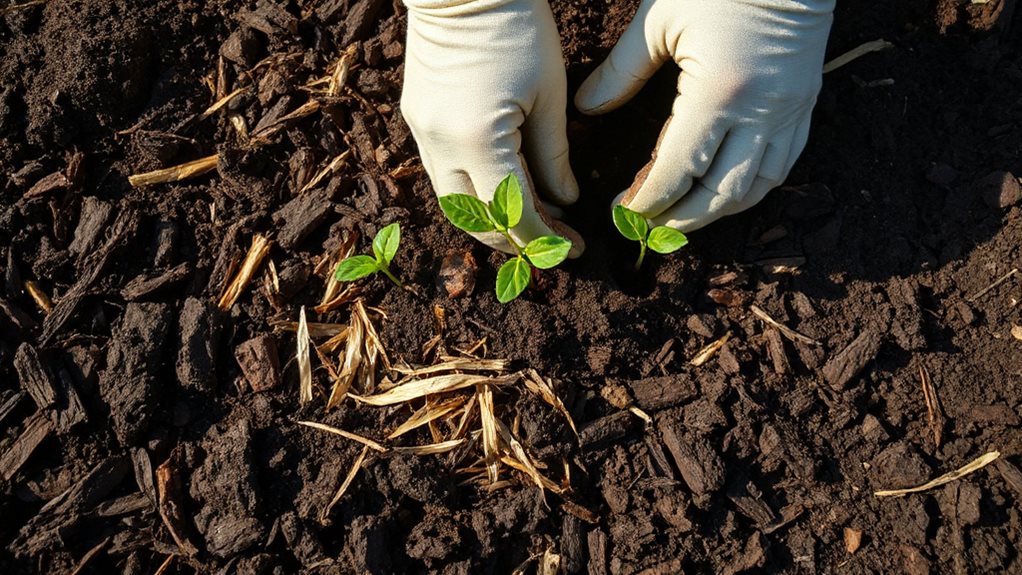
You can jump right into planting once your no-dig bed is layered, since there’s no need to wait for decomposition to finish—seeds and seedlings thrive immediately when placed in the nutrient-rich compost top layer.
Lightly rake the surface, sow seeds or transplant seedlings at proper depth and spacing, then water gently.
Roots easily penetrate the softened cardboard, and with no digging required, your garden grows stronger each season.
Water Less by Protecting Soil Moisture
Often, the secret to watering less lies not in reducing irrigation frequency alone, but in how well your soil holds onto moisture. You build this capacity by adding generous layers of organic matter, which improve structure and water retention.
With regular mulching and no-dig practices, your soil stays cool, reduces evaporation, and allows roots to access deeper moisture—meaning you’ll water less over time.
Stop Weeds With Mulch and Smart Spacing
A well-mulched garden doesn’t just hold moisture—it also keeps weeds from taking over.
Lay overlapping cardboard, then add 4–5 inches of compost or 10–15cm of organic mulch to block light and smother weeds.
Use straw, wood chips, or green-waste compost, and replenish as needed.
Plant directly into the layer, space wisely, and maintain edges to reduce weeding while enhancing yields.
Keep Your No Dig Garden Healthy Every Season
Maintaining a healthy no-dig garden throughout the year means working with nature, not against it, and sticking to simple, consistent practices that build soil and enhance plant resilience.
Water only when needed, add compost annually, and pull weeds early. Avoid stepping on beds, and let roots stay put at harvest. With seasonal care, your garden thrives, asking less of you over time.
Final Note
You’ve built a strong foundation by layering compost and mulch, skipping the till, and protecting your soil. Now, maintain it with seasonal additions of organic matter and careful planting. You’ll conserve moisture, suppress weeds, and promote healthy microbial life. Over time, your no dig garden grows richer and easier to manage. Stay consistent, observe changes, and adjust as needed—your efforts will yield productive, sustainable harvests year after year.