First locate the wet spot, then map a trench that runs from the high‑point to a safe outlet, keeping a 1‑3 % slope (about one inch per eight feet). Call 811, flag utilities, and dig a 18‑24‑inch‑wide trench while rolling aside and storing the top sod for later. Wrap a perforated pipe in non‑woven geotextile, lay it with holes down, and backfill with washed gravel to two inches below the surface, covering the pipe with fabric and then the remaining soil. Compact and restore the surface with sod, seed, or mulch, then test flow with a hose; if you keep going, you’ll discover how to troubleshoot blockages and maintain the system.

TLDR
- Determine the drainage path, check utilities (call 811), and mark a trench with a 1‑3 % slope toward a suitable outlet.
- Dig a trench 18‑24 inches deep, preserving top sod for re‑laying, and ensure the slope remains consistent using stakes and a string line.
- Line the trench with non‑woven geotextile, place a perforated pipe (holes down) on a base of washed gravel, then fold the fabric over the gravel.
- Backfill with additional gravel, cover with the geotextile, then refill the trench with soil, restoring the surface with sod, seed, or mulch.
- Test the system by running water, check for steady flow, and schedule regular inspections and cleaning to maintain performance.
Identify the French‑Drain Problem and Set a Realistic Slope Goal
First, pinpoint where water’s causing trouble—whether it’s standing pools in low spots, soggy lawns after rain, or erosion near foundations—because those symptoms tell you a French drain is needed and help you decide where to place it.
Assess soil type, measure the yard’s gradient, and aim for a 1‑3 % slope, confirming with a level over long spans, so water flows reliably toward the outlet without undermining foundations.
Proper depth is crucial for effective water management, especially when dealing with high water table conditions.
A grid-based planning approach can help you organize the trench layout and outlet routing with clear, repeatable steps grid layout to ensure consistent results across the yard.
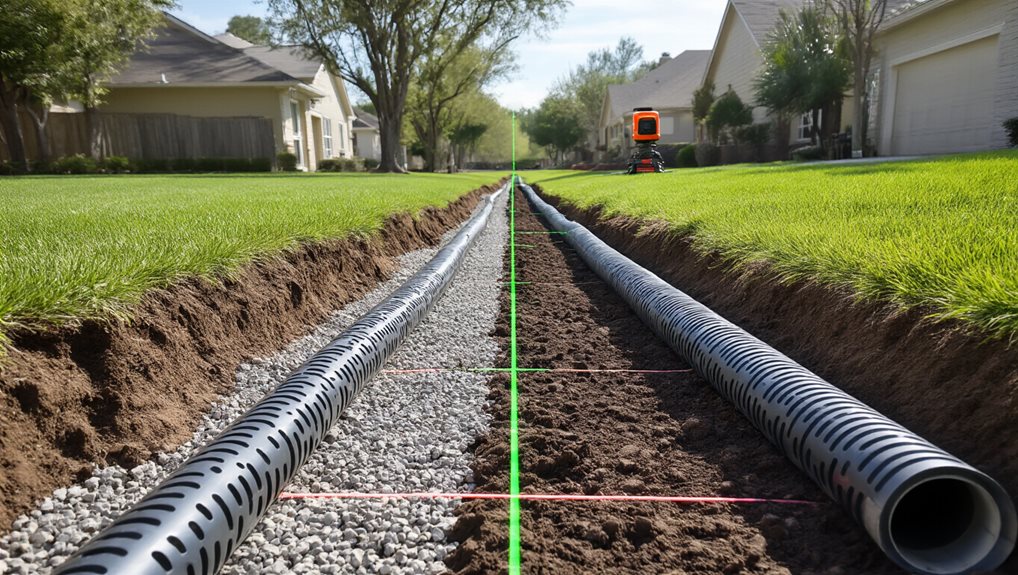
Lay Out the Drain Route and Flag Utilities Before You Dig
If you’ve already identified where water’s pooling, the next step is to map the drain’s path and mark any underground utilities before you break ground. Call 811 to schedule free markings, noting red, yellow, and blue signals, then photograph each flag. Scan your yard for surface clues—green patches, depressions, or manhole covers—to confirm pipe trends, and use a probe or metal detector to verify locations before digging. Deep-rooted plants and fibrous-root cover crops can also temporarily loosen soil and improve drainage around the trench area, helping to establish the overall system more effectively. Deep-rooted plants
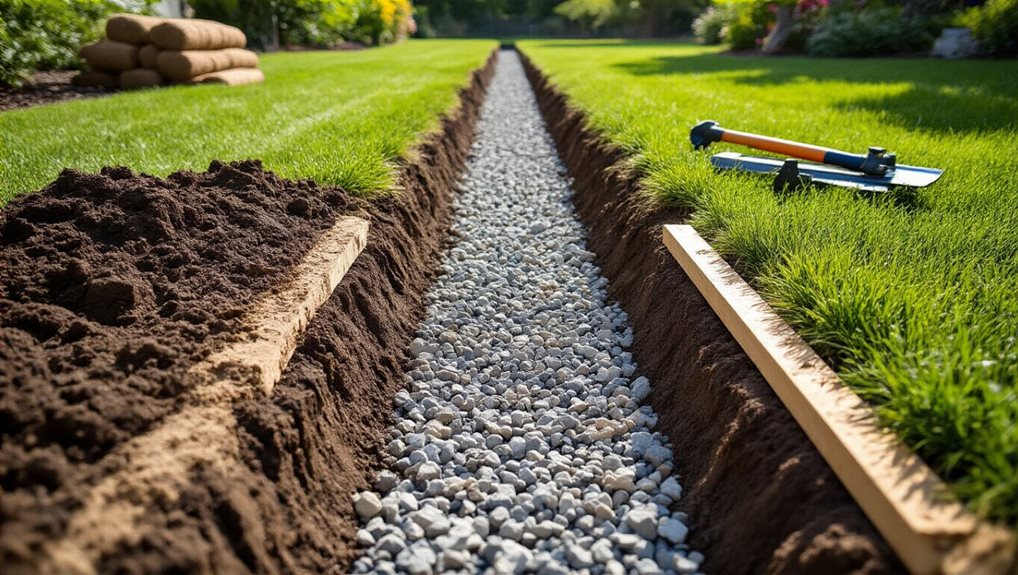
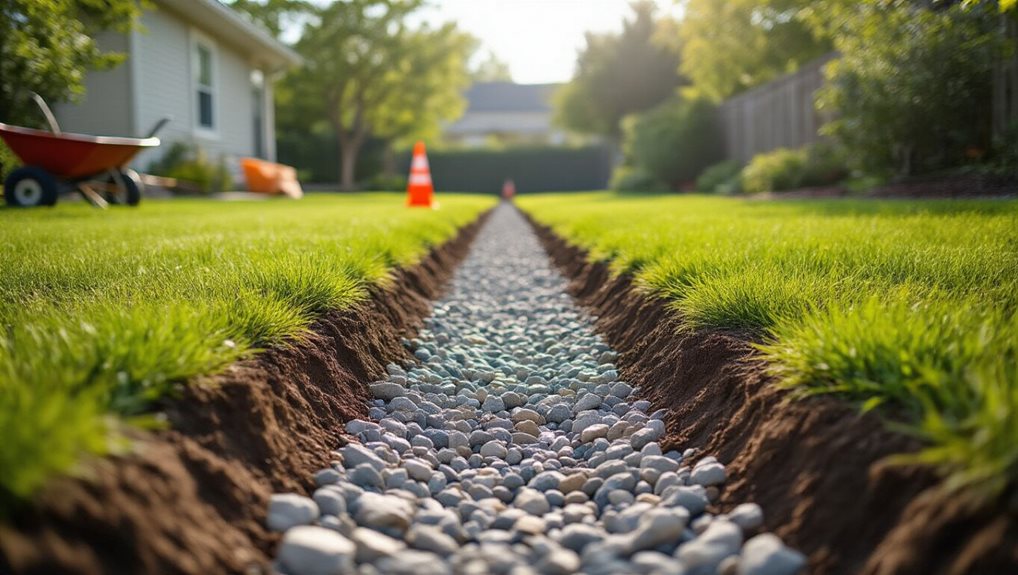
Dig a Properly Sloped Trench and Preserve the Top Sod for Later
First, you’ll need to calculate a consistent trench gradient—typically a 1% slope (1 inch drop per 8 feet) or a steeper 3–4% if the terrain permits—by measuring and marking the line with stakes and a level before you start digging.
As you excavate, carefully roll back the top sod, stack it in a shaded spot, and keep it lightly moist so you can replace it later for a seamless finish. Maintaining the correct slope and preserving the sod ensures efficient water flow and a professional‑looking result.
Determine Trench Gradient
How do you guarantee the trench you dig will carry water away efficiently?
Stake the two ends, stretch a taut string, and check the drop every few feet, aiming for at least a 1% slope—ideally 2% for corrugated pipe—so water flows downhill without pooling.
Dig to a depth of 18‑24 inches for residential yards, adjusting for soil type, and keep the gradient consistent as you work.
Preserve Sod for Re‑laying
After confirming the trench’s 1‑2 % slope, shift your focus to protecting the existing sod so it can be replanted later without damage. Carefully cut a 2‑3 inch strip with a shovel or sod cutter, roll it up like a carpet, and stack it grass‑side up in a shaded, moist area. Avoid walking on it, keep it flat, and water lightly until you’re ready to re‑lay.
Use Stakes and Level
Where do you begin when you need a precisely sloped trench while keeping the top sod intact? Drive 36‑inch wooden stakes at the trench’s start and end, bury them 6‑12 inches deep, then stretch a string between them, attaching it just above ground on the top stake and adjusting the bottom stake until the line is level with a carpenter’s level. Measure the rise and run, calculate a minimum 1% slope, and check frequently as you dig, preserving the sod for later re‑laying.
Choose the Right French‑Drain Pipe, Fabric, and Gravel for Your Soil
You’ll pick a pipe that matches your soil’s behavior—PVC for clay‑rich or chemically aggressive sites, corrugated HDPE when freeze‑thaw cycles demand flexibility, and perforated options if you need high flow.
Next, choose a geotextile fabric with a high permeability rating to keep silt out of the gravel while allowing water to pass, avoiding cheap filter fabrics that can clog quickly.
Finally, fill the trench with washed river gravel sized 0.75‑1.5 in., which maintains porosity, supports the pipe, and works with the fabric to sustain long‑term drainage performance.
Additionally, be mindful of potential environmental and health considerations when yard activities involve wildlife, such as ensuring that any nearby animal remains are handled safely and cleaned up promptly to prevent exposure to parasites or disease. wildlife safety
Pipe Material Selection
What pipe material you choose will dictate how efficiently water moves through your French drain and how well the system endures the soil’s chemistry and load. PVC offers smooth interiors and corrosion resistance, ideal for flatter slopes; corrugated pipe flexes with freeze cycles and costs less; HDPE/N‑12 combines strength and durability, resisting crushing. Pair any pipe with 0.75‑1.5” washed river gravel to keep slots clear and maintain flow.
Fabric Permeability Rating
Choosing the right fabric for your French drain hinges on permeability, because the material must let water pass while trapping soil and debris. Opt for non‑woven geotextile, preferably 4 oz, which offers high flow and filters silt, especially in clay‑heavy yards. Match fabric weight to soil K‑factor, use polypropylene for durability, and wrap tightly to prevent mud ingress, ensuring long‑term performance.
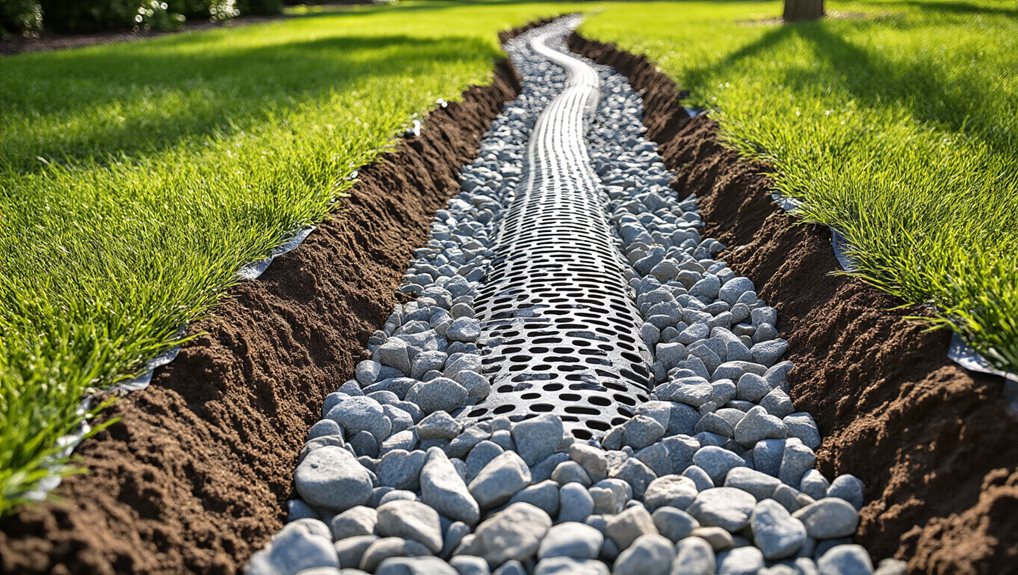
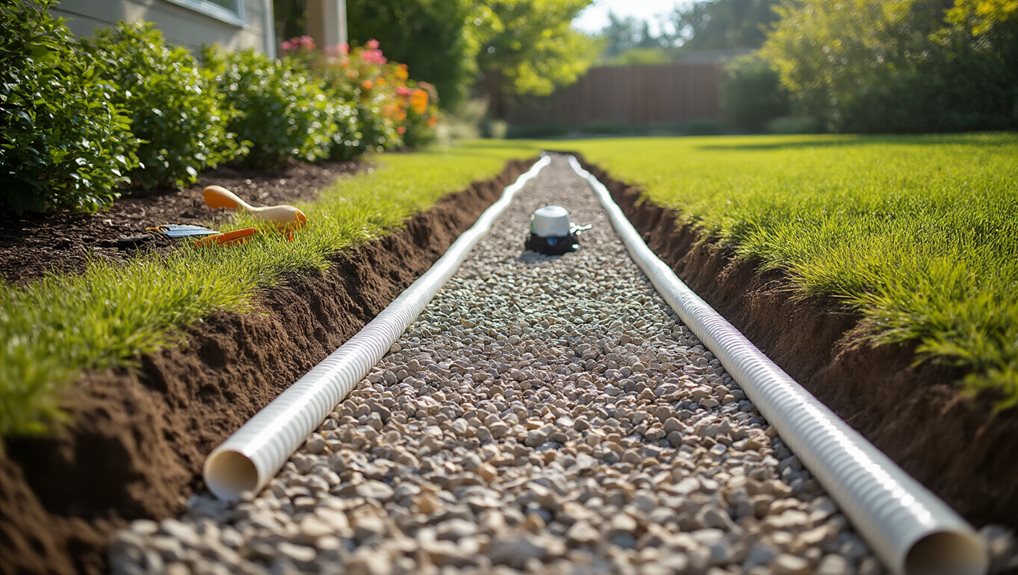
Install Landscape Fabric and Lay the French‑Drain Pipe With Holes Down
Line the entire trench with non‑woven geotextile fabric, extending ten inches past each side, and pin it securely with staples so it stays taut. Then lay the perforated pipe on the fabric with holes facing downward, ensuring a one‑percent slope and confirming the angle with a level before connecting fittings. Lightly dampen the fabric before placing the pipe to minimize dust and ensure the fabric lies flat against the trench walls. geotextile fabric blocks moisture and provides separation while the trench is excavated and prepared.
Add a Gravel Base, Cover the Pipe, and Backfill With Clean Stone
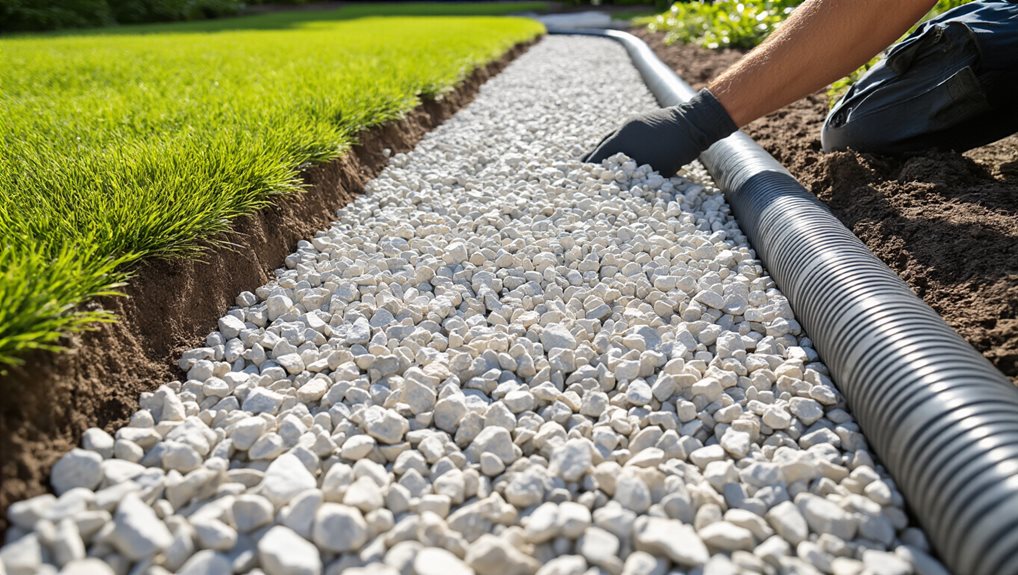
First, spread a 2‑3‑inch layer of washed ¾‑inch‑to‑1½‑inch gravel in the trench to give the pipe a stable, well‑draining foundation and keep the slope consistent.
Next, lay the drain pipe and cover it with additional gravel, leaving about five inches of stone above the pipe so water can infiltrate while the pipe stays anchored and protected from soil pressure.
Finally, wrap the top gravel with landscape fabric, then backfill the remaining trench with clean, crushed drain rock, ensuring the stone stays free of fines and the system remains effective over time.
Gravel Base Preparation
Where does the gravel go, and why does it matter? You spread 2–3 inches of washed ¾‑inch‑to‑1½‑inch gravel at the trench bottom, level it, and compact it to create a stable, permeable base that supports the pipe and filters silt.
The trench should be at least six inches wide, sloped 1% for gravity flow, and lined with fabric before you cover the pipe and backfill with clean stone.
Pipe Covering and Protection
After you’ve laid the washed ¾‑inch‑to‑1½‑inch gravel base, the next step is to protect the pipe and guarantee water can flow freely through it. Wrap the perforated pipe in a 4‑6 oz non‑woven geotextile, then surround it with 1‑½‑inch clean, round stone, ensuring a full cover that cushions and filters fines. Finally, backfill to grade with the same stone, avoiding crushed‑rock fines, so the system stays clear of roots and debris for reliable, long‑term drainage.
Cover the Pipe With Fabric and Restore the Surface With Sod, Seed, or Mulch
How do you guarantee the French drain stays effective while blending seamlessly into your yard? Wrap the pipe in non‑woven geotextile, staking it taut and overlapping edges to keep soil and debris out, then lay washed stone to two inches below the surface, fold fabric back over the gravel, backfill and compact soil, and finally sow sod, seed, or mulch so the area looks natural and the system works for years.
How to Test Flow and Fix the Most Common Blockages?
Ever notice the water pooling at the outlet after a heavy storm? Test flow by clearing the outlet, running a garden hose at the inlet, and timing drips until they’re one second apart; a fast, steady stream means the pipe’s clear.
If water trickles, uncover gravel sections, look for mud, roots, sediment, or clogged fabric, then flush with a high‑pressure hose or snake the blockage, and verify a proper slope before confirming steady discharge.
Maintain Your French Drain for Long‑Term Performance
What keeps a French drain working efficiently for decades is consistent, proactive maintenance, and you can achieve that by establishing a regular inspection schedule, clearing surface debris, managing vegetation, and periodically cleaning the pipe system.
Inspect monthly, especially after rain, remove leaves and litter, trim nearby trees, and flush the trench with a hose or pressure washer yearly to prevent clogs, ensuring long‑term performance and community confidence. Regular maintenance should include ensuring that protective measures and safety considerations are in place to prevent accidents during inspections and cleaning. PPE compliance and proper maintenance routines help sustain system performance and reduce risk during upkeep activities.
When to Upgrade to a Dry‑Well Backup or Hire a Professional?
Regular maintenance keeps a French drain effective, but when you start noticing persistent pooling, frequent backups during storms, or a noticeable slowdown in drainage, it’s time to regard a dry‑well backup or professional help.
If a high water table, limited space, or storm overload exceed capacity, consider a dry‑well with proper slope, perforated pipe, and geotextile.
Call a pro when trench design, utility clearance, or pump installation feels beyond DIY comfort.
Final Note
By following these steps you’ll create a reliable French drain that directs water away from your foundation, reduces yard flooding, and protects your landscaping. Proper slope, quality pipe, fabric, and gravel guarantee efficient flow, while regular inspection and clearing of debris keep the system functioning long‑term. If you encounter persistent blockages or water‑table issues, consider adding a dry‑well or consulting a professional to safeguard your property.