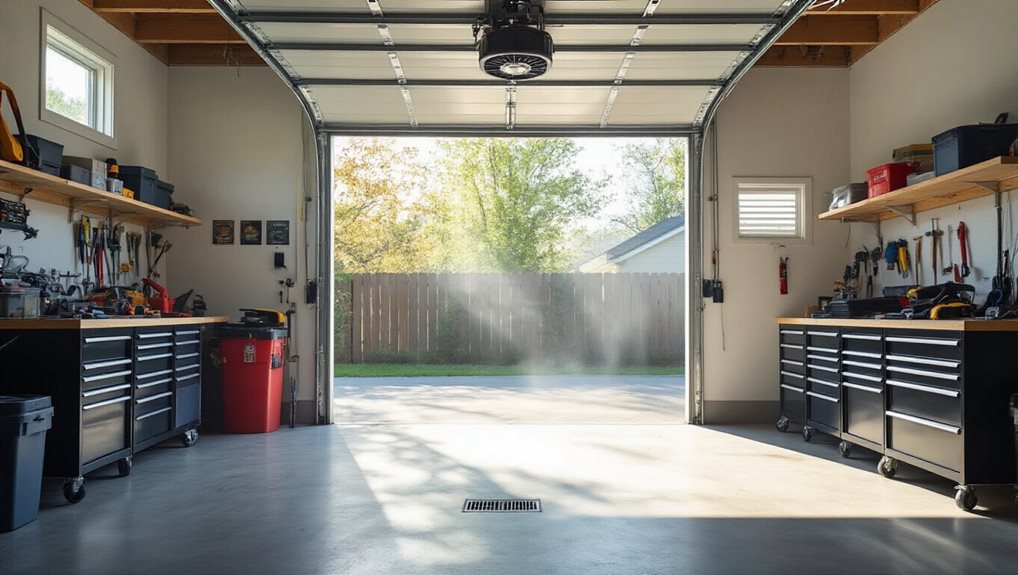
Seal the garage from the house, then install an exhaust fan sized for the garage volume (about 600 CFM for one car, 1,200 CFM for two) and provide at least 1 ft² intake per 300 CFM. Use a blower‑door test to create a 50 Pa negative pressure, checking that CFM drops less than 6 % when the door opens, which indicates proper sealing of cracks and joints. Position intake and exhaust vents for cross‑ventilation, run the fan at low speed with a VFD or demand‑controlled controller, and maintain filters and seals regularly; doing so will cut VOCs up to 62 % and CO by 23 %, and if you keep going you’ll discover the exact steps to verify compliance with EPA Indoor AirPlus.

TLDR
- Install an exhaust fan sized for the garage volume (≈600 CFM for one‑car, ≈1,200 CFM for two‑car) and ensure adequate intake area (≥1 ft² per 300 CFM).
- Use a blower‑door test to verify a 45–50 Pa pressure differential, confirming negative pressure and identifying leaks.
- Place vents and intakes to create cross‑ventilation, avoiding stagnation zones identified via CFD or tracer‑gas studies.
- Implement demand‑controlled ventilation with VFDs, thermostat‑linked controls, and occupancy sensors to reduce unnecessary CFM and energy use.
- Perform regular maintenance—clean filters and fan blades, reseal cracks, and re‑test pressure differentials—to sustain performance and safety.
Learn Why Proper Garage Ventilation Matters for Indoor Air Quality
Why does proper garage ventilation matter for indoor air quality? You’re breathing garage pollutants—benzene, CO, VOCs—that can leak through walls and ceilings, raising indoor levels up to 50‑times higher than outdoors.
Proper ventilation creates negative pressure, blocks stack effect, and cuts VOCs by up to 62 % and CO by 23 %. This protects your home’s air, keeping you and your family healthier.
Cracks and expansion joints in concrete facilitate air movement from the garage into living spaces.
How to Check Your Garage’s Pressure With a Blower‑Door Test
Get your blower‑door kit ready by assembling the frame, flexible panel, variable‑speed fan and the two manometers, then connect the plastic tubing and T‑fittings so you can measure pressure differentials accurately.
Once the house is set to a steady 50 Pa relative to the outside, record the CFM50 reading with the garage door closed, open the garage door, repressurize the house and take a second CFM50 measurement to see how the pressure changes.
Compare those readings to the ideal 45‑50 Pa house‑to‑garage differential, and use the results to pinpoint any leaks that need sealing. Regularly verify that the cleaning products you use for any maintenance in the garage area are pH‑neutral and safe for wood‑floored surfaces to prevent damage if you store or move equipment across the space. pH‑neutral cleaners
Prepare Blower‑Door Kit
How do you ensure your garage’s pressure is accurately measured before testing ventilation? First, tighten the frame knobs, attach the nylon panel with Velcro, and seal the doorway using the cam levers. Insert the fan bottom‑first, secure the guard and flow rings, then seal with elastic. Mount the gauge board, connect the manometers via the T‑fittings, and close all doors, dampers, and flame sources to ensure a clear, unobstructed airflow path.
Interpret Pressure Differential Results
Ever wondered whether your garage’s air barrier is truly airtight? Compare the CFM50 reading with the garage closed to the reading with it open; subtract the closed value, then divide that difference by the closed‑garage CFM50 to get a percentage. If it’s under 6 %, your barrier passes, and a 45‑50 Pa differential confirms proper house‑to‑garage pressure. Higher percentages signal leaks that need sealing.
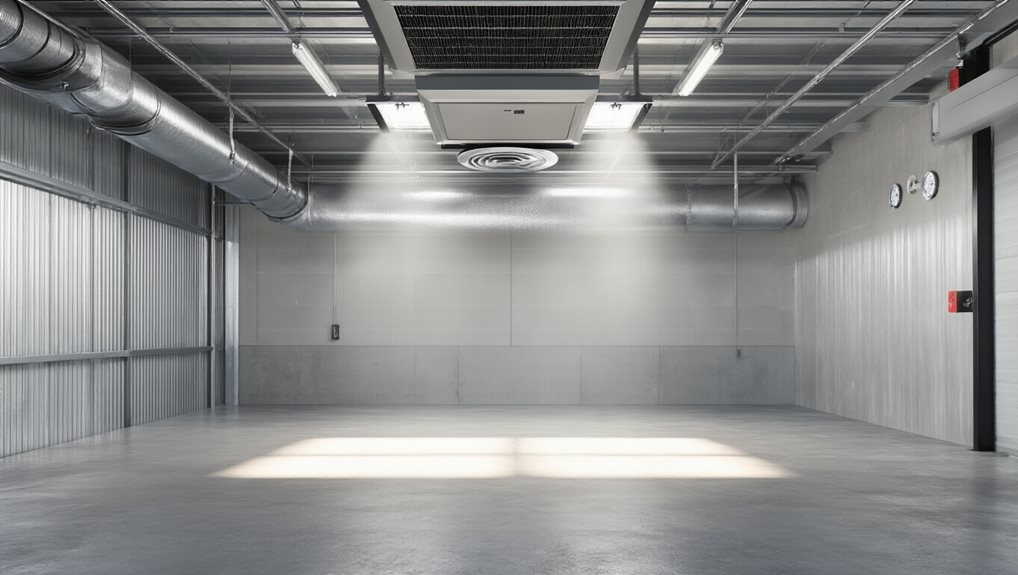
Choose the Right Exhaust Fan Size Using CFD‑Optimized Airflow
First, calculate the required CFM by multiplying your garage’s cubic footage by the desired air‑changes‑per‑hour and dividing by 60, then choose a fan rated at or above that number.
Next, use CFD simulations to pinpoint stagnation zones where airflow is weak, allowing you to place exhaust vents where they’ll break up dead air pockets most effectively.
Finally, adjust fan size and vent location based on those maps, ensuring enough intake area to prevent negative pressure while keeping the system efficient for your garage’s specific layout and use.
Determine Required CFM
When sizing an exhaust fan for your garage, you first need to calculate the required cubic feet per minute (CFM) based on the space’s volume and the desired air changes per hour (ACH).
Measure length, width and height, multiply to get cubic feet, then apply CFM = volume × ACH ÷ 60; choose a fan equal to or above that rating, adjusting for natural ventilation and duct losses.
Map Airflow Stagnation Zones
How can you pinpoint the spots where airflow stalls before installing a fan? Use CFD simulations to map dead zones in corners, along walls, and under equipment, then visualize jet‑fan thrust patterns that push air into those pockets. By comparing simulated velocity fields with the 0.75 CFM/ft² benchmark, you’ll select a fan size that overcomes stagnation, prevents short‑circuiting, and ensures consistent circulation throughout the garage.
Optimize Vent Placement Position
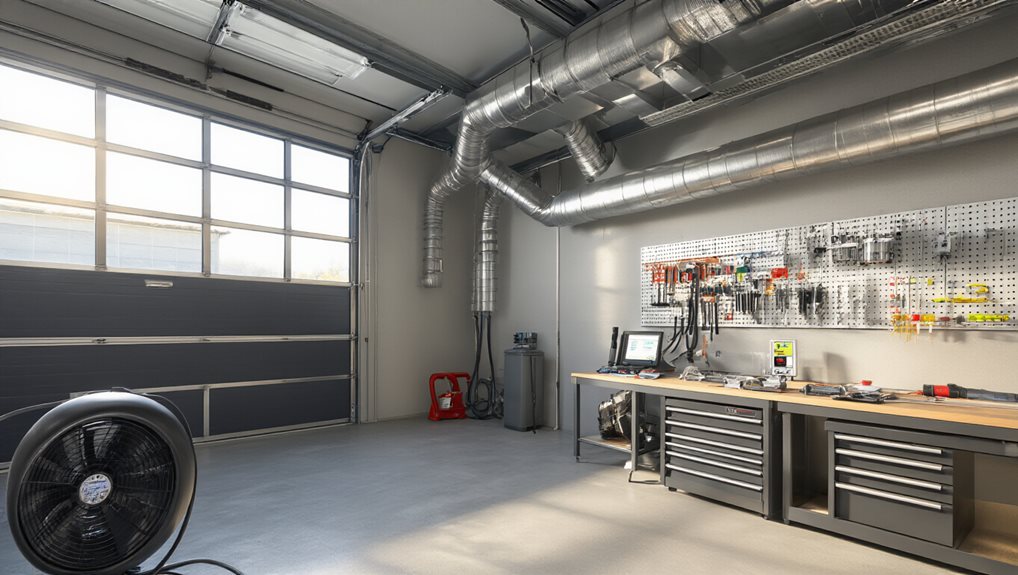
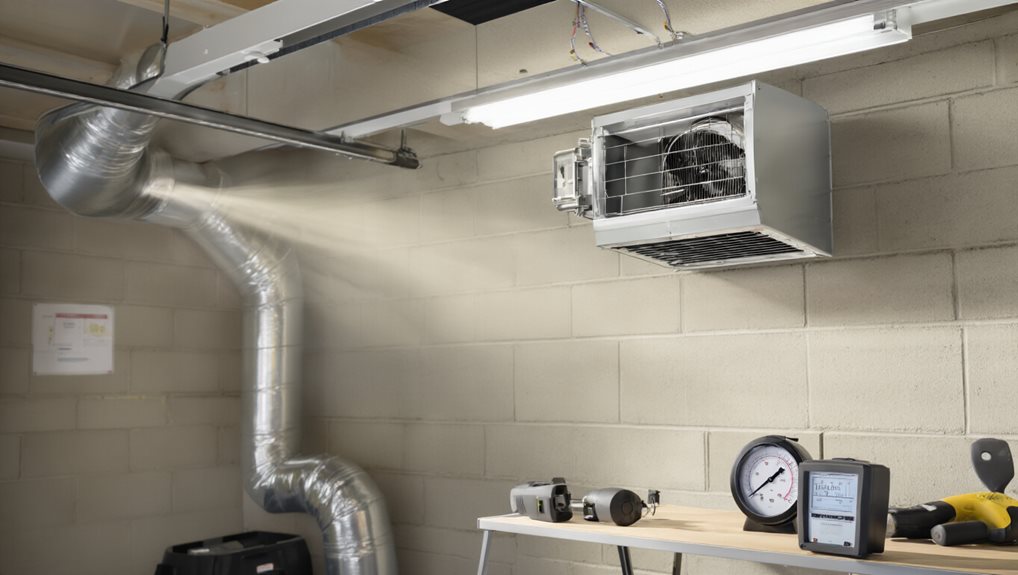
Where should you locate the exhaust fan to eliminate dead‑air pockets and meet the required air‑change rate? Position it near the ceiling on the wall opposite the intake, aligning with the longest airflow path, and ensure the opening matches the fan’s 14‑inch template; use CFD‑optimized sizing—say 600 CFM for a one‑car garage or 1,200 CFM for a two‑car space—and provide at least one square foot of intake per 300 CFM to maintain balanced pressure.
Install Exhaust Fans to Achieve Target Depressurization While Preserving Home Air‑Exchange
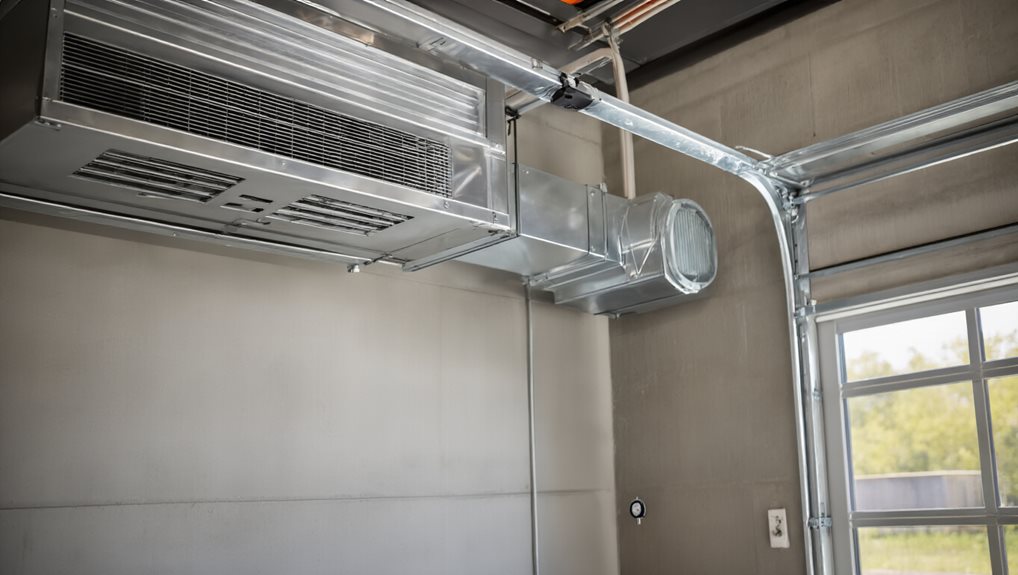
Why must you balance exhaust‑fan capacity with home air‑exchange? You calculate fan size from garage volume for six to ten air changes per hour, select ENERGY STAR‑certified models, and match capacity to achieve target depressurization without over‑ventilating. Position the fan on an exterior wall away from doors and windows, cut a 14‑inch square opening, seal with silicone, test airflow outward, and verify that pressure differentials preserve your home’s air‑exchange.
Place Vents and Intakes to Eliminate Stagnation Zones
After sizing your exhaust fan to achieve the desired depressurization, the next step is to arrange vents and intakes so the air actually moves through the whole garage instead of looping back on itself. Place low‑level intakes opposite high‑level exhausts, distribute them evenly across walls, and keep them away from doors and exhaust points. Install multiple high exhausts or, corners, use jet fans near remote intakes, and ensure openings form clear cross‑ventilation paths to eliminate dead zones. Sand and seal any gaps around vent penetrations to maintain efficiency airflow efficiency.
Use Supply Ventilation to Keep Positive Pressure and Stop Pollutants From Entering Your Home
A supply‑ventilation system pushes fresh outdoor air into the garage, creating a steady positive pressure that blocks fumes and pollutants from seeping into the house.
You’ll notice that the constant inflow replaces stale air, reduces CO and VOCs, and prevents heat transfer, keeping indoor air quality high while using minimal electricity.
Regular fan checks ensure the pressure stays balanced, safeguarding your home’s comfort and safety.
Combine Garage Exhaust With Whole‑House Exhaust for Balanced Performance
You’ll pair a garage fan with an HRV/ERV, using backdraft dampers to avoid drafts, and the combined system cools attic heat, lowers AC load, improves indoor air quality, and protects appliances—all while fitting code and reducing long‑term energy costs.
As you integrate the system, apply a square foot approach to space planning for duct routing and filtration zones to minimize leaks and simplify future maintenance grid layout.
Run a 48‑Hour Tracer‑Gas Study to Verify VOC and CO Reductions
How do you confirm that a garage’s ventilation system actually cuts VOC and CO levels in the home? Run a 48‑hour tracer‑gas study, injecting SF6 or propane, sealing openings, and maintaining a 47 Pa differential. Measure decay every minute, plot air‑change rates, and compare baseline to 165 cfm house supply results; your data will validate reductions and reassure you that the system works for everyone. In addition, consider exploring purple flowering vines as a visual reference for how properly designed exterior spaces can improve overall environmental quality around a home, since both ventilation and garden design contribute to healthier outdoor-adjacent living areas purple flowering vines and can inspire broader, nature-friendly approaches to home improvement.
Minimize Energy Use by Reducing Pressure Drops and Unnecessary CFM
When you lower pressure drops and eliminate unnecessary CFM, the fan’s workload drops dramatically, which cuts electricity use and extends equipment life. By maintaining 165 cfm supply for 1.5 Pa positive pressure, you suppress house‑garage air transfer, while VFDs and demand‑controlled ventilation keep fan speed near 30 Hz, reducing consumption from hundreds of kilowatts to just a few, saving money and promoting a collaborative, efficient garage environment.
Set Fan Controls for Seasonal Use and Occupancy‑Based Operation
What if you could let your garage ventilation system adapt automatically to the seasons and to the moments when the space is actually in use?
Install a thermostat‑linked fan that triggers when attic heat rises, set GarageVent™ to start at a chosen temperature, and use dual smart monitors to compare indoor and outdoor temps, keeping fans low in winter.
Add magnetic door switches and programmable delay timers so the exhaust runs only after doors close, while CO detectors and a humidistat handle safety and moisture, giving you efficient, occupancy‑based airflow without constant manual tweaking.
Maintain Your System: Filter Changes, Seal Checks, and Periodic Re‑Testing
Ever wondered why your garage’s airflow can drop off after a few months?
You should clean intake vents, exhaust fan blades, and dehumidifier filters every few months, inspect motor efficiency, and verify that fans maintain at least 70 cfm. Maintaining ventilation also involves keeping toxic plant risks away from animals and ensuring that foraging areas are free of hazardous materials to prevent accidental exposure. Seal walls, ceilings, and doors with weather‑stripping, check penetrations, and re‑test depressurization after each maintenance cycle to keep the system balanced and reliable.
Pass EPA Indoor Airplus With One‑Step Pressure‑Differential Testing
You can meet EPA Indoor AirPlus requirements by performing a one‑step pressure‑differential test, which quickly confirms that your garage‑to‑house air barrier is airtight.
The test, documented by a certified rater, satisfies the compliance paperwork needed for the Indoor AirPlus label and aligns with ENERGY STAR verification.
One‑Step Pressure Test
How does a one‑step pressure test verify that an attached garage meets EPA Indoor AirPLUS requirements? You close all garage openings, turn on the blower door to reach 50 Pa house pressure, then measure the garage‑to‑house differential with a two‑channel manometer; a reading above 45 Pa passes.
This simple, repeatable procedure shows you’re part of a community that values safe, compliant homes.
EPA Compliance Documentation
A one‑step pressure test gives you the data you need to complete the EPA Indoor AirPlus verification paperwork, because the measured differential directly satisfies the “air‑barrier effectiveness” requirement in the Version 2 Certification Protocol. You’ll then submit a signed Verification Checklist, attach ENERGY STAR documentation for Gold tier, and ensure your verifier—trained, RESNET‑accredited—files the package with HCO, securing certification and belonging to the certified community.
Final Note
By ensuring proper garage ventilation you protect indoor air quality, reduce pollutant buildup, and meet EPA standards. A blower‑door test verifies pressure, while CFD‑optimized fan sizing and strategic vent placement eliminate stagnation zones and minimize energy waste. Seasonal and occupancy‑based controls keep airflow efficient, and regular maintenance—filter changes, seal inspections, and re‑testing—preserves performance. Implement these steps, and you’ll achieve consistent depressurization, healthier air, and a reliable, cost‑effective ventilation system.