You can change your house locks by either rekeying existing hardware for $50-$100 per lock, which takes 10-40 minutes and renders old keys useless, or replacing the entire system for $200+ when you need enhanced security features. For replacement, you’ll need a drill, hole saw kit, screwdrivers, and the new lock assembly. Remove old hardware systematically, drill precise 2-1/8″ face holes and 1″ edge holes, then install new components following the manufacturer’s template for proper alignment and security.

TLDR
- Remove existing hardware by unscrewing visible screws from interior and exterior knobs, then extract latch assembly systematically.
- Drill precise holes using templates: 2-1/8″ face bore and 1″ edge bore, working from both sides to prevent splintering.
- Install new latch assembly first, then attach exterior and interior handles according to manufacturer’s template and specifications.
- Test lock function with door open multiple times, verifying smooth operation and proper strike plate alignment before finishing.
- Consider rekeying existing locks for $50-100 versus full replacement at $200+ depending on your security and feature needs.
When to Replace Your House Locks vs. Rekeying Existing Hardware

When evaluating your home security options, you’ll face a fundamental decision between rekeying your existing locks or replacing them entirely with new hardware.
Rekeying costs $50–$100 per lock and takes 10–40 minutes, making previous keys useless while maintaining existing security levels. Reinforcing outward-opening doors’ weak points like hinges and frames can further improve safety for doors that remain in place and are not being replaced, especially on older installations with exposed hardware hinge reinforcement.
Replacement costs $200+ but provides enhanced features, updated technology, and improved durability for aging or malfunctioning locks. This approach enables you to upgrade to smart locks with keypad entry or advanced security features that integrate seamlessly with modern home automation systems.
Essential Tools and Materials for Lock Installation Projects
When you’re ready to install new locks, having the right tools and materials will determine whether your project proceeds smoothly or becomes a frustrating ordeal.
You’ll need specific hardware components like pre-assembled lock kits that include strike plates, latch assemblies, and all necessary screws, along with specialized installation tools such as hole saw kits and drill guides for precise placement. A professional door lock installation kit with 16 gauge sheet steel hole saws and medium carbon steel drill bits can accommodate nearly any door type while providing the precision needed for proper lock placement. Be sure to identify the location of the main water shut-off valve before starting any work near plumbing fixtures.
Beyond the basic components, proper preparation requires measuring tools, safety equipment, and supporting materials like lubricants to guarantee your new locks function correctly from the start.
Required Hardware Components
Before starting any lock installation project, you’ll need to gather specific tools and materials to guarantee professional results and avoid costly mistakes.
Essential hardware components include exterior and interior handles, latch mechanisms, deadbolt assemblies, faceplates, and strike plates.
You’ll also require mounting screws, machine screws, wood screws, and pilot drill bits for secure assembly and proper functionality.
Specialized Installation Tools
Precision drilling and accurate measurements separate professional lock installations from amateur attempts that result in misaligned hardware and security vulnerabilities.
Essential tools include drill guides like the HIT-49 Drillmaster, 2-1/8″ multi-spar bits for main bore holes, and 1″ auger bits for edge drilling.
Door prep templates, mortising chisels, and alignment jigs guarantee proper positioning and clean installations.
Understanding Different Types of Door Locks in Your Home

Sorting through the various door lock options in your home can feel overwhelming, but understanding the five main types will help you make informed decisions about security and functionality.
Deadbolts provide maximum security with solid metal bolts, while knob locks work best for interior doors. Lever handles offer accessibility, mortise locks suit commercial applications, and smart locks enable digital control. For projects that involve painting or refinishing doors, consider how ventilation and tools like an air compressor with adequate CFM rating can affect the outcome and safety of the job.
Preparing Your Door and Work Area for Lock Replacement
Before installing your new lock, you’ll need to prepare both your workspace and the door itself to assure a smooth replacement process. Start by gathering essential tools like Phillips and flat-head screwdrivers, a tape measure, and potentially a drill, while clearing the area around the door and laying down a drop cloth to catch debris.
Once your workspace is organized, you can begin removing the existing hardware systematically, taking photos beforehand and labeling each component to maintain a clear reference throughout the installation.
Clean Door Surface Area
Properly cleaning your door surface area sets the foundation for a successful lock replacement that’ll function smoothly for years to come.
Remove dust and dirt using a damp cloth with mild detergent if grease is present. Avoid excessive moisture that could damage wood or metal.
Dry thoroughly and inspect for residual debris or old adhesive before proceeding.
Gather Required Tools
What tools will you need to guarantee a smooth and efficient lock replacement process? Essential items include flathead and Phillips screwdrivers, measuring tape for dimensional verification, and a pencil for marking.
You’ll also need protective eyewear, work gloves, and adequate lighting.
Organize your new lockset components, keep screws in a magnetic tray, and make certain your workspace remains clear and accessible.
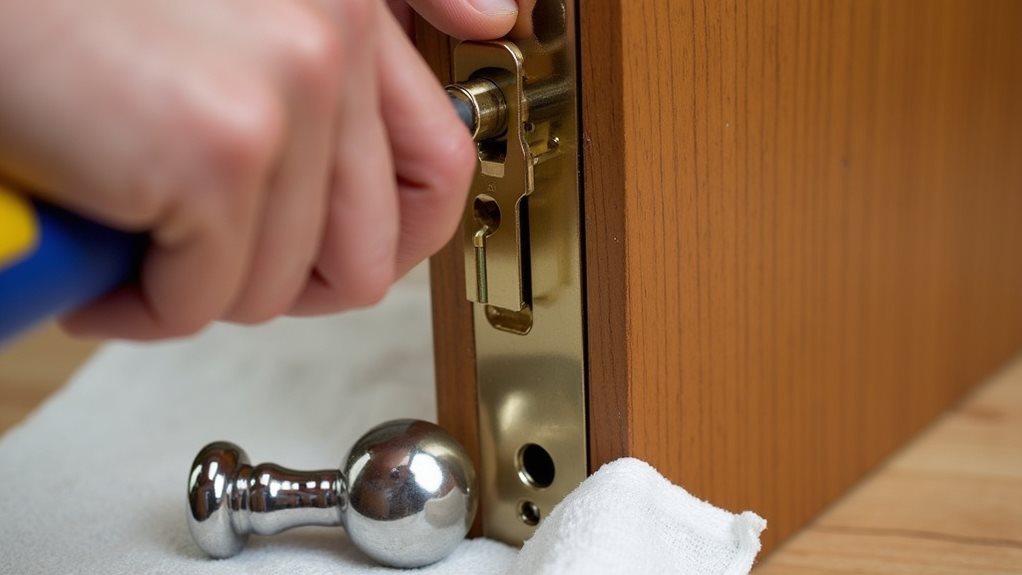
Remove Existing Hardware
Starting with the interior components, you’ll want to tackle the removal of your existing lock hardware in a systematic order that prevents damage and maintains organization.
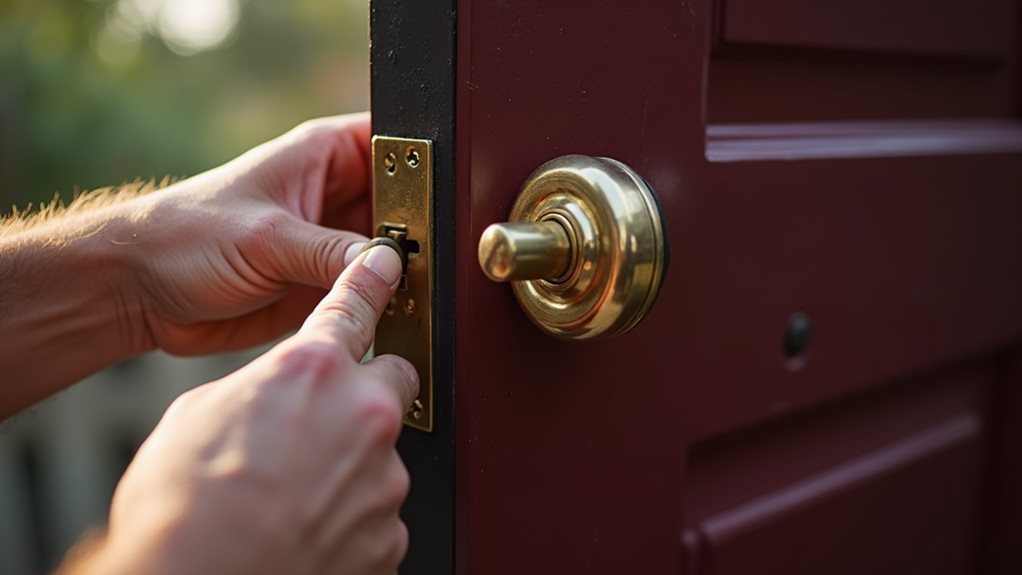
Unscrew all visible screws from both interior and exterior knobs, then pull the halves apart.
Next, remove the latch plate screws and extract the assembly from the door’s crossbore.
Step-by-Step Removal of Old Lock Components
Before you begin dismantling your old lock, you’ll need to gather the right tools and prepare your workspace to guarantee a smooth removal process.
Assemble Phillips and flathead screwdrivers, Allen wrenches, needle-nose pliers, and WD-40 lubricant.
Prop the door open securely, clear the surrounding area for unobstructed work, and identify your specific lock type since removal steps vary accordingly.
Installing Standard Cylindrical Door Locks
Now that you’ve successfully removed the old lock assembly, you’ll need to assess whether your existing door holes require modification before installing the new cylindrical lock hardware.
Start by using the provided door template to check if your current openings match the new lock’s specifications, as most standard locks require a 2-1/8″ diameter hole through the door face and a 1″ diameter edge hole for the latch unit.
If your existing holes are too small, you’ll need to carefully enlarge them using proper drilling techniques to prevent damage to your door’s structural integrity.
Removing Old Lock Assembly
Taking apart an old lock assembly requires a systematic approach that begins with the most accessible components and works inward toward the core mechanisms.
Start by removing visible screws from interior knobs using a Phillips-head screwdriver, then pull off both handles to expose the lock mechanism.
For deadbolts, remove thumb turn screws and extract the cylinder through the exterior door hole.
Installing New Hardware
Installing a new cylindrical door lock requires precise measurements and careful preparation to guarantee proper fit and functionality.
You’ll need to drill a 1″ hole in the door edge for the latch mechanism, plus a 2-1/8″ hole from both sides of the door face to prevent splintering during installation procedures.
Deadbolt Installation and Alignment Techniques
Proper deadbolt installation requires precise measurements and careful attention to alignment details that’ll guarantee your new lock operates smoothly and provides maximum security.
Mark your backset distance, typically 2-3/8″ or 2-3/4″ from the door edge, then drill the 2-1/8″ face bore and 1″ edge bore.
Chisel mortises for flush faceplate fitting before final assembly.
Replacing Lever Handles and Mortise Lock Systems

While lever handles offer superior accessibility and modern aesthetics compared to traditional doorknobs, replacing them requires methodical removal of existing hardware and careful alignment of new components.
You’ll need to locate set screws, extract the spindle, and remove the latch mechanism before installing new hardware with proper beveled positioning for smooth operation.
Rekeying Lock Cylinders With New Pin Configurations
When you need to maintain existing locks while changing who’s access, rekeying the cylinder offers a cost-effective alternative to complete lock replacement.
You’ll need essential tools including flathead screwdriver, needle-nose pliers, and a brand-specific rekeying kit.
Remove the cylinder using the original key, replace old pins with new ones matching your key’s cuts, then reassemble and test thoroughly.
Testing Lock Function and Making Final Adjustments
After completing the rekeying process, your next step involves thorough testing to guarantee your locks function reliably and securely.
Test with the door open to avoid accidental lockouts, rotating the knob multiple times to verify smooth deadbolt operation.
Confirm proper latch alignment by ensuring it clicks firmly upon closure, then adjust strike plates if necessary.
Maintenance Tips for Long-Lasting Lock Performance
Regular maintenance plays a crucial role in extending your lock’s lifespan and ensuring reliable security performance for years to come.
Clean external surfaces monthly with a damp cloth, removing dirt and debris that can cause malfunctions. Apply silicone-based or graphite lubricants quarterly, avoiding oil-based products that attract dust and grime, compromising smooth operation over time.
Final Note
You’ve now acquired the fundamental skills to change your house locks effectively, whether through complete replacement or rekeying existing hardware. Remember to test each lock thoroughly after installation, ensuring smooth operation and proper alignment. Regular maintenance, including periodic lubrication and inspection, will extend your locks’ lifespan and maintain peak security. If you encounter complex issues during installation, don’t hesitate to consult a professional locksmith for assistance.