Open your basement windows and run a 50‑100 CFM exhaust fan near the bathroom or laundry to pull moist air out, then add a low‑flow supply fan for balanced circulation; seal cracks with caulk or expanding foam and install a continuous vapor‑barrier sheet that extends up the walls, and place natural desiccants like rock salt, baking soda, or silica gel in breathable containers, refreshing them on a schedule that matches humidity levels; monitor RH with a digital hygrometer, keep the thermostat on AUTO to avoid cold spots, and consider venting dryer and kitchen exhausts outside—continue for and you’ll discover deeper strategies.

TLDR
- Open basement windows and use low‑flow exhaust fans to promote continuous fresh‑air exchange.
- Install a reinforced polyethylene moisture barrier on the floor and up the walls, sealing all seams.
- Route dryer and kitchen exhausts through rigid metal ducts to the exterior with louvered backdraft dampers.
- Place natural desiccants (rock salt, baking soda, silica gel) in breathable containers and replace them according to humidity levels.
- Monitor indoor RH with digital hygrometers and keep it below 50 % by adjusting ventilation and dehumidification as needed.
Open Windows and Use Exhaust Fans to Ventilate Properly
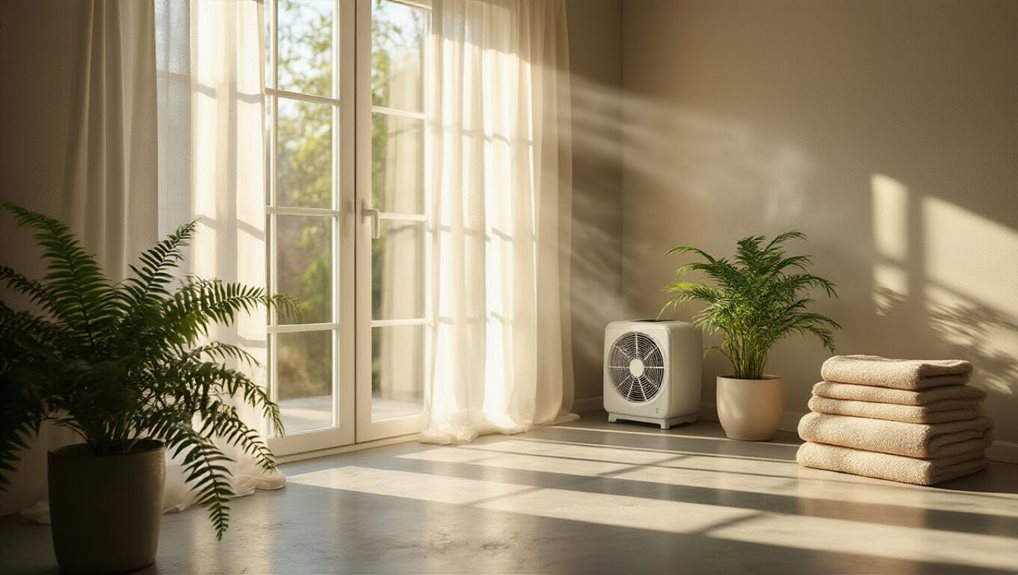
Why not start by simply opening the basement windows and adding an exhaust fan to pull the damp air out? You’ll invite fresh air that dilutes humidity, while a 50‑100 CFM fan placed near bathrooms or laundry removes moisture at its source, keeping levels below 60 %. This combined airflow eliminates musty odors, reduces mold risk, and creates a healthier, shared space for everyone. Consider installing strategic exhaust fans in areas with the highest moisture production for optimal control.
Seal Gaps and Install Vapor Barriers to Prevent Dampness
You’ll start by sealing any visible cracks with caulk or expanding foam, making sure the barrier can’t be bypassed by water.
Next, you’ll install a continuous vapor‑barrier sheet—typically 6‑20 mil polyethylene—over walls, floors, and even around pipes, overlapping seams and taping them securely.
Finally, wrap exposed pipes and conduit with insulation to block condensation and keep the basement’s humidity in check.
Seal Cracks With Caulk
Ever wondered how a simple caulk job can keep basement moisture at bay? You’ll clean each crack, remove dust, insert a backer rod for gaps over a half‑inch, then apply flexible polyurethane caulk in a steady, 45‑degree bead, tooling it smooth.
Ensure the surface is dry, let it cure 1‑2 hours tack‑free, and avoid moisture exposure, because proper sealing prevents hidden mold and structural decay.
Install Vapor Barrier Sheeting
After sealing cracks with caulk, the next step is to create a continuous vapor barrier that blocks moisture from seeping through walls, floors, and ceilings.
Roll out 6‑mil polyethylene sheeting, overlap seams six inches, and staple it taut to joists, using acoustical sealant under edges.
Tape joints, secure gaps with vapor‑barrier tape, and attach rigid foam with plastic anchors for an airtight, protective envelope.
Wrap Pipes With Insulation
How does wrapping your basement pipes with insulation actually stop moisture from gathering on them? By reducing the temperature differential, insulation keeps pipe surfaces near water temperature, blocking warm, moist air from contacting cold metal and preventing condensation.
Seal gaps and overlaps with tape, use tubular foam or pipe wrap, and you’ll eliminate pipe sweating, curb mold growth, and improve energy efficiency for the whole household.
Add Natural Desiccants: Rock Salt, Baking Soda, and Silica Gel
You can enhance your basement’s dryness by placing rock salt in breathable buckets, where its natural hygroscopic properties pull moisture from the air as efficiently as many commercial desiccants. Moisture control Mulch acts as a protective barrier that stabilizes soil temperature and retains essential moisture.
Rock Salt Benefits
Rock salt’s hygroscopic nature makes it an effective natural desiccant for basement humidity control, as it readily absorbs moisture from the air and channels it into a brine that drips into a lower container.
You’ll notice mold risk dropping, and items like stored books staying dry, while the inexpensive, non‑toxic solution works silently alongside ventilation; simply stack containers, monitor brine levels, and refresh the salt when saturated for reliable, short‑term relief.
Baking Soda Absorption
While rock salt pulls moisture into a brine, baking soda offers a lighter, yet still effective, way to keep basement air dry and odor‑free. Place open bowls or jars in damp corners, stir the powder occasionally to refresh its surface, and replace every thirty days; it absorbs humidity for about ten days, traps musty smells, and remains safe for children and pets.
Introduce Moisture‑Absorbing Plants to Reduce Indoor Dampness
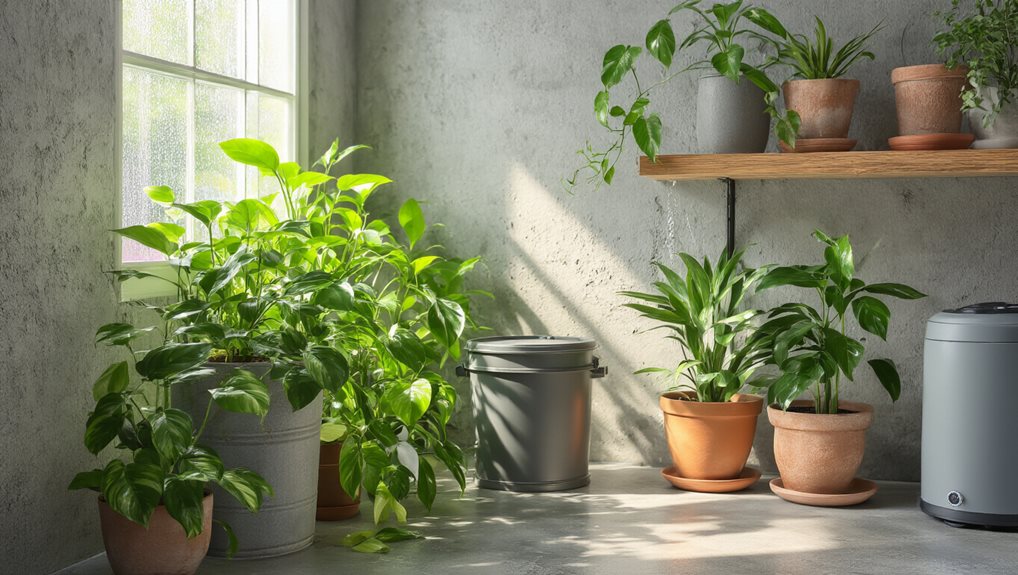
Ever wondered how a few well‑chosen houseplants can turn a damp basement into a healthier space? Boston ferns, English ivy, peace lilies, and areca palms each absorb moisture, release oxygen, and filter toxins, creating a balanced micro‑climate. Group them in corners, use well‑draining pots, provide indirect light or grow lights, and mist fronds occasionally to maximize uptake and keep humidity below mold‑promoting levels. Adding natural soil amendments or compost practices can further support soil health around container plantings, enhancing resilience against moisture fluctuations. Soil health
Track Humidity With a Hygrometer and Adjust Strategies Quickly
How do you keep basement humidity in check before mold takes hold? Place a digital hygrometer in each corner, set alerts for above 50 % RH, and log daily highs and lows; analog models work too, but digital gives ±1‑5 % accuracy and temperature readouts, helping you spot trends quickly.
When readings spike, adjust dehumidifiers or ventilation, then recalibrate the device to ensure reliable, community‑wide moisture control.
Use Fans to Boost Air Flow and Prevent Mold
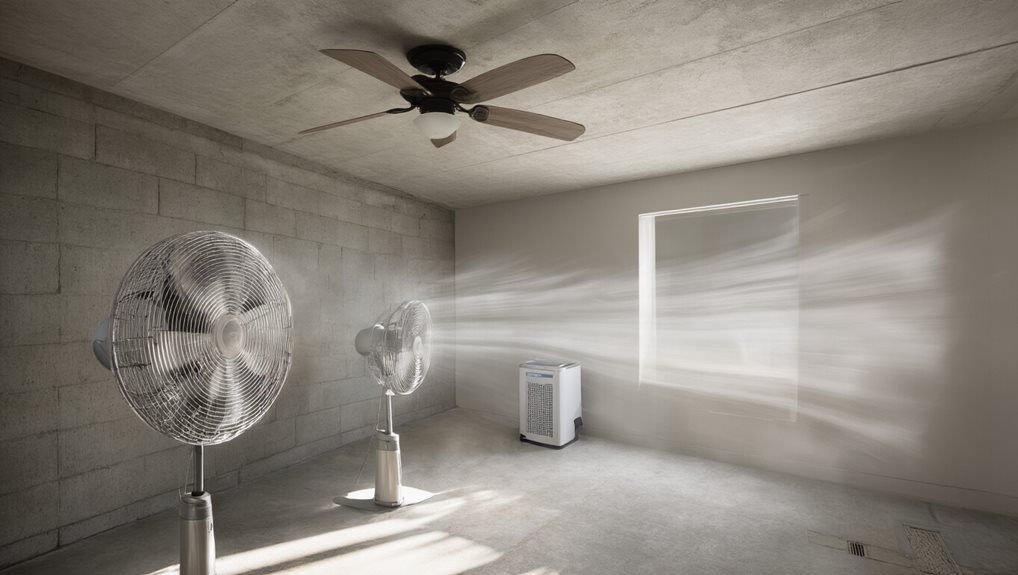
After logging humidity trends with a hygrometer, the next step is to keep the air moving so moisture doesn’t settle.
Install an exhaust fan in the basement bathroom to pull moist air out, pair it with a low‑flow supply fan for balanced circulation, and use axial fans for larger spaces; this continuous airflow disrupts stagnant pockets, lowers condensation risk, and helps dehumidifiers work efficiently, keeping mold at bay.
Keep Interior Temperatures Even to Avoid Cold Spots and Condensation
You should keep your thermostat set at a steady temperature, because fluctuations create cold spots that invite condensation. Make sure any gaps around doors and windows are sealed tightly, and insulate the exterior walls and floors to retain heat and stop moisture from forming. By combining consistent settings, proper sealing, and solid insulation, you’ll maintain an even indoor climate that discourages humidity buildup. The Easy Change system’s emphasis on a clean, enclosed cartridge highlights the benefit of preventing leaks and spills, which parallels keeping moisture controlled in a basement environment by using tightly sealed, energy-efficient components air-tight sealing.
Maintain Consistent Thermostat Settings
Ever notice how a sudden chill in the basement can leave droplets on the walls? Keep your thermostat on AUTO, not ON, so the fan runs only when the system calls for it, allowing coils to drain moisture outdoors. Set the temperature a few degrees lower during humid periods, and use a hygrometer to maintain 30‑50 % RH, ensuring even, dry air that prevents cold spots and mold.
Seal Gaps Around Doors and Windows
A few small cracks around doors and windows can let humid outdoor air seep into the basement, creating temperature differentials that cause cold spots and condensation on walls and floors. Inspect sill plates, CMU openings, and window wells, then apply waterproof sealant or caulk, and install weather‑stripping or shrink‑wrap kits. This airtightness keeps interior temperatures even, preventing condensation and lowering humidity.
Insulate Exterior Walls and Floors
Why bother insulating exterior basement walls and floors? You’ll keep interior temperatures even, eliminate cold spots, and stop condensation from forming on concrete.
Apply XPS or EPS foam directly to the wall after waterproofing, then cover with a thermal barrier for fire safety; similarly, place rigid foam under the slab, add gravel and a polyethylene vapor retarder, and seal all seams to create a continuous moisture‑resistant envelope.
Cover Crawlspace Floors With Plastic to Stop Ground Dampness
How can you keep ground moisture from turning your crawlspace into a damp, unhealthy environment? Lay a 16‑mil reinforced polyethylene sheet over the dirt floor, extending it up the walls six to ten inches, then seal seams with spray‑foam adhesive. This barrier stops evaporation, cuts humidity, deters mold, protects joists, and eases HVAC load, giving you a healthier, more efficient basement. Regularly inspect the barrier for punctures and ensure proper ventilation to maintain long‑term effectiveness condensation control.
Vent Dryer and Kitchen Exhausts Outside
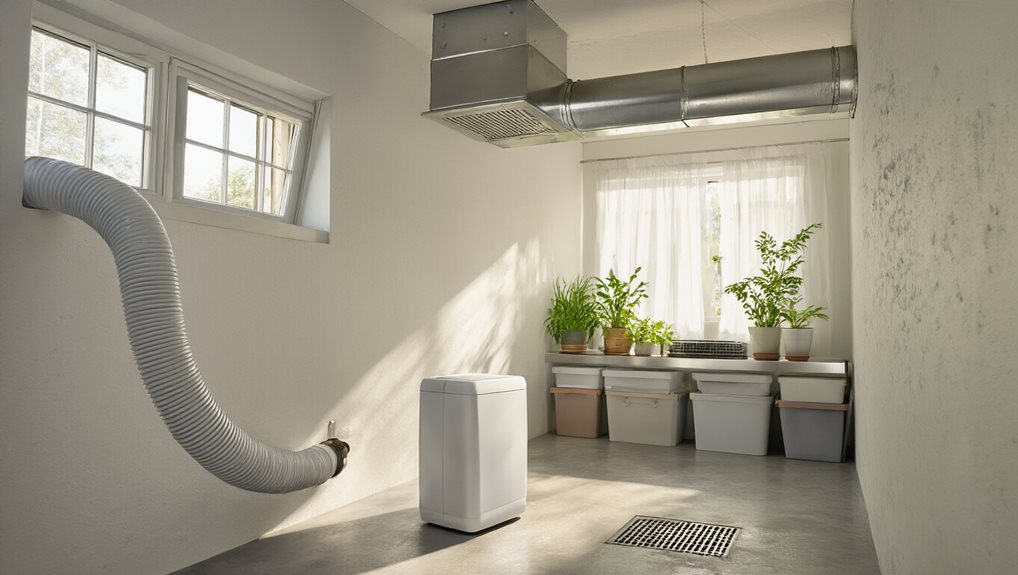
After sealing the crawlspace floor with a polyethylene barrier, the next step in keeping basement humidity low is to vent moisture‑producing appliances outdoors.
Route dryer exhaust and kitchen fans through rigid metal ducts to the exterior, install louvered backdraft dampers and vent covers to block rain, and keep the paths clear of obstructions.
This reduces indoor moisture, prevents mold, and improves air quality for everyone in the home.
Refresh or Replace Desiccants Regularly for Ongoing Control
Ever notice how your basement’s humidity spikes just as the season changes? Refresh or replace desiccants on a schedule that matches your moisture level—high‑humidity spaces need new gel every 3‑6 months, while moderate areas stretch to 6‑12 months. Check silica gel color, pressure drop, and humidity readings regularly; regenerate silica by heating or refill absorbent types as instructed. Consistent monitoring and timely swaps keep your basement dry, comfortable, and part of a well‑maintained home community. Regularly monitor indoor humidity with a sensor to ensure you adjust desiccant use promptly humidity sensing and maintain a proactive moisture control routine.
Final Note
By combining proper ventilation, sealing, and natural desiccants, you’ll keep basement humidity at bay without costly equipment. Regularly monitor levels with a hygrometer, replace moisture‑absorbing agents, and maintain even temperatures to prevent condensation. Adding moisture‑absorbing plants and covering crawl‑space floors further curbs dampness. When you follow these steps consistently, you’ll protect your home’s structure and air quality, ensuring a dry, healthy basement year‑round.