To cut a wine bottle safely, you’ll need safety goggles, thick gloves, and a dust mask before starting. Clean the bottle thoroughly and remove all labels. Using a specialized glass cutter, score a single precise line around the bottle’s circumference while maintaining steady pressure. Apply heat evenly around the scored line, followed by cold water to create a clean break. Sand the edges with progressively finer grits for a smooth finish. Perfecting these fundamental steps will open endless creative possibilities.
TLDR
- Clean the bottle thoroughly and remove all labels, ensuring a smooth surface for accurate cutting without unexpected breaks.
- Score the bottle once with steady pressure using a glass cutter, making a single precise line around the circumference.
- Apply even heat to the scored line by rotating the bottle, then quickly cool with cold water to create controlled cracking.
- Sand the cut edges progressively with different grit sandpapers, starting coarse and moving to finer grits for safety.
- Use proper safety gear including goggles, gloves, and a dust mask throughout the entire cutting and finishing process.
Essential Safety Gear and Precautions
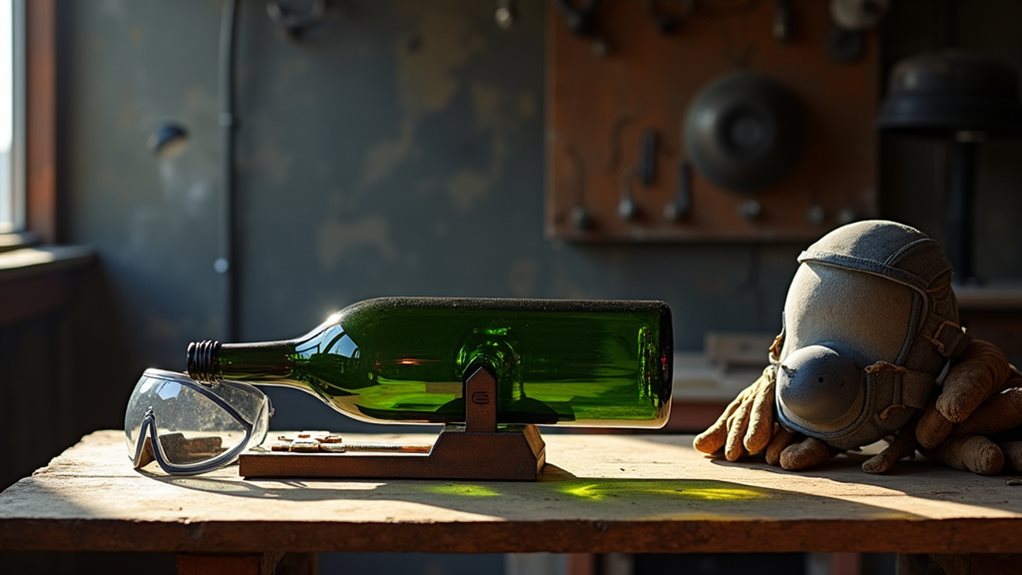
Three critical safety considerations must be addressed before attempting to cut a glass wine bottle.
You’ll need proper eye protection with safety goggles, thick gloves to prevent cuts, and a well-fitting dust mask for respiratory safety. Respiratory issues can arise from inhaling fine glass dust, so it’s essential to ensure adequate ventilation during the cutting process.
Make certain you’re working in a well-ventilated area with a stable surface, and wear long sleeves and pants to protect your skin from glass fragments. Proper preparation helps prevent sudden temperature shifts that can cause unwanted cracking during the cutting process.
Required Tools and Materials
To cut a glass wine bottle effectively, you’ll need essential tools like a specialized glass cutter, protective gear, and materials for finishing the edges. While basic equipment includes scoring tools and sandpaper, you can also investigate alternative options such as wet saws, diamond blades, or the string-and-fire method depending on your project needs. Proper preparation steps for the glass surface can significantly enhance the cutting process. Your choice of tools will impact both the precision of your cuts and the final finish quality, so it’s worth considering investing in reliable equipment that matches your specific requirements. A simple and cost-effective option is using a carbide v-bit cutter mounted on scrap wood.
Basic Tools List
Every successful glass bottle cutting project begins with gathering the right set of essential tools and materials.
You’ll need a handheld glass cutter for scoring, masking tape to guide your cuts, and both hot and cold water for the thermal shock process.
Don’t forget safety equipment, including protective gloves and a mask to guard against glass particles during cutting.
Alternative Equipment Options
While standard glass cutting tools serve their purpose well, several alternative equipment options offer unique advantages for bottle cutting projects.
You’ll find that DIY carbide tool cutters with v-bits provide cost-effective scoring, while specialty models like the Kinkajou come with built-in cutting wheels.
For a more precise approach, you can opt for stationary bottle cutting machines featuring diamond carbide blades and adjustable mechanisms.
Preparing Your Wine Bottle
Before cutting your wine bottle, you’ll need to thoroughly clean it and remove all labels by soaking in warm, soapy water until they peel away easily.
Next, carefully inspect the entire bottle for any existing cracks, chips, or irregularities that could affect the cutting process or compromise safety.
Finally, put on your protective gear, including safety glasses and cut-resistant gloves, and set up your work area with all necessary materials within easy reach. Additionally, ensure your workspace is free of abrasive cleaners that could pose a risk during the cutting process.
Clean and Remove Labels
Starting with a clean wine bottle is essential for achieving precise cuts and professional results in your bottle-cutting project.
Begin by identifying your label’s material, then soak the bottle in warm, soapy water mixed with baking soda.
For stubborn adhesives, use a utility knife to carefully lift edges, followed by Goof Off or CRC to remove residue.
Always work in a well-ventilated area.
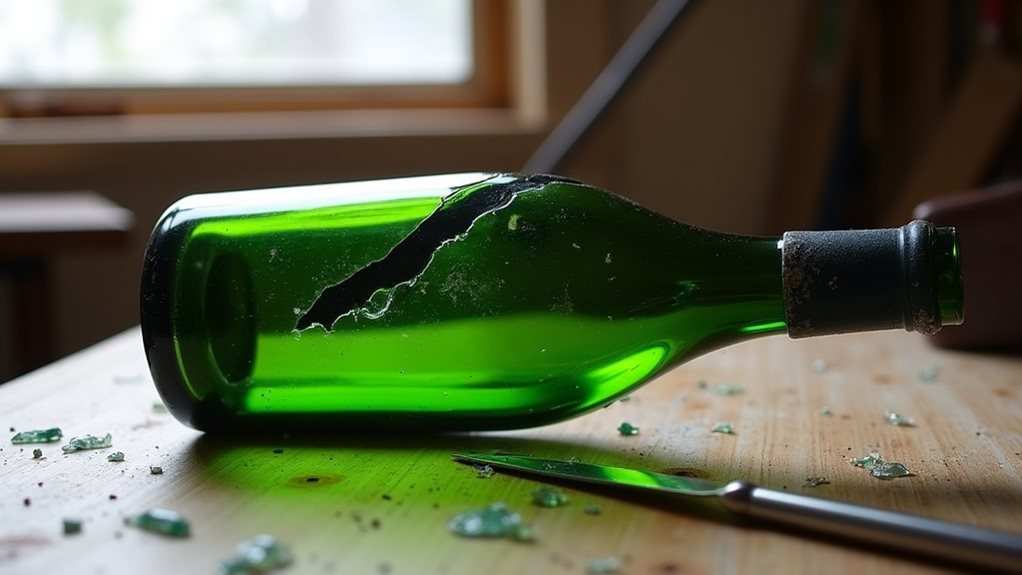
Check for Glass Defects
Since glass defects can compromise both safety and aesthetics, inspecting your wine bottle thoroughly before cutting is an essential preparatory step.
Check the bottle’s surface for cracks, protrusions, and irregular textures, while examining the interior for bubbles or threads.
Pay special attention to the neck and base, looking for deformities, shoulder checks, or unstable bottom formations.
Safety Equipment Setup
A thorough inspection of your wine bottle sets the stage for proper safety equipment setup, which will protect you throughout the cutting process.
You’ll need to wear safety goggles and sturdy gloves to shield against glass shards, and don’t forget to put on closed-toe shoes.
Set up your workspace with protective covering, and make certain you’re working in a well-ventilated area with a dust mask nearby.
Choosing the Right Cutting Method
When it comes to cutting glass wine bottles, selecting the appropriate method can make the difference between a clean cut and a shattered mess.
You’ll find several reliable options: a glass bottle cutter for precise scoring, the string method using acetone for thermal shock, or a Dremel tool for more controlled cuts. Consider your bottle’s thickness and shape when choosing your approach. Additionally, having the right tools, such as the ideal planting trowel, can enhance your overall crafting experience.
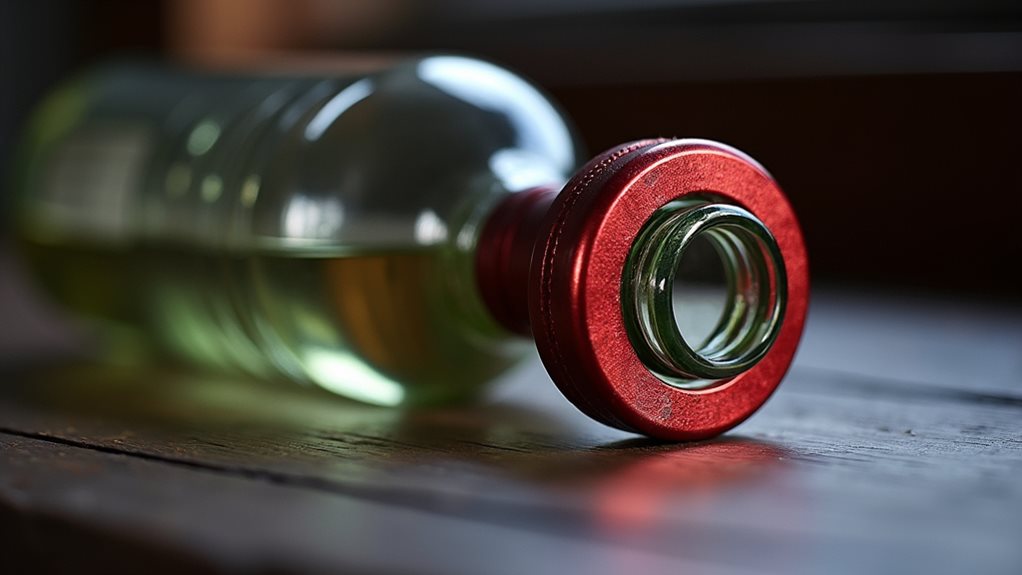
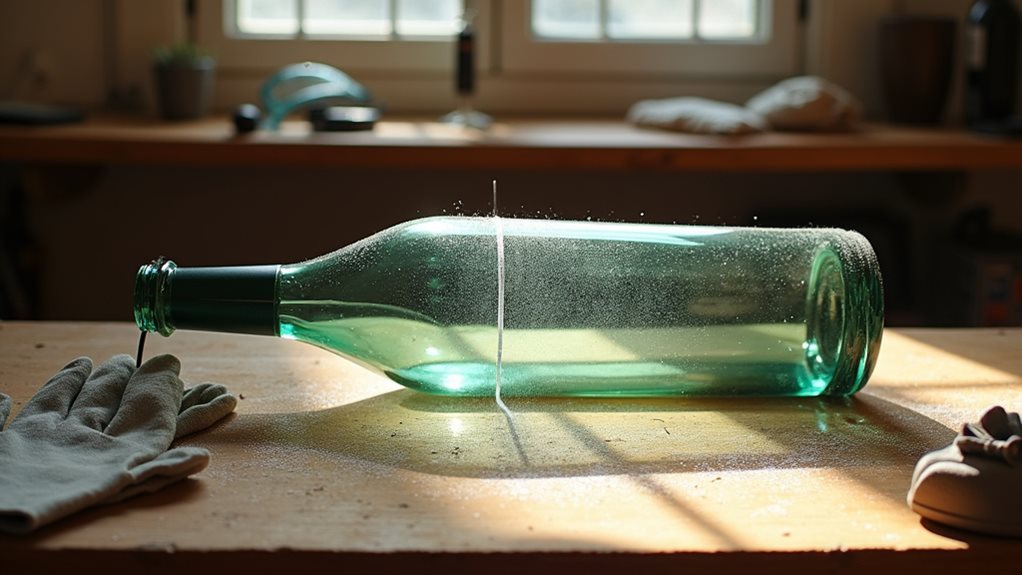
Step-by-Step Glass Scoring Guide
Proper glass scoring stands as the foundation of successful bottle cutting, determining whether you’ll achieve that perfect break you’re aiming for.
Begin by marking your cutting line with a temporary marker, then position your glass cutter at a consistent height.
Rotate the bottle while maintaining steady, gentle pressure, ensuring you’re creating a continuous score line that’s light but uniform around the entire circumference.
Thermal Stress Application Techniques
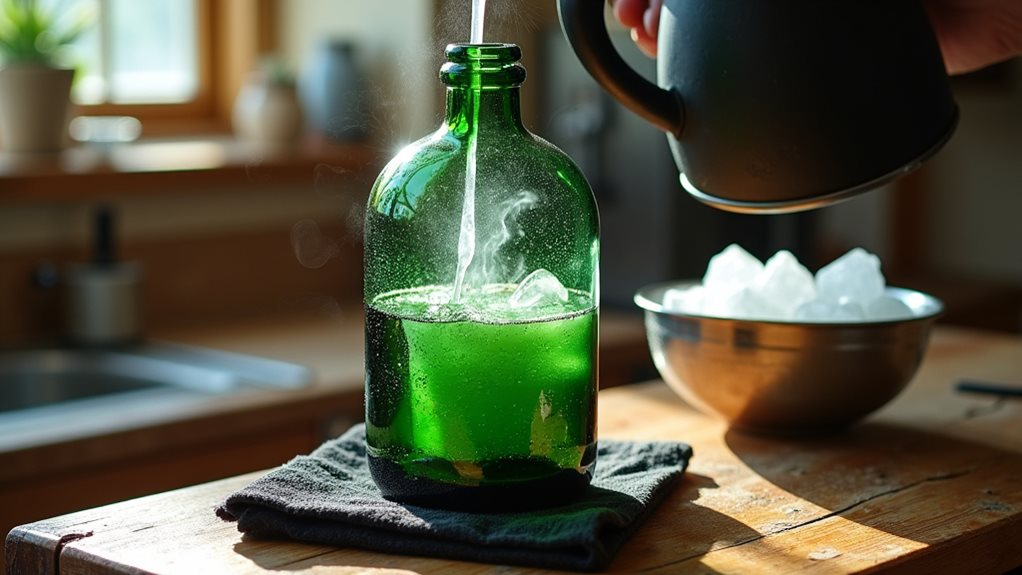
Apply even, controlled heat along your scored line using either a nichrome wire or heated glass-cutting tip, maintaining consistent contact for 10-15 seconds.
You’ll want to rotate the bottle smoothly to guarantee uniform heating around the entire circumference, watching for any signs of thermal stress developing along the score.
Once you’ve completed the heating process, immediately quench the heated area with cold water, which creates the thermal shock needed to separate the glass cleanly along your score line.
Heat Temperature Control Steps
Since thermal stress plays an essential role in bottle cutting, maintaining precise temperature control will determine your success rate.
You’ll need to create a temperature difference of about 70°C between the scored line and surrounding glass.
Apply heat gradually using boiling water, a candle, or heating coil, and allow several minutes for the heat to penetrate the glass’s entire thickness.
Cold Water Quenching Process
The cold water quenching process represents a critical step in successfully cutting your wine bottle, requiring careful control over temperature differences to create precise breaks.
You’ll need to apply cold water directly to the scored line rather than submerging the entire bottle, as this focused approach creates controlled stress that encourages a clean break along your score mark.
Always maintain uniform cooling for predictable results.
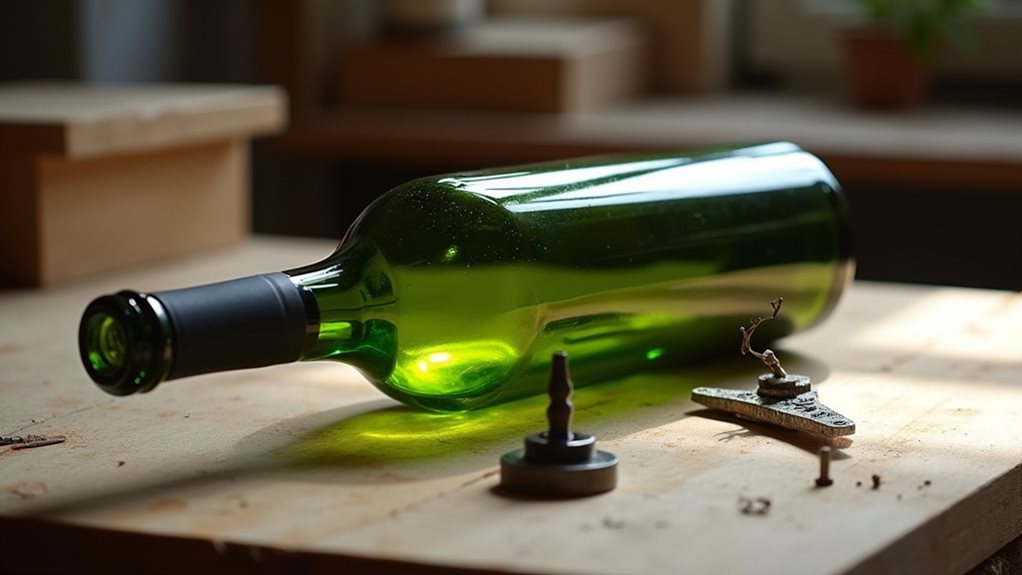
Edge Smoothing and Finishing
Once you’ve successfully cut your glass bottle, properly smoothing and finishing the edges becomes essential for both safety and aesthetics.
You’ll want to start with wet sanding using coarse-grit sandpaper, gradually progressing to finer grits.
For professional results, employ silicon carbide powder or a Dremel tool with polishing attachments, and don’t forget to wear protective gear throughout the finishing process.
Common Mistakes to Avoid
Successfully cutting glass bottles requires careful attention to detail, and even experienced crafters can encounter common pitfalls that compromise their results.
You’ll need to avoid over-scoring the glass, maintain proper heating temperatures, and guarantee stable bottle positioning during cutting.
Don’t rush through preparation steps, and always wear protective gear to prevent injuries while working with glass.
Creative Uses for Cut Wine Bottles
Repurposed wine bottles offer endless possibilities for creative projects that convert ordinary glass vessels into extraordinary home decor, functional items, and artistic expressions.
You’ll find diverse applications, from crafting stylish candle holders and chandeliers that cast enchanting light patterns to designing sustainable herb gardens and unique glassware.
Alter bottles into personalized gifts, including customized centerpieces, mosaic art pieces, and themed gift sets.
Expert Tips for Perfect Results
To achieve professional-quality results when cutting wine bottles, you’ll need to perfect several critical techniques that experienced crafters have refined over time.
Start by making a single, precise scoring line while maintaining steady pressure, then guarantee uniform heating around the bottle’s circumference.
Don’t rush the cooling process, and always follow up with progressive wet sanding techniques to achieve perfectly smooth edges.
Final Note
You’re now equipped to convert ordinary wine bottles into beautiful, functional pieces. With proper safety precautions, the right tools, and careful attention to technique, you’ll be able to create clean cuts consistently. Remember to take your time scoring the glass, apply even pressure during the separation process, and always smooth the edges thoroughly. Whether you’re making drinking glasses, vases, or art pieces, your repurposed bottles will showcase your craftsmanship.