You can reduce indoor humidity naturally by using moisture-absorbing plants like peace lilies and Boston ferns in bathrooms or damp areas, where they thrive and help lower moisture levels. Pair them with natural desiccants such as rock salt, baking soda, or silica gel in bowls or closets to draw out excess humidity. Run exhaust fans, limit shower times to 5–8 minutes, and open windows only when outdoor air is dry. Combine these strategies with proper airflow and reactivated absorbers for sustained control—there’s more to optimizing your home’s humidity balance effectively.
TLDR
- Use humidity-absorbing plants like Peace Lily, Boston Fern, and Spider Plant in damp areas to naturally regulate moisture.
- Place natural desiccants such as rock salt, baking soda, or silica gel in humid rooms to passively draw moisture from the air.
- Limit shower time and use low-flow showerheads to reduce steam and excess indoor humidity.
- Improve airflow by using exhaust fans, opening windows when outdoor humidity is low, and pairing with ceiling fans.
- Reactivate silica gel or dry out rock salt periodically to maintain effectiveness of reusable moisture absorbers.
Use Houseplants That Absorb Moisture
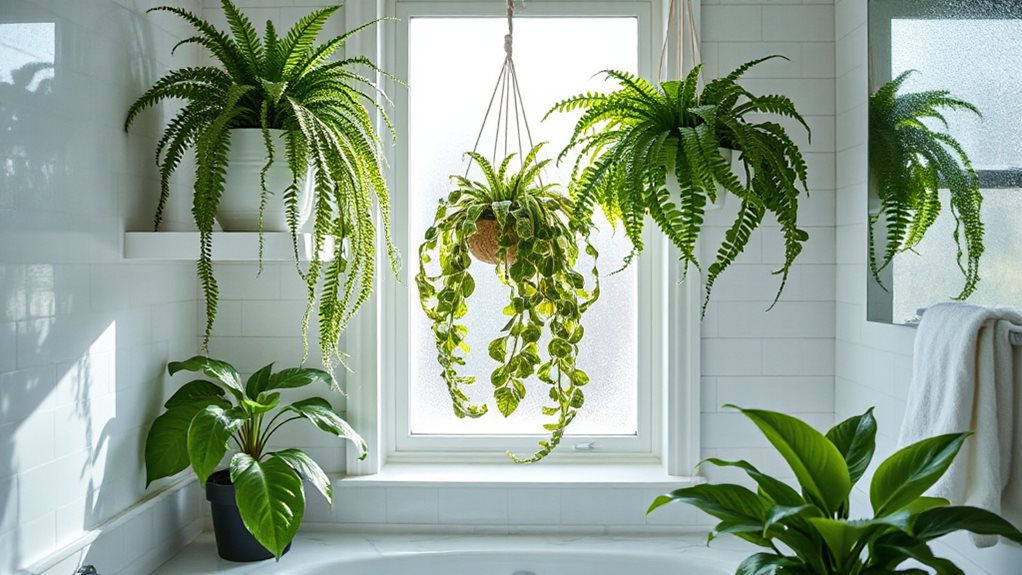
Bring in the right greenery, and you’ll quickly see how houseplants can make a real difference in tackling indoor humidity.
You can rely on Monstera Deliciosa and Peace Lily to absorb moisture, while Spider Plants and English Ivy naturally reduce mold risks.
Phalaenopsis Orchids not only thrive in bright light but also help cool spaces by lowering humidity, making your home healthier and more comfortable.
Maintaining indoor humidity levels between 40–50% helps prevent mould and dust mite proliferation, and certain houseplants contribute significantly to achieving this balance through natural moisture regulation (40–50% humidity range). Plants like the Peace Lily are especially effective in humid environments because they thrive with consistent moisture and steam humidity-loving.
Leverage Air Conditioning for Humidity Control
When you run your air conditioner, it naturally removes humidity as warm air passes over cold evaporator coils, causing moisture to condense and drain away.
You’ll stay more comfortable at cooler temperatures because dry air feels less clammy, even if the thermostat stays the same.
While standalone dehumidifiers target moisture directly, your AC works best when properly sized and maintained—so keep filters clean, guarantee steady airflow, and consider a two-stage or variable-speed system for longer, more effective drying cycles.
Regular maintenance, including replacing dirty air filters, helps ensure efficient dehumidification and prevents airflow restrictions.
Cool Air, Less Moisture
Cooling your home does more than just lower the temperature—your air conditioner quietly pulls excess moisture from the air as it runs.
As warm air passes over cold evaporator coils, water vapor condenses and drains away.
Cooler air holds less moisture, so your system naturally dehumidifies while it cools, helping maintain a comfortable, healthy indoor environment.
AC vs. Dehumidifiers
Your air conditioner already plays a key role in managing indoor humidity by removing moisture as it cools, but it’s not always the most efficient solution when comfort hinges solely on dryness rather than temperature.
You’ll save energy and money using a dehumidifier in damp areas or mild weather, since it targets moisture without cooling, reduces AC strain, and maintains ideal humidity levels more precisely.
Smart Ventilation Tips
While your air conditioner naturally removes moisture during cooling, you can markedly enhance its dehumidifying power with smart ventilation strategies that work in tandem with your HVAC system.
Use energy recovery ventilators (ERVs) to exchange stale indoor air with fresh outdoor air, balancing humidity without overworking your AC. Pair this with variable speed air handlers and clean evaporator coils to maintain consistent, comfortable indoor moisture levels efficiently and effectively all year round.
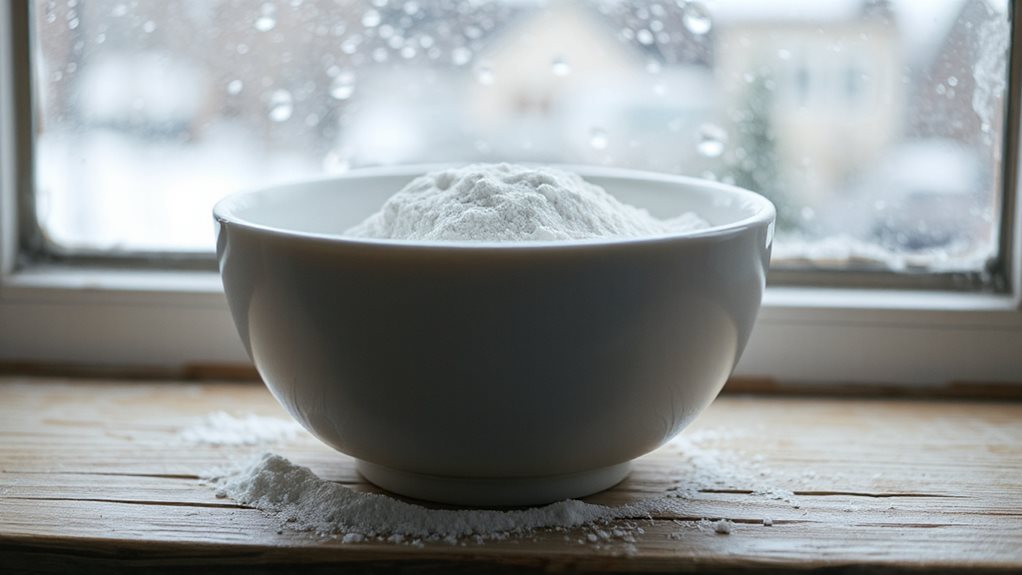
Place Natural Desiccants Around Your Home
Tackle excess indoor humidity the natural way by placing effective desiccants throughout your home—simple, chemical-free solutions that actively pull moisture from the air.
Use rock salt in basements, baking soda in closets, or silica gel packets in cabinets. Try activated charcoal for odor and moisture control, or eco-friendly clay desiccants in moderate humidity. These reusable, affordable options keep your space dry, fresh, and naturally protected. High indoor humidity above 60% can promote mold growth and damage your home, so monitor levels with a hygrometer and take corrective action when needed.
Limit Shower Duration to Minimize Steam
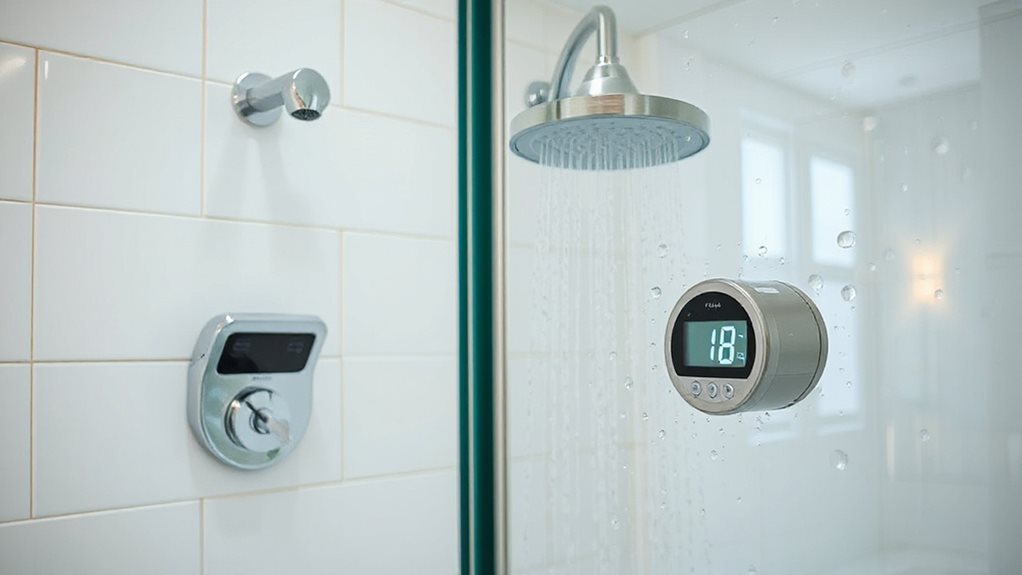
Cutting down your shower time can make a real difference in keeping indoor humidity in check—aim for 5 to 8 minutes to stay clean and limit excess moisture.
Keep rain showers under 5 minutes due to high water output, and remember each extra minute increases vapor release.
Shorter showers reduce mold risk, ease strain on plumbing, and work better with ventilation to control humidity effectively.
Upgrading to a low-flow showerhead can further lower water use and reduce steam production.
Group Humidity-Absorbing Plants Strategically
Grouping humidity-absorbing plants like Peace Lilies and Boston Ferns enhances their ability to pull excess moisture from the air, especially in steamy spots like bathrooms.
Choose species such as Spider Plants and English Ivy that thrive in damp, low-light areas, and place them together to increase natural dehumidification.
Consider adding sun-loving tropicals like Bougainvillea to sunny rooms or near windows to balance moisture with heat-loving, drought-resistant foliage.
Group Plants for Impact
You’ll get the most out of your indoor plants by clustering them strategically, where their combined transpiration and moisture-absorbing abilities work more efficiently than when spaced apart.
Group peace lilies, spider plants, and ferns in humid zones like bathrooms or kitchens.
Pairing species like Boston fern with English ivy enhances mold and moisture control.
Dense, well-placed clusters enhance dehumidification, improving air quality naturally and effectively.
Choose Right Species
Now that you’ve arranged your plants to maximize their moisture-managing potential, it’s time to focus on selecting the most effective species for tackling indoor humidity.
Choose Rhapis excelsa or Boston fern for dense, humidity-loving foliage, and pair them with low-maintenance Scindapsus aureus or Peace Lily, which thrive in damp areas while filtering pollutants, ensuring your space stays fresh, balanced, and beautifully green.
Boost Natural Absorption
A well-placed cluster of humidity-absorbing plants can markedly improve indoor air quality by enhancing natural moisture regulation.
Group spider plants, Boston ferns, or English ivy in bathrooms, kitchens, or bedrooms to elevate transpiration and balance humidity. Clustering plants increases collective moisture uptake, while strategic placement near damp areas improves efficiency.
Together, you create a healthier, more comfortable indoor environment.
Choose Plants That Thrive in Humid Environments
While managing indoor humidity often involves mechanical solutions, incorporating certain houseplants offers a natural and aesthetically pleasing alternative.
You can choose Golden Pothos or Philodendron Brazil, which thrive in damp spaces while purifying air.
Opt for Boston Ferns or Calatheas, which prefer 50–60% humidity, or try moisture-loving Monsteras and Fittonias to enhance your indoor oasis naturally.
Utilize Baking Soda as a Moisture Absorber
Place open containers of baking soda in damp areas like bathrooms, closets, or basements to actively absorb excess moisture and neutralize odors. You can reuse it by exposing it to sunlight, making it a budget-friendly, natural solution.
While it works best in small spaces and requires regular replacement, it’s safe, dual-purpose, and effective when combined with other humidity strategies.
Deploy Rock Salt in Damp Areas
You can count on rock salt to pull moisture from the air, thanks to its natural hygroscopic properties that help keep damp areas drier over time.
Place it in a ventilated container on windowsills, in basements, or near bathrooms where humidity tends to build up, and pair it with regular maintenance for best results.
While you’ll need to replace the salt every few weeks and empty collected water from the bottom bucket, this low-cost method effectively reduces condensation and supports a healthier indoor environment.
Rock Salt Benefits
A natural and budget-friendly option for tackling indoor dampness, rock salt works effectively as a passive moisture absorber in enclosed or poorly ventilated areas.
You’ll appreciate its hygroscopic properties, drawing water from the air and reducing musty odors.
It forms brine over time, so replace it regularly.
While not for severe damp, it’s a practical, non-toxic choice that supports healthier indoor spaces alongside other moisture-control methods.
Placement Tips
Rock salt’s ability to pull moisture from the air makes it a smart, natural choice for managing indoor humidity, especially when positioned strategically.
Place bowls in damp basements, near kitchen sinks, or in dark corners where air doesn’t circulate well.
Use coarse crystals for better absorption, and pair with silica gel in storage areas.
Refresh weekly to maintain effectiveness and protect your home.
Reuse and Refresh
Tapping into the natural power of rock salt means setting it up right where moisture gathers—basements, closets, and under-sink cabinets become prime spots for deployment.
You can refresh saturated salt by spreading it outside to dry, then reuse it briefly. Though full restoration isn’t possible, repurposing extends its life.
Pair it with good airflow, and you’ll maintain fresher, drier spaces naturally and affordably.
Reuse Silica Gel and Charcoal for Ongoing Protection
Breathe new life into used silica gel and activated charcoal by reactivating them for continued moisture control.
Heat silica gel in your oven at 120–150°C for 1–2 hours, or microwave it briefly before finishing in the oven.
Reactivate charcoal the same way to save money and reduce waste.
Once cooled, return them to closets, drawers, or storage boxes, where they’ll keep absorbing moisture, protecting your belongings and maintaining a fresh, dry space you can feel good about.
Optimize Ventilation Without Inviting Humidity

After reactivating silica gel and charcoal to maintain dry spaces, you can further control indoor humidity by fine-tuning how your home exchanges air with the outside.
Open windows when outdoor humidity is low, especially on cool, breezy days, to enhance cross-ventilation. Use exhaust fans in kitchens and bathrooms to remove moisture at the source, and pair ceiling fans with natural airflow to circulate air effectively, preventing stagnation and reducing reliance on open windows when humidity is high.
Implement Low-Cost Solutions for Targeted Relief
You can tackle damp spots in your home without breaking the bank by putting everyday items to work where moisture builds up.
Place bowls of baking soda or rock salt in humid rooms to absorb excess moisture, and tuck silica gel or charcoal in tight spaces to reduce condensation.
Use houseplants like aloe vera or golden pothos to naturally lower humidity while improving air quality.
Final Note
You can effectively lower indoor humidity using natural, low-cost methods that work together to create a healthier environment. By placing moisture-absorbing plants, using rock salt or recycled desiccants, and optimizing ventilation, you tackle dampness at its source. Limiting shower steam and running your AC wisely also helps. These practical steps, when combined, maintain balanced humidity without relying on expensive equipment, giving you long-term control and improved air quality.