You can find wood studs by starting 16 inches from room corners, where the first stud typically sits, then measuring at 16-inch intervals for load-bearing walls or 24-inch spacing for non-load-bearing applications. Use electrical outlets as reference points since they’re mounted beside studs, tap the wall to detect solid sounds versus hollow cavities, or run a strong neodymium magnet across the surface to locate metal fasteners. These thorough techniques will guarantee accurate stud detection for your project needs.
TLDR
- Measure 16 inches from room corners where first studs typically sit, then mark centers at 16-inch intervals.
- Tap horizontally across walls listening for dull sounds over studs versus hollow, ringing tones over cavities.
- Use neodymium magnets to detect metal nails or screws securing drywall to underlying wood studs.
- Check electrical outlets and door frames as reference points since they’re typically mounted to studs.
- Confirm stud locations by drilling small exploratory holes with finish nails before hanging heavy objects.
Understanding Standard Stud Spacing in Modern Construction

Two standard measurements dominate modern residential construction when it comes to stud spacing, and understanding these patterns will greatly improve your ability to locate wall framing.
You’ll encounter 16 inches on center spacing most frequently, particularly in load-bearing walls where structural integrity matters. Bermuda grass is unrelated to stud spacing but highlights that different materials and requirements influence how things are arranged.
The secondary standard is 24 inches on center, commonly used in non-load-bearing applications. This wider spacing is often chosen for material savings while still meeting structural requirements for interior walls.
Locating Studs Using Electrical Outlets and Switch Boxes
Looking beyond measuring tape and electronic devices, you can tap into your home’s electrical system as a reliable guide for finding wall studs. Electrical boxes are typically mounted to studs, making outlets and switches excellent reference points.
Remove the cover plate safely after turning off the breaker, then inspect for mounting nails or brackets indicating stud location. Once you’ve identified a stud using an electrical outlet, you can measure 16 to 24 inches from that point to locate the next stud in the sequence. Stud finders and wall scanners can provide extra confirmation before you drill.
The Sound Test: Identifying Studs Through Wall Tapping

The sound test method relies on systematic wall tapping to detect acoustic differences between hollow cavities and solid wood studs, requiring you to develop consistent technique and recognize distinct sound patterns.
You’ll need to tap horizontally across the wall surface while listening for pitch changes and feeling vibration differences, as areas over studs produce higher-pitched, firm sounds compared to the drum-like resonance of hollow sections.
Regular practice with this technique markedly improves your accuracy in distinguishing between solid and hollow responses, making it an effective preliminary tool for stud location.
Quality plaster jobs enhance weight-bearing capacity, so consider using toggle bolts or locating studs directly when hanging heavier items.
Tapping Technique Basics
Tapping your way across a wall surface reveals critical acoustic differences that can pinpoint wood stud locations with surprising accuracy.
Use your knuckle or small tool to tap gently along horizontal lines, spacing taps approximately 16 to 24 inches apart.
Listen for distinct sound changes—solid studs produce duller, less resonant sounds, while hollow spaces create ringing responses.
Sound Pattern Recognition
Commanding the acoustic differences you hear while tapping requires understanding specific sound patterns that distinguish solid wood studs from hollow wall cavities. You’ll notice studs produce dull, less resonant sounds, while hollow sections create echoic tones.
The sharp contrast between these frequencies indicates stud presence. Listen carefully for consistent changes in sound quality along horizontal lines.
Practice Improves Accuracy
Regularly practicing the wall tapping technique converts your ability to distinguish between the solid thump of a stud and the hollow echo of an empty cavity.
You’ll develop a mental reference for sound patterns, reducing error rates markedly.
Start by practicing on walls with known stud locations to calibrate your auditory perception, leading to faster, more confident detection.
Using Strong Magnets to Detect Metal Fasteners
Strong magnets offer a reliable, low-tech approach for locating wood studs by detecting the metal nails or screws that secure drywall to the framing.
You’ll need neodymium magnets with 5-20 pounds of pull force for best results.
Move the magnet slowly across the wall, marking spots where you feel magnetic attraction, then confirm by checking vertically for consistent pull points.
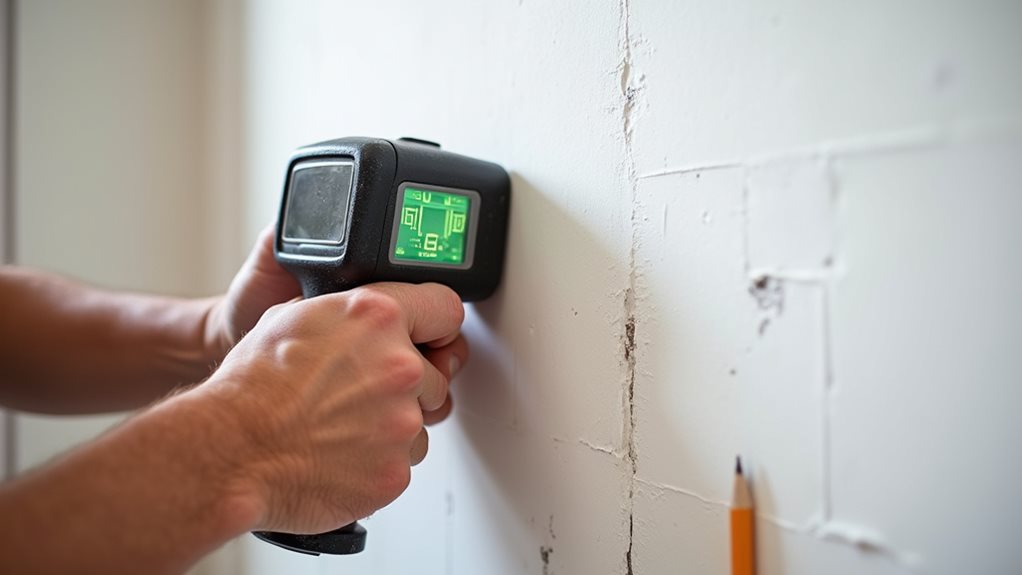
Electronic Stud Finder Tools and Techniques
Electronic stud finders offer sophisticated detection capabilities that surpass traditional magnetic methods, but you’ll need to select the right device for your specific wall configuration and detection requirements.
Your operating technique markedly impacts accuracy, as proper calibration and scanning patterns guarantee reliable stud identification across different surfaces and materials.
Understanding advanced features like wire detection, depth scanning modes, and center-finding technology will help you maximize your electronic stud finder’s performance while avoiding common detection errors.
Choosing the Right Device
When you’re faced with the task of locating studs behind drywall, selecting the appropriate stud finder can make the difference between a successful project and hours of frustration.
Consider your wall type and project requirements when choosing between edge-finding and center-finding electronic models.
Advanced devices like the Bosch GMS120 offer material differentiation and wire detection for enhanced safety and versatility.
Proper Operating Technique
Although having the right stud finder is essential, mastering proper operating technique will determine whether you achieve accurate results or struggle with false readings and missed studs.
Begin by calibrating your device on a stud-free wall section, holding it flat while pressing the calibration button. Wait for confirmation signals before proceeding with your scan.
Advanced Feature Benefits
Beyond basic functionality, modern stud finders incorporate sophisticated features that dramatically improve your detection accuracy and scanning experience.
Multiple sensors enable simultaneous wall scanning, while advanced algorithms process data to determine precise stud positioning. Real-time imaging displays exhaustive views of hidden structures, and enhanced safety features detect live wires and pipes, preventing costly accidents.
Visual Inspection Methods for Spotting Stud Indicators
Look carefully at your wall’s surface features to identify telltale signs that reveal stud locations beneath the drywall or plaster.
You’ll notice electrical outlets and switches mounted directly onto studs, while baseboards and trim are typically nailed into them.
Watch for subtle ridges, bulges, or paint variations that indicate underlying framing members beneath the surface.
Starting Points: Using Corners and Windows as References

Once you’ve examined the wall’s surface features, you’ll need reliable reference points to establish your first stud location with confidence.
Start by measuring 16 inches from room corners, where the first stud typically sits according to standard building codes. Window and door frames also provide excellent reference points, as king studs position just beyond their trim edges.
Measuring and Marking Stud Locations at Regular Intervals
Once you’ve established a reliable starting point using corners or windows, you’ll need to measure and mark stud locations at their standard spacing intervals, which are typically 16 or 24 inches on center.
Starting from your reference point, use a tape measure to mark sequential stud positions along the wall, ensuring you’re measuring from the center of one stud to the center of the next.
This systematic approach allows you to predict where studs should be located throughout the entire wall, making it easier to locate them with your stud finder and reducing guesswork during installation projects.
Standard Stud Spacing Intervals
While building codes establish specific requirements for stud placement, understanding standard spacing intervals becomes essential for accurately locating and marking stud positions during construction or renovation projects.
You’ll encounter 16-inch on-center spacing most frequently in residential construction, while 24-inch intervals work for non-load-bearing walls. Load-bearing walls require closer spacing for structural support.
Measuring From Reference Points
After you’ve determined the standard spacing interval for your project, you’ll need to establish a reliable starting point for your measurements.
Choose a fixed reference like a corner, door frame, or electrical outlet, which are typically mounted beside studs. Use your tape measure to mark intervals horizontally along the wall, accounting for potential variations near corners or framing irregularities.
Marking Sequential Stud Positions
Accurately marking sequential stud positions requires systematic measurement and precise notation to guarantee your wall framing maintains consistent spacing throughout its length.
Start at the plate’s end, then use your tape measure to mark centers at 16-inch intervals.
Mark both top and bottom plates simultaneously, double-checking each measurement to prevent cumulative errors that’ll compromise structural integrity.
Confirmation Drilling to Verify Stud Presence
Once you’ve identified potential stud locations using electronic detectors or measurement techniques, confirmation drilling provides the most reliable method to verify actual stud presence before hanging heavy objects or making significant wall modifications.
Use small finish nails or fine drill bits to minimize wall damage while creating exploratory holes at marked locations for tactile verification.
Troubleshooting Common Stud Detection Challenges
Even experienced DIY enthusiasts encounter frustrating obstacles when locating wall studs, as various factors can interfere with detection methods and lead to inaccurate results.
Metal studs require magnetic detection rather than traditional tapping, while textured surfaces compromise electronic readings.
Electrical wiring and plumbing create false signals, demanding multiple scanning passes for verification before drilling.
Final Note
You’ve now mastered multiple techniques for locating wood studs, from understanding standard spacing patterns to using electronic detection tools. Remember that combining methods increases accuracy—start with corner measurements, use the tapping test, and confirm with a stud finder or magnet. When you encounter challenging situations like textured walls or metal framing, don’t rely on just one approach. Practice these techniques, and you’ll confidently locate studs for any mounting project.