Install a heavy‑duty woven geotextile barrier over a cleared, compacted subgrade, overlapping seams by six inches and stapling every few feet; then lay 4–6 inches of stone dust and larger crushed stone, followed by 1–2 inches of medium gravel and a final 1-inch surface layer, compacting each stage. Secure edge barriers with galvanized stakes to block light, and apply a pre‑emergent herbicide each spring and fall. Spot‑treat any survivors and re-top the gravel every 1–3 years to keep voids filled, and you’ll uncover additional maintenance tips ahead.
TLDR
- Install a heavy‑duty woven geotextile barrier, overlapping seams by six inches and securing with staples or stakes.
- Prepare the subgrade by removing all vegetation, loosening the soil, and compacting it before adding gravel.
- Use angular crushed stone in layered depths (4–6 in base, 1–2 in middle, 1 in top) and compact each layer.
- Add edge barriers (brick, metal strips, or bender boards) with overlapping fabric to block light and prevent seed germination.
- Apply pre‑emergent herbicide each spring/fall and re‑top gravel every 1–3 years, performing regular biweekly weed checks.
Install a Heavy‑Duty Geotextile Barrier

A heavy‑duty geotextile barrier is the first line of defense against weeds in a gravel driveway, and choosing the right fabric is essential. You’ll want a woven 300 g/m² material, or heavier 200‑800 gsm if load demands increase, because it separates subgrade soil from gravel, lets water drain, and resists weather. Roll it flat, overlap six inches, and staple every few feet to keep it secure before adding gravel. The fabric also prevents soil erosion by acting as a filtration layer that keeps fine particles from clogging drainage.
Prepare Soil and Remove Existing Weeds
First, clear any existing vegetation by pulling weeds out to the root with gloves and a small spade, or by chopping them with a hoe and covering the remnants with gravel to smother regrowth.
Next, loosen the top layer of soil using a hand tamper or a plate compactor, then compact it to create a firm, even surface that discourages seed accumulation.
Finally, ensure the prepared soil is free of debris and level before laying the gravel, which will provide a stable base and reduce future weed intrusion. Additionally, be mindful of HOA rules about maintaining a neat exterior, since keeping driveways weed-free can help preserve neighborhood aesthetics and property values as outlined in community guidelines. HOA rules
Clear Existing Vegetation
Why clear the existing vegetation before tackling a gravel driveway? You’ll remove competing roots, prevent seed spread, and create a clean base for proper drainage.
Hand‑pull weeds after watering, use a hoe or wheel hoe for stubborn patches, and sweep debris with a stiff broom.
For quick, chemical‑free control, apply a propane torch, boiling water, or a vinegar‑salt solution, then rake the gravel back into place.
Prepare Soil Surface
After clearing the existing vegetation, the next step is to prepare the soil surface so that weeds can’t re‑establish beneath the gravel. Examine the soil, turn it to expose roots and seeds, then manually pull any weeds, removing all debris.
Lay a compacted 3‑inch crushed‑stone base, install taut geotextile fabric with overlapped seams, and secure with staples to block light and prevent seed germination.
Choose Gravel and Depth for a Weed‑Free Gravel Driveway
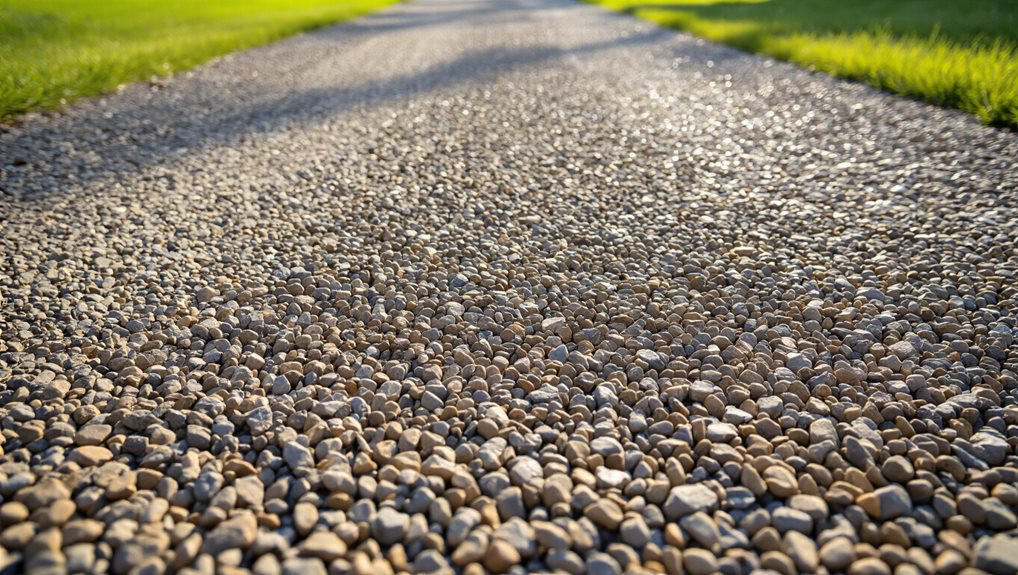
You’ll want to pick an angular stone such as crushed stone or crusher run, because their interlocking shape creates a stable, compacted surface that blocks weed roots. Aim for a total depth of 8‑12 inches, with a 4‑6‑inch base layer of stone dust and larger gravel, then add a 1‑2‑inch middle layer and a final 1‑inch top layer of surface gravel, compacting each stage. This combination of the right gravel type and proper layering gives you a durable driveway that naturally suppresses weed growth. 8‑foot fencing
Optimal Gravel Type
What gravel you select and how deep you lay it will determine whether weeds ever take root in your driveway. Choose crushed stone for durability and low‑maintenance drainage, or quarry process for a compacted, semi‑solid surface that resists weed infiltration. If you prefer a decorative look, pea gravel or Jersey Shore gravel work when edged, while Blackstar rock offers angular locking and long‑term stability for residential traffic.
Recommended Gravel Depth
How deep should you lay the gravel to keep weeds at bay? Aim for a solid 3‑4 inch surface layer over a compacted 3‑4 inch crushed‑stone base, using angular granite no larger than 2 inches.
Install landscape fabric first, secure it, then spread the gravel evenly. This depth blocks sunlight, limits seed germination, and creates a durable, low‑maintenance driveway that feels like a shared, weed‑free space.
Add Edge Barriers to Keep a Weed‑Free Gravel Driveway Clean
Ever wondered why weeds keep slipping through the gaps of a gravel driveway? You can stop them by installing edge barriers—brick or paver borders that match your siding, metal or plastic strips that define the perimeter, or recycled‑plastic bender boards for durability. Lay landscape fabric beneath the gravel, overlap edges 1‑3 inches, secure with galvanized stakes, and the woven polypropylene blocks sunlight while allowing water, keeping your driveway clean and weed‑free. Rotating and mixing barrier materials in your layout can also help improve long‑term soil and weed management by creating distinct zones that discourage weed establishment weed suppression benefits.
Apply Pre‑Emergent Herbicides and Salt for Long‑Term Control

Edge barriers keep the gravel packed and limit seed entry, but they don’t stop weeds that already lie dormant in the soil beneath. Apply a granular pre‑emergent, such as Dimension 2EW or Gallery 75DF, each spring and fall to block crabgrass and black medic germination, then spot‑treat any survivors with a post‑emergent. For long‑term sterilization, sprinkle salt sparingly, monitoring runoff, and reapply annually to keep the driveway bare. Layered organic matter helps improve soil health under the gravel and can reduce weed pressure over time.
Torch, Hand‑Pull, and Maintain a Weed‑Free Gravel Driveway
Ever wonder why weeds keep resurfacing in your gravel driveway despite a solid edge and fabric beneath? Use a propane torch to wilt foliage at 150 °F, then rake dead material after a couple of days; repeat every 2–4 weeks.
Hand‑pull young weeds for quick removal, especially in gaps the torch missed. Schedule 10–20‑minute checks biweekly, staying alert to seed emergence and fire safety rules.
Set Up Drainage and Compaction for a Weed‑Free Gravel Driveway

Why is proper drainage and compaction essential for a weed-free gravel driveway? You’ll prevent water pooling, which creates fertile pockets for seeds, by installing a French drain with a 1% slope, wrapping it in geotextile, and back-filling with clean, angular stone. Crown the surface, grade edges, and compact a 4-6-inch angular sub-base, ensuring runoff flows away and the gravel stays stable. water closet
Re‑Top Gravel Periodically to Fill Voids and Preserve Uniformity
How often should you re‑top your gravel driveway to keep it even and functional? Re‑top every one to three years, or annually in high‑traffic zones, adding one to two inches of the same angular, washed stone you used initially.
Edge the driveway, rake toward tire paths, compact with a plate compactor, and maintain a slight crown; this fills voids, prevents ruts, and preserves uniformity.
Spot and Fix Weed Breakthroughs on Gravel

Spotting and fixing weed breakthroughs on gravel driveways starts with a quick visual scan, because even a few sprouting shoots can signal deeper infiltration of seeds into the voids between stones.
You then choose a method—hand‑pull, boiling water, vinegar‑salt‑soap spray, or propane torch—based on weed size and root depth, reapplying as needed, and always keep a hose nearby for safety while maintaining a tidy, weed‑free surface.
Final Note
By installing a heavy‑duty geotextile barrier, preparing the base, selecting the right gravel depth, and adding edge barriers, you create a solid foundation that blocks weed germination. Complement this with pre‑emergent herbicides, occasional salt, and regular torching or hand‑pulling to address any breakthroughs. Proper drainage and compaction keep the surface stable, while periodic re‑toppling fills voids and maintains uniformity. Follow these steps consistently, and your gravel driveway will stay clean, functional, and virtually weed‑free.