To seal wood from water damage, you’ll need to clean the surface thoroughly, sand along the grain, and remove all dust before application. Choose between oil-based sealers for enhanced natural appearance or water-based options for faster drying and lower VOCs. Apply thin, even coats allowing proper drying time between applications, and plan for reapplication every 1-2 years depending on exposure conditions. Perfect these techniques to uncover advanced protective strategies that maximize your wood’s longevity.
TLDR
- Choose the right sealant for your project – polyurethane for durability, oil-based for natural appearance, or liquid rubber for quick-drying protection.
- Prepare wood surfaces properly by cleaning thoroughly, sanding with the grain, and ensuring complete dryness before applying any sealant.
- Apply multiple thin, even coats rather than one thick coat, allowing proper drying time between applications for maximum protection.
- Select sealants with UV protection and weather resistance for outdoor applications to prevent fading, cracking, and moisture damage.
- Maintain sealed wood with annual inspections and reapplication every 1-2 years, with more frequent touch-ups for high-exposure areas.
Understanding Different Types of Wood Sealants and Their Properties
The foundation of effective wood protection lies in selecting the right sealant for your specific project, as each type offers distinct advantages and limitations that directly impact performance and longevity. You’ll find synthetic sealants like polyurethane provide glossy, durable finishes for interior applications, while oil-based options enhance natural appearance with moderate weather resistance requiring periodic maintenance. Additionally, proper surface preparation is crucial for ensuring the longevity of the sealant applied. Modern liquid rubber solutions offer a cost-effective alternative that dries quickly and provides excellent durability without harmful VOC emissions.
Choosing the Right Sealant for Your Wood Type and Application
When selecting a wood sealant, you’ll need to match the product’s characteristics to both your wood species and its intended use, as this decision determines whether your protection efforts succeed or fail prematurely. Different woods absorb sealers uniquely, requiring specific formulations for ideal results. Outdoor applications demand weather-resistant products with UV protection, while indoor sealants prioritize aesthetics and lower toxicity levels. Proper wood preparation involves ensuring surfaces are completely dry and thoroughly cleaned before sealer application to maximize adhesion and penetration effectiveness. Additionally, using low-sudsing options can help ensure that any cleaning agents used won’t interfere with the sealant’s effectiveness.
Essential Wood Preparation Steps Before Sealing
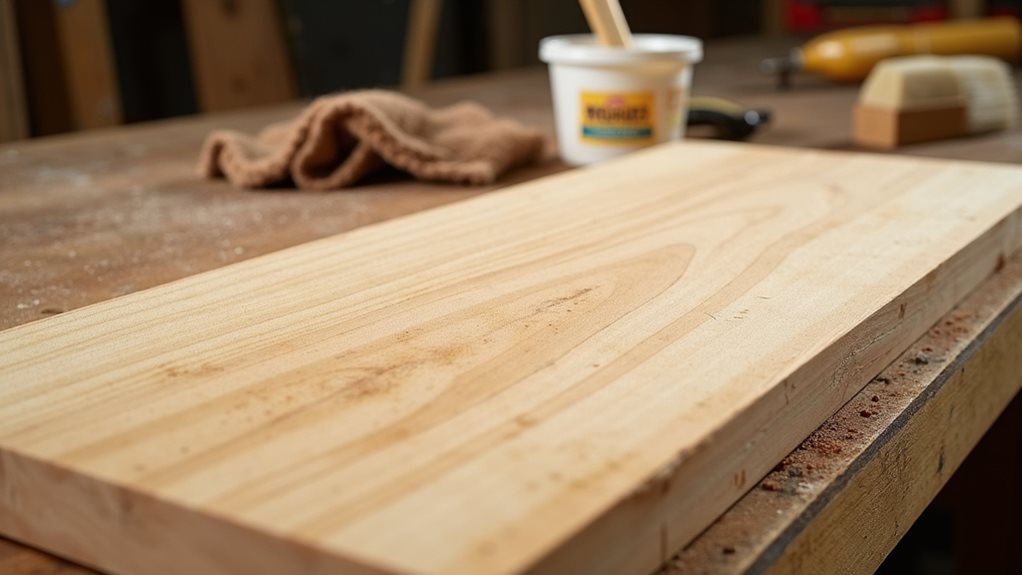
Before you apply any water sealant to your wood project, you must thoroughly prepare the surface through proper cleaning and sanding techniques.
Surface preparation begins with removing all dust, dirt, and debris from the wood using a clean, damp cloth, followed by careful sanding in the direction of the grain to create an even surface that allows ideal sealant adhesion.
You’ll then need to eliminate every trace of sawdust with a tack cloth, as even microscopic particles can interfere with the sealing process and compromise your wood’s water protection. Additionally, ensure that the wood is fully dried and free of moisture, as curing involves chemical changes that can affect the adhesion of the sealant.
Surface Cleaning and Preparation
Proper surface preparation forms the foundation of any successful wood sealing project, determining whether your protective coating will adhere effectively and provide long-lasting water resistance.
Use a soft brush to sweep away loose debris, then wipe down with a damp cloth.
For stubborn stains, apply a mild soap solution, avoiding harsh chemicals that could damage the wood fibers.
Sanding and Dust Removal
Two critical steps separate adequately cleaned wood from perfectly sealed surfaces: systematic sanding and thorough dust removal.
You’ll need progressively finer grits, sanding along the grain to prevent fiber damage.
After sanding, use a HEPA-filtered vacuum with soft-bristle attachments, followed by microfiber cloths and tack cloths.
This dust-free preparation guarantees ideal sealant adhesion and longevity.
Proper Surface Cleaning and Sanding Techniques
Before applying any water-sealing product, you’ll need to thoroughly clean your wood surface to remove dirt, debris, and any existing finishes that could interfere with proper adhesion.
Once the surface is clean, sanding with progressively finer grits will open the wood’s pores and create the smooth, even texture necessary for ideal sealant penetration.
After completing the sanding process, you must carefully wipe down the entire surface to eliminate all dust particles, ensuring your sealer can bond effectively with the prepared wood.
Remove Dirt and Debris
The foundation of any successful wood sealing project lies in achieving a spotless, debris-free surface that allows the sealant to bond effectively with the wood fibers.
Start by removing all surface dirt and dust using a soft brush or vacuum.
Then wash stained areas with mild detergent mixed with water, ensuring you rinse thoroughly to eliminate soap traces.
Sand for Better Penetration
Proper sanding creates the ideal surface texture that allows waterproofing sealants to penetrate deeply into wood fibers, forming a lasting protective barrier against moisture damage.
Start with 80-100 grit sandpaper to remove old finishes, progress to 120-150 grit for smoothing, then finish with 220-320 grit.
Sand along the grain using consistent pressure to open pores effectively.
Wipe Clean After Sanding
After completing your sanding process, you’ll need to thoroughly clean the wood surface to guarantee ideal sealant adhesion and a professional-looking finish.
Use a vacuum to remove loose particles, then wipe down with lint-free cloths or tack cloths.
For stubborn contaminants, mineral spirits effectively eliminate grease and remaining dust, ensuring even waterproofing application.
Application Methods for Oil-Based and Water-Based Sealers
While both oil-based and water-based sealers protect wood from moisture damage, they require distinctly different application approaches that affect everything from preparation to cleanup.
Oil-based sealers need well-ventilated areas and respiratory protection, take longer to dry, and shouldn’t be thinned.
Water-based sealers dry faster, have lower VOCs, and allow indoor application with minimal ventilation requirements.
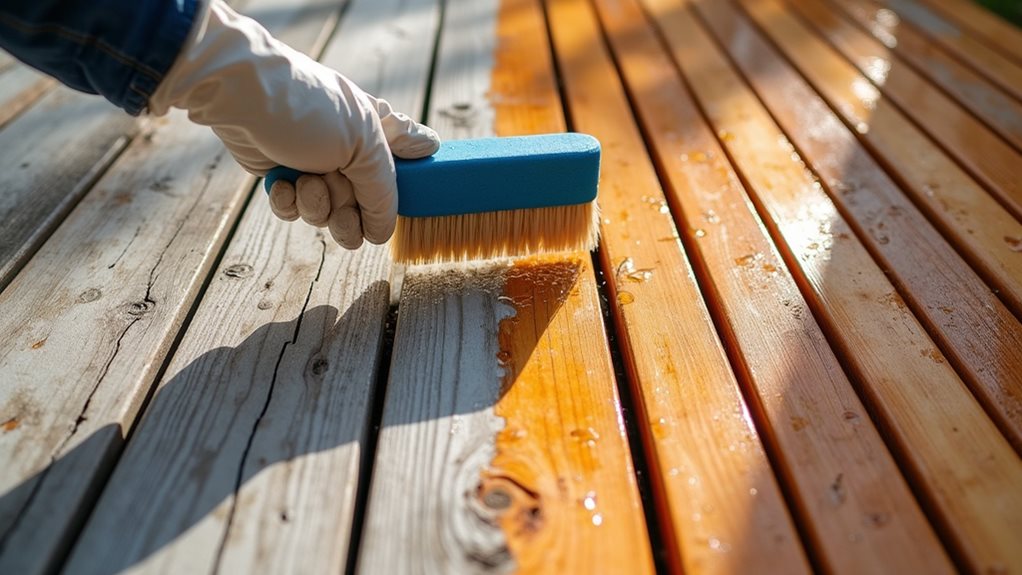
Achieving Professional Results With Proper Coating Techniques
You’ll achieve professional-quality results when sealing wood from water by following three critical techniques that separate amateur work from expert craftsmanship.
Your success depends on careful surface preparation steps that include proper cleaning and sanding, strategic application method selection between spray guns and high-quality brushes, and implementing a multiple coat strategy with thin, even layers.
These fundamental coating techniques, when executed correctly, create a durable barrier that protects your wood investment while providing the smooth, flawless finish you’re seeking.
Proper Surface Preparation Steps
Success in waterproofing wood hinges entirely on careful surface preparation, which serves as the foundation for any long-lasting protective coating.
You’ll need to thoroughly clean the surface using mild cleaner or water-vinegar mixture, removing all dirt and old finishes.
After ensuring complete dryness, sand with fine-grit sandpaper following the grain direction for ideal penetration.
Application Method Selection
The application method you choose determines whether your wood sealing project achieves professional-grade results or falls short of expectations.
Select synthetic bristle brushes for precision work, paint rollers for large deck surfaces, or sprayers for uniform polyurethane coverage on intricate pieces.
Match your tool to the sealant type and wood surface characteristics for ideal adhesion and protection.
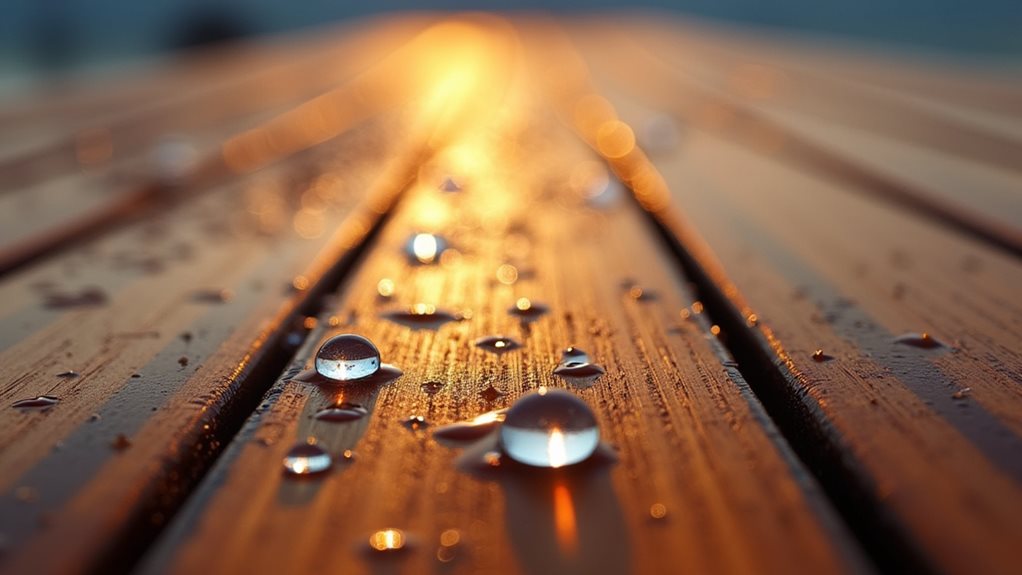
Multiple Coat Strategy
While single-coat applications might seem efficient, professional wood sealing demands a systematic multiple-coat approach that builds layers of protection over time.
Apply thin, even coats using rollers for large surfaces and brushes for edges. Allow 4-6 hours drying time between applications, maintaining consistent environmental conditions.
Test water resistance after final coat to verify effectiveness.
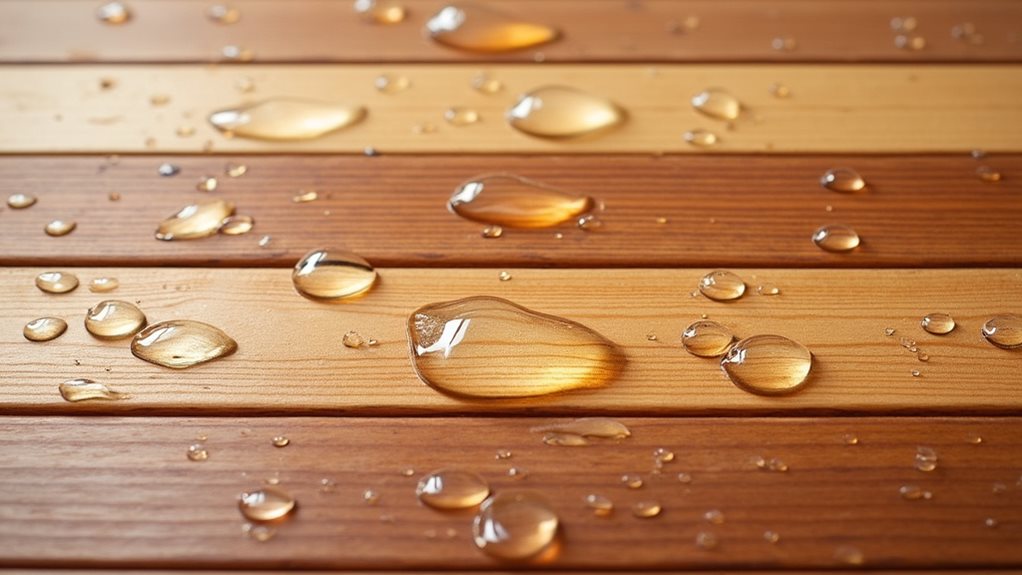
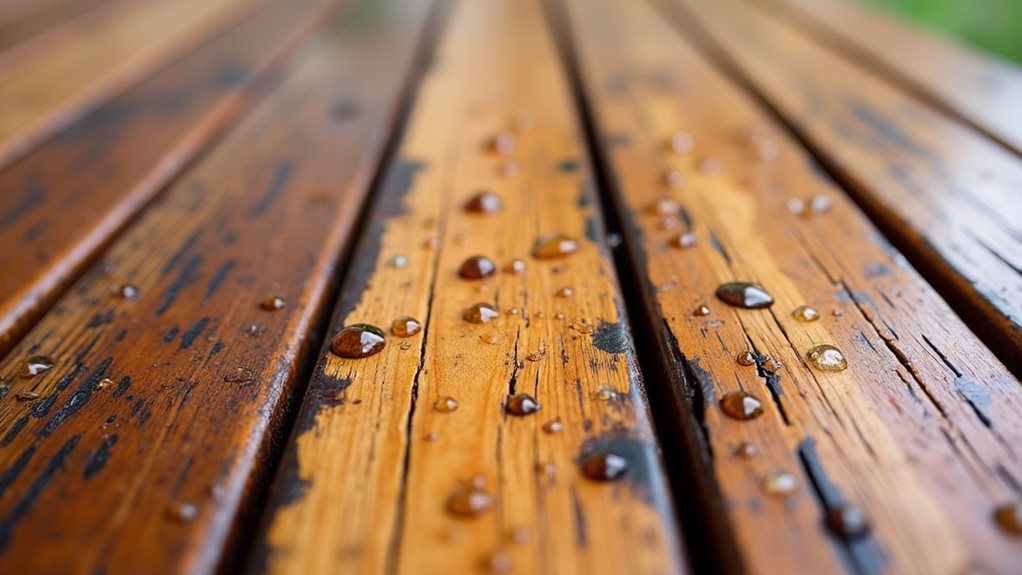
Moisture and Weather Protection Benefits of Quality Sealants
Protection against moisture infiltration stands as the primary advantage of applying quality wood sealants, fundamentally altering how wood responds to environmental challenges.
You’ll prevent swelling, warping, and cracking while blocking water absorption through wood fibers. These barriers resist rot, mold, and fungal growth, maintaining structural integrity against rain, frost, and humidity-related degradation for enhanced longevity.
UV Resistance and Additional Protective Properties
Beyond moisture protection, ultraviolet radiation poses an equally significant threat to wood surfaces, causing photodegradation that breaks down lignin and cellulose fibers through continuous exposure.
You’ll need sealants containing UV protectants like titanium dioxide or zinc oxide to prevent fading and discoloration.
Quality sealants also provide additional protection against insects, fungi, saltwater corrosion, and chemical damage.
Maintenance Schedule and Reapplication Guidelines
Three critical factors determine your wood sealing maintenance schedule: environmental exposure, sealant type, and wood species characteristics.
You’ll need reapplication every 1-2 years, with high-exposure areas requiring more frequent attention.
Perform your first maintenance after 12 months, then inspect annually for touch-ups.
Clean thoroughly before recoating, and adjust schedules based on saltwater exposure, humidity, and sun intensity in your specific location.
Safety Precautions and Environmental Considerations
When working with wood sealants, you’ll need to prioritize both personal safety and environmental responsibility throughout every stage of your project.
Always wear protective equipment including gloves, goggles, and NIOSH-approved respirators for oil-based products.
Maintain proper ventilation, choose eco-friendly sealants when possible, and follow local regulations for chemical use and disposal to protect waterways.
Troubleshooting Common Sealing Problems and Solutions
Even after following proper safety protocols and environmental guidelines, wood sealing projects can encounter various technical challenges that require specific troubleshooting approaches.
Common issues include cratering from contamination, discoloration from improper storage, flooding from over-application, gloss variation from uneven drying, and coating separation from inappropriate solvents.
Thorough surface preparation and proper application techniques prevent most defects.
Final Note
You’ve now learned the essential steps to effectively seal wood from water damage, from selecting the appropriate sealant to proper application techniques. Remember that consistent maintenance and timely reapplication will extend your wood’s lifespan considerably. By following these guidelines, preparing surfaces thoroughly, and adhering to safety protocols, you’ll achieve professional-quality results that protect your investment for years to come while maintaining the wood’s natural beauty.