You’ll start by clearing furniture and sweeping debris, then wash the deck with a pH‑appropriate cleaner to remove dirt, mold, and mildew, rinsing thoroughly and letting it dry until moisture is under 15%. Inspect and replace or drive in fasteners, repair or fill cracks, and sand along the grain with progressively finer grit. Protect surrounding plants, prime with an exterior oil‑based primer, and apply paint per manufacturer cure times; follow the next steps for detailed technique and timing.
TLDR
- Clear all furniture and decor, protect nearby plants and fixtures with drop cloths and plastic sheeting.
- Thoroughly sweep and wash the deck using a pH-neutral or oxygen-bleach cleaner, scrubbing along the grain.
- Rinse fully and allow the deck to dry 24–48 hours; verify moisture is under 15% before finishing.
- Inspect boards and fasteners, repair or replace rotten wood and drive or swap out protruding nails with corrosion-resistant screws.
- Sand smooth (with the grain), remove dust, apply primer if needed, then repaint using proper brushes, rollers, or an airless sprayer.
Gather Tools and Materials
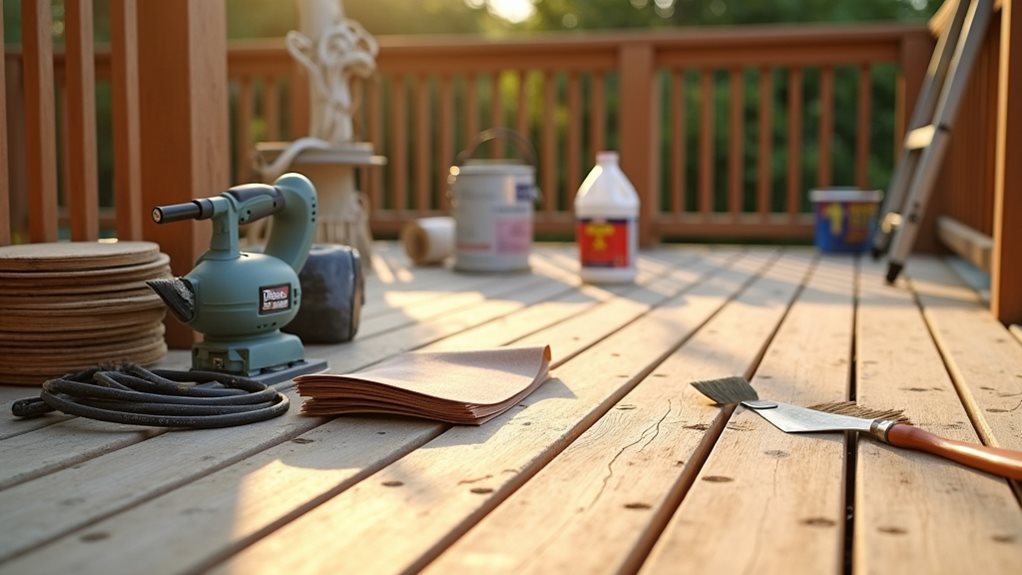
Start by assembling all the tools and materials you’ll need so the job goes smoothly and efficiently: you’ll want wood-deck prep cleaner and a deck-washing solution to remove grime, mold, and mildew, plus a stiff-bristled brush and extended scrub handles to reach every board. Remember to use eco-friendly cleaners to avoid harming surrounding plants while cleaning your deck.
Also gather sandpaper, caulk, paint brushes and rollers, trays, drop cloths, gloves, goggles, masks, and pails. Consider using a solid exterior wood stain and an airless paint sprayer for a faster, more durable finish.
Clear Furniture and Outdoor Items
Before you start scraping or sanding, remove all furniture and large items from the deck so you have unobstructed access to every surface and edge.
Gather small accessories like cushions, planters, and decorative pieces into labeled boxes or bins and store them in a shaded, dry spot to prevent damage or mildew. Additionally, make sure to clean the deck surface thoroughly using a garden hose and soft-bristle brush with mild soapy water to remove dirt and mildew before repainting, as regular sweeping and gentle cleaning with pH-neutral cleaners can prevent buildup.
Finally, protect nearby plants and landscaping with drop cloths or plastic sheeting to shield foliage from dust, debris, and paint overspray while you work.
Remove All Furniture
Clear the deck of every chair, table, planter, grill, and decorative item so you can access the full surface for thorough cleaning and repainting; move lightweight pieces carefully to avoid damage and put cushions and fabrics indoors or under protective covers to keep them from chemicals and paint splatter.
Inspect furniture for rust or damage, clean items before moving, secure small hardware, and store pieces raised in a dry, shaded spot.
Store Small Accessories
Pack up small accessories and tuck them into weatherproof storage so they stay protected while you prep and repaint your deck; choosing the right containers and organizing items thoughtfully will save time, prevent damage, and keep the work area safe.
Clean, dry fabrics before storing, use resin or powder‑coated boxes with lockable lids, add liners for airflow, and compartmentalize for easy access.
Protect Nearby Plants
When you’re preparing to repaint a deck, protecting nearby plants and outdoor items should be treated as a deliberate step in your prep plan, because paint overspray, drips, and foot traffic can quickly damage foliage and stain furniture.
Clear and store movable items, lay drop cloths, stake rope barriers, wrap trunks with breathable material, secure edges with weights, and paint only on calm, dry days.
Sweep and Remove Surface Debris
Before you start washing, sweep the entire deck with a sturdy outdoor broom or use a leaf blower to clear loose debris like leaves, twigs, and pine needles, working in one consistent direction to avoid recontamination.
For stubborn dirt lodged in gaps or textured boards, use a stiff-bristle brush and firm strokes to dislodge particles, then collect and remove them so they don’t interfere with cleaners or paint adhesion. Regular maintenance, such as leaf vacuums and leaf blowers, can help keep your deck area free of debris.
Finish by rinsing with a garden hose to lift remaining dust, inspect for any hidden damage, and prepare buckets and brushes for the next cleaning phase.
Clear Loose Debris
Start by clearing away loose debris with a sturdy broom or leaf blower, so you’ll have an even, dust-free surface to work on before any deeper cleaning or painting.
Sweep all boards, corners, railings, and joints with firm, consistent strokes, use a handheld brush for crevices, then vacuum or hose off fine dust.
Collect debris in bags to prevent recontamination.
Remove Stubborn Dirt
You’ll need to tackle stubborn dirt with a methodical approach that combines the right cleaners, scrubbing tools, and rinsing techniques so the surface’s texture and integrity are preserved for repainting.
Use a deck cleaner (oxygen bleach or oxalic acid for wood), scrub along the grain with a stiff brush or nylon for composites, rinse with low-pressure washer, and allow 24–48 hours to dry before inspecting.
Treat Mold and Mildew
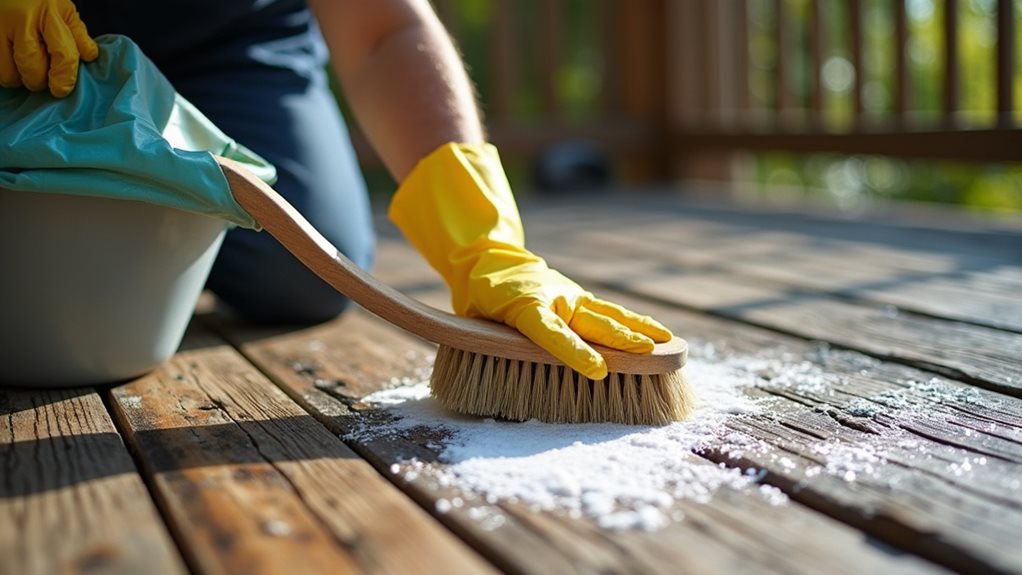
Tackle mold and mildew on your deck by choosing the right cleaner and application method for the type of growth and the wood species involved; oxygen-bleach or sodium percarbonate formulas work well on most stains and are kinder to the environment, while vinegar mixes handle lighter mildew and chlorine-based products should be reserved for stubborn dark stains because they can harm plants and nearby materials.
Use scrubbing brushes, low-pressure sprayers, or softwash techniques, let solutions dwell 5–20 minutes, then agitate problem areas; wear PPE and avoid overpressure to protect wood.
Rinse and Dry the Deck Thoroughly
After scrubbing, rinse thoroughly with a garden hose on a strong, but gentle setting to remove all soap residue that could interfere with stain or paint adhesion. Keep the spray aligned with the wood grain and make multiple passes if needed, avoiding high-pressure settings that can damage fibers.
Then let the deck dry fully—ideally 24 to 48 hours, or until a moisture meter reads under 15%—before you apply any finish.
Remove All Soap Residue
Always rinse thoroughly and dry completely before you paint, because even faint soap film can cause slippery surfaces, attract dirt, and interfere with paint or sealant adhesion; use plenty of clean water, a garden hose with a spray nozzle or a low-pressure power washer, and work in manageable sections so suds don’t dry back onto the wood, paying special attention to gaps, seams, and hardware where residue hides.
Check visually and by touch, re-rinse any dull or sticky spots, then speed drying with microfiber cloths or a leaf blower so paint adheres evenly and finishes last.
Use Gentle Water Pressure
Rinse the deck using gentle, controlled water pressure so you remove cleaners and loosened debris without gouging the wood, aiming for roughly 600–2,500 PSI (1,500–2,000 PSI is a good target for most wooden decks) and keeping the nozzle 6–12 inches away to reduce risk of splintering; use a wide fan or 25–40° tip, test the pressure and angle on a hidden corner, and work in overlapping, smooth passes from one side to the other, lifting the wand at the end of each stroke and avoiding direct sprays at nails or seams to prevent water intrusion beneath the boards.
After rinsing, move methodically across manageable sections, wearing eye and ear protection, using back-and-forth motions, and ensuring all cleaner residue and loose fibers are washed away so the surface is ready for the next step.
Allow Full Drying Time
Because trapped moisture is the leading cause of paint and stain failure, you should let the deck dry fully before you apply any finish, giving the wood time to reach a stable moisture level so coatings can bond and cure properly.
Rinse thoroughly, sweep debris, then wait based on wood type, weather, and treatment; verify dryness with a moisture meter or water droplet test before repainting.
Inspect Boards for Damage and Rot
Before you start repainting, walk the deck and perform a careful visual and physical inspection of every board, pressing lightly as you go to spot soft, spongy, or sagging areas that signal rot or structural damage.
Check for cracks, splinters, staining or mold, probe suspect spots with a screwdriver, and examine exposed edges, stair areas, and shaded sections where moisture and decay often begin.
Secure or Replace Loose Fasteners
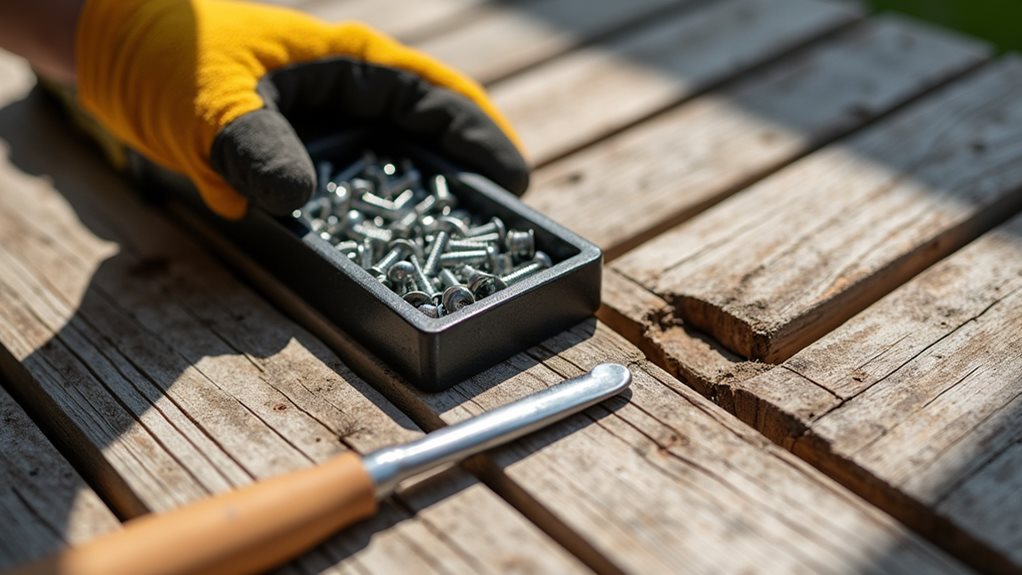
Start by walking the deck and checking every fastener, since loose nails or screws can lift boards, cause squeaks, and create tripping hazards; use a hammer to drive back nails that still hold, and swap out any that won’t seat properly for corrosion‑resistant deck screws to guarantee a stronger, longer‑lasting grip.
Then remove or replace protruding fasteners with stainless or coated screws, matching length to board thickness.
Fill Cracks and Holes
Inspect cracks and holes carefully and you’ll save time and materials later, since different damage patterns — horizontal, vertical, diagonal, stepped, or isolated pits — demand distinct repair methods and products.
Clean and measure each defect, choose compatible fillers (concrete patch, epoxy injection, or wood filler), pack and overfill small gaps, remove air pockets, then let cures complete before smoothing and repainting.
Sand the Deck Surface
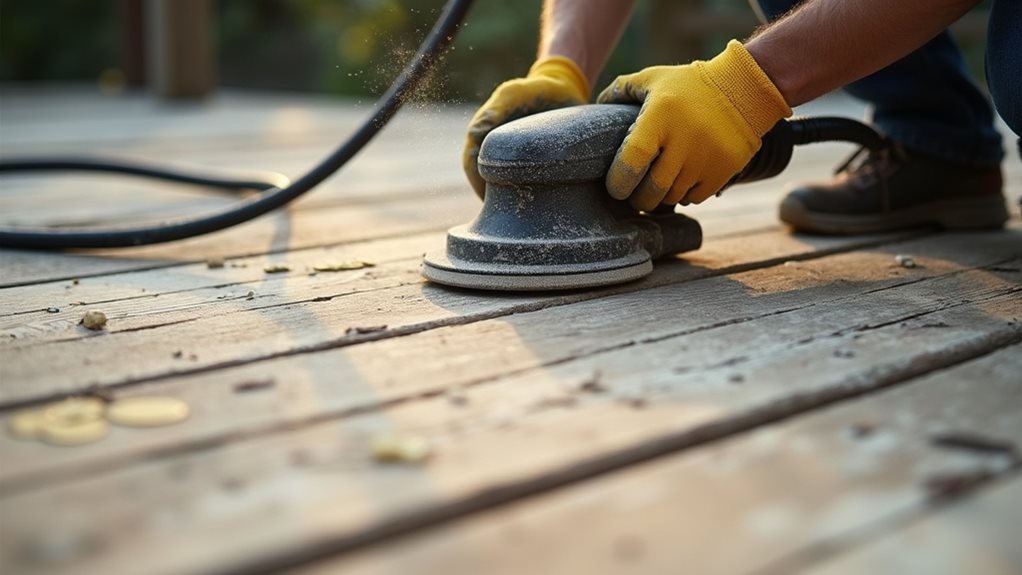
Choose the right sanding approach and you’ll save time, preserve the wood, and get a surface that accepts stain or sealer evenly.
Use a random-orbit sander for flats and a detail sander for rails, sand with the grain, and follow grit progression: 60–80 to remove finish, 100–120 to smooth.
Replace worn paper, avoid floor sanders, and vacuum all dust before staining.
Protect Surrounding Areas and Fixtures
Before you begin painting or staining, clear and cordon off the area so nearby surfaces and fixtures stay intact and your work stays efficient: remove all furniture, potted plants, and movable decorations, cover immovable items like light fixtures and railing posts with plastic sheeting or painter’s tape, and lay drop cloths or tarps over adjacent landscaping, patios, and equipment to catch drips and overspray.
Secure coverings with weights or tape, shield siding and windows with plastic, tape edges for sharp lines, protect outlets, and establish barriers or signage to keep pets and people out while you work.
Apply Oil-Based Exterior Primer
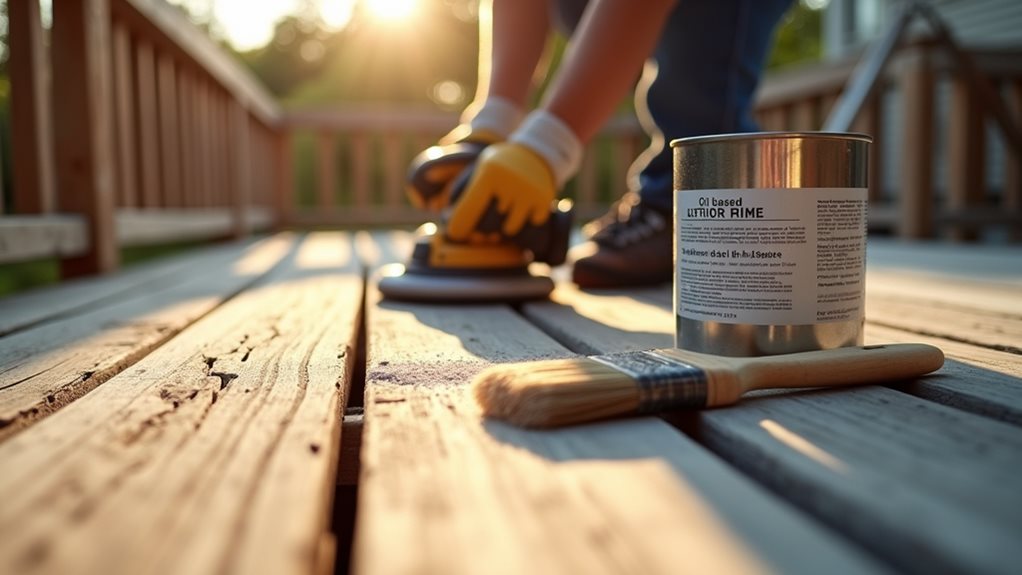
Start by prepping your primer and work area so the coating can bond properly and protect the wood.
Stir oil-based primer thoroughly, pour into a clean container, and thin with mineral spirits if too thick.
Use quality brushes or a ½-inch nap roller, apply in small sections, brush into grooves, maintain a wet edge, and guarantee suitable temperature and ventilation for proper drying and adhesion.
Plan Paint Application and Curing Time
When you plan paint application and curing time, think concerning both short-term drying and long-term curing so you can schedule coats, foot traffic, and furniture placement without risking damage; drying usually means the finish feels dry to the touch within hours, while curing is the gradual chemical hardening that can take several days, and both depend heavily on product type, coat thickness, and weather conditions.
Plan coats early, allow 24–48+ hours between layers, expect 3–7 days for full cure, avoid high humidity or extreme temperatures, and keep traffic and furniture off until the manufacturer’s recommended cure time elapses.
Final Note
You’ve covered every preparatory step, from clearing and sweeping the deck to treating mold, rinsing, drying and sanding, and protecting nearby surfaces; now apply an oil‑based exterior primer and plan paint timing so coatings cure properly and adhesion remains strong. By following this sequence you’ll minimize failures, extend the life of the finish, and reduce maintenance needs. Proceed methodically, check manufacturer instructions, and allow adequate drying and curing between coats for durable results.